//Made for arduino
//by ArduiCreate
//if any problems pls email to sumithaak@gmail.com
//Thanks
#include <ESP8266WiFi.h>//Install these library
#include <BlynkSimpleEsp8266.h>
#include <SimpleTimer.h>
#define BLYNK_PRINT Serial
float vref = 3.3;
float resolution = vref / 1023.0;
float temperature;
char auth[] = "auth";//yourauthtoken
char ssid[] = "name of wifi";//name of your wifi
char pass[] = "password";//password of wifi
SimpleTimer timer;
void setup()
{
Serial.begin(9600);
Blynk.begin(auth, ssid, pass);
timer.setInterval(2000, sendUptime);
}
void sendUptime()
{
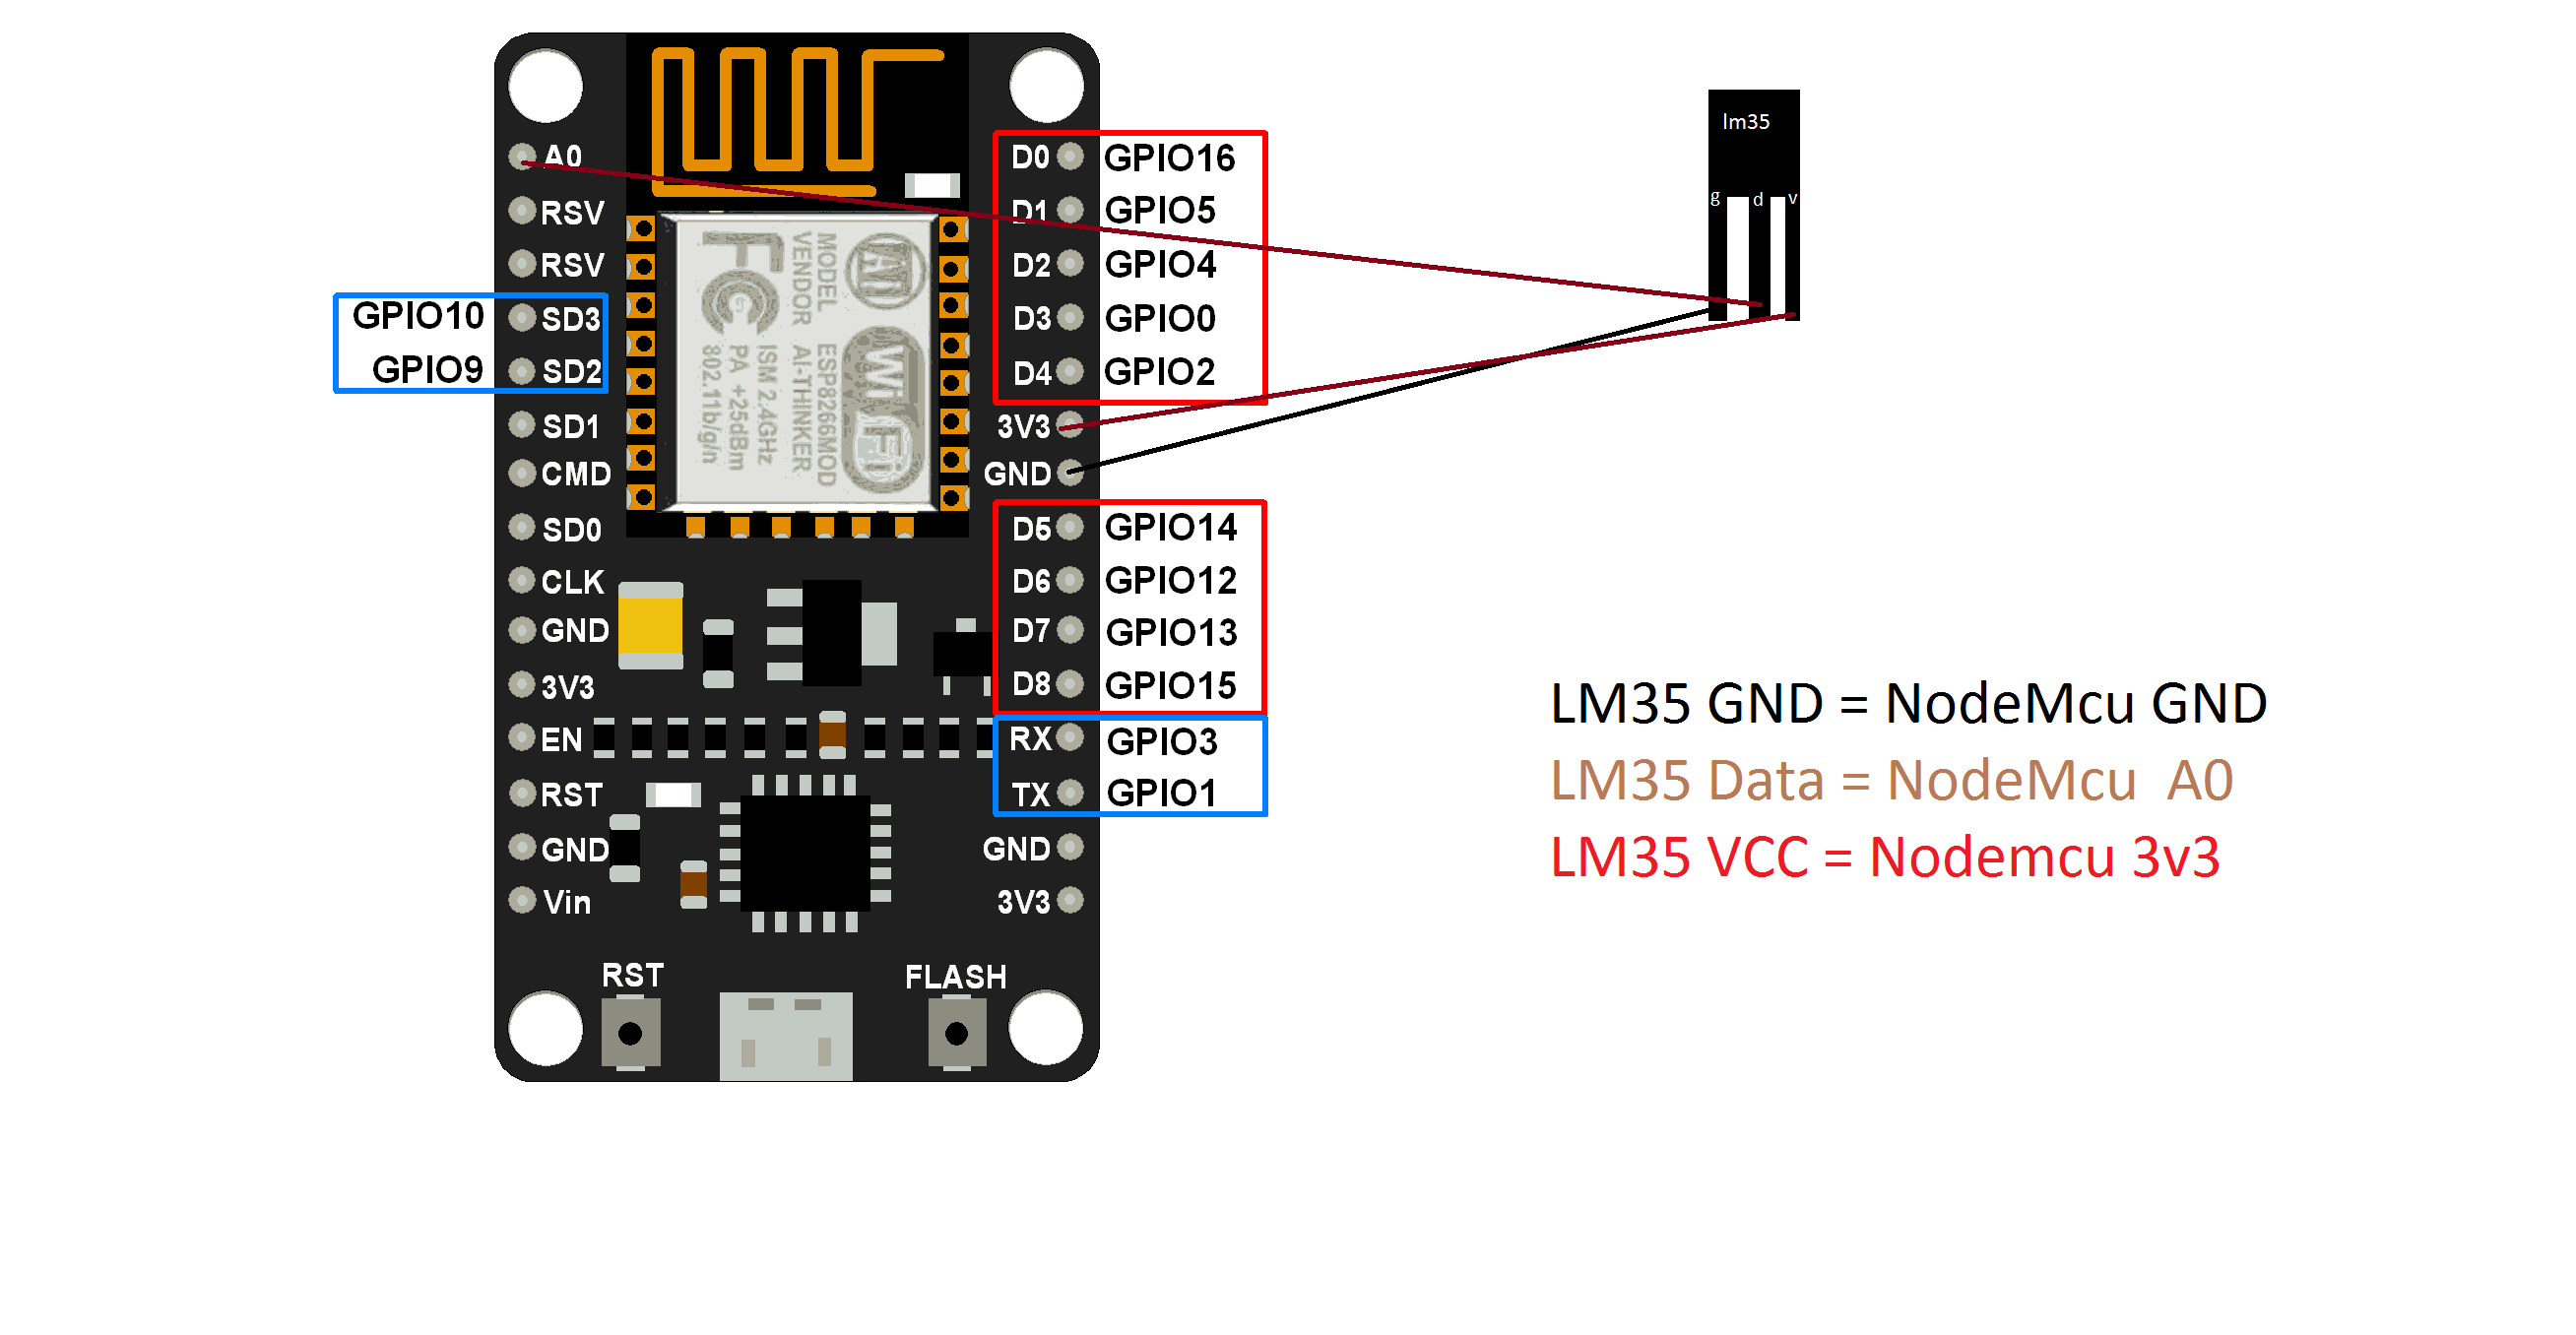
float temperature = analogRead(A0);//lm35 is connected to pin A0 on NodeMcu
temperature = (temperature * resolution);
temperature = temperature * 100.0;
Serial.print("LM35 temperature: ");//serial print the value
Serial.println(temperature);
Blynk.virtualWrite(V0, temperature);//send the value to blynk application
}
void loop()
{
Blynk.run();
timer.run();
}
//Thanks for your use


Comments