


Hardware components | ||||||
| × | 15 | ||||
 |
| × | 10 | |||
 |
| × | 1 | |||
 |
| × | 1 | |||
 |
| × | 1 | |||
 |
| × | 1 | |||
Software apps and online services | ||||||
 |
| |||||
Sometimes the best projects start with a very simple thought:
“Let's just try something and see what happens.” 😂
That’s exactly how this project started.
I wanted to experiment with the HC-SR04 ultrasonic sensor and see if I could turn the distance it detects into something visual and fun. Instead of only displaying a distance value, I decided to use a row of colorful LEDs to create a simple distance indicator.
And honestly... I didn't expect to enjoy it this much. 😭
💡 The IdeaThe basic idea was pretty simple:
Detect distance → process it with Arduino → show it through LEDs.
I used an Arduino UNO as the brain of the project and connected it to an HC-SR04 ultrasonic sensor.
The sensor detects how far an object is, and depending on the detected distance, different LEDs light up.
The LEDs are arranged like a little visual scale:
🔵 Blue → 🟢 Green → 🟡 Yellow → 🔴 Red
As the object gets closer, the LED indication changes accordingly.
So instead of having to constantly look at numbers, I can just look at the LEDs and get a quick visual idea of the distance.
🧰 Building the CircuitFor this project, I used:
🔌 Arduino UNO
- 🔌 Arduino UNO
📡 HC-SR04 Ultrasonic Sensor
- 📡 HC-SR04 Ultrasonic Sensor
💡 2 Blue LEDs
- 💡 2 Blue LEDs
💡 2 Green LEDs
- 💡 2 Green LEDs
💡 2 Yellow LEDs
- 💡 2 Yellow LEDs
💡 2 Red LEDs
- 💡 2 Red LEDs
⚡ Resistors
- ⚡ Resistors
🔗 Jumper wires
- 🔗 Jumper wires
🧱 Breadboard
- 🧱 Breadboard
💻 USB cable
- 💻 USB cable
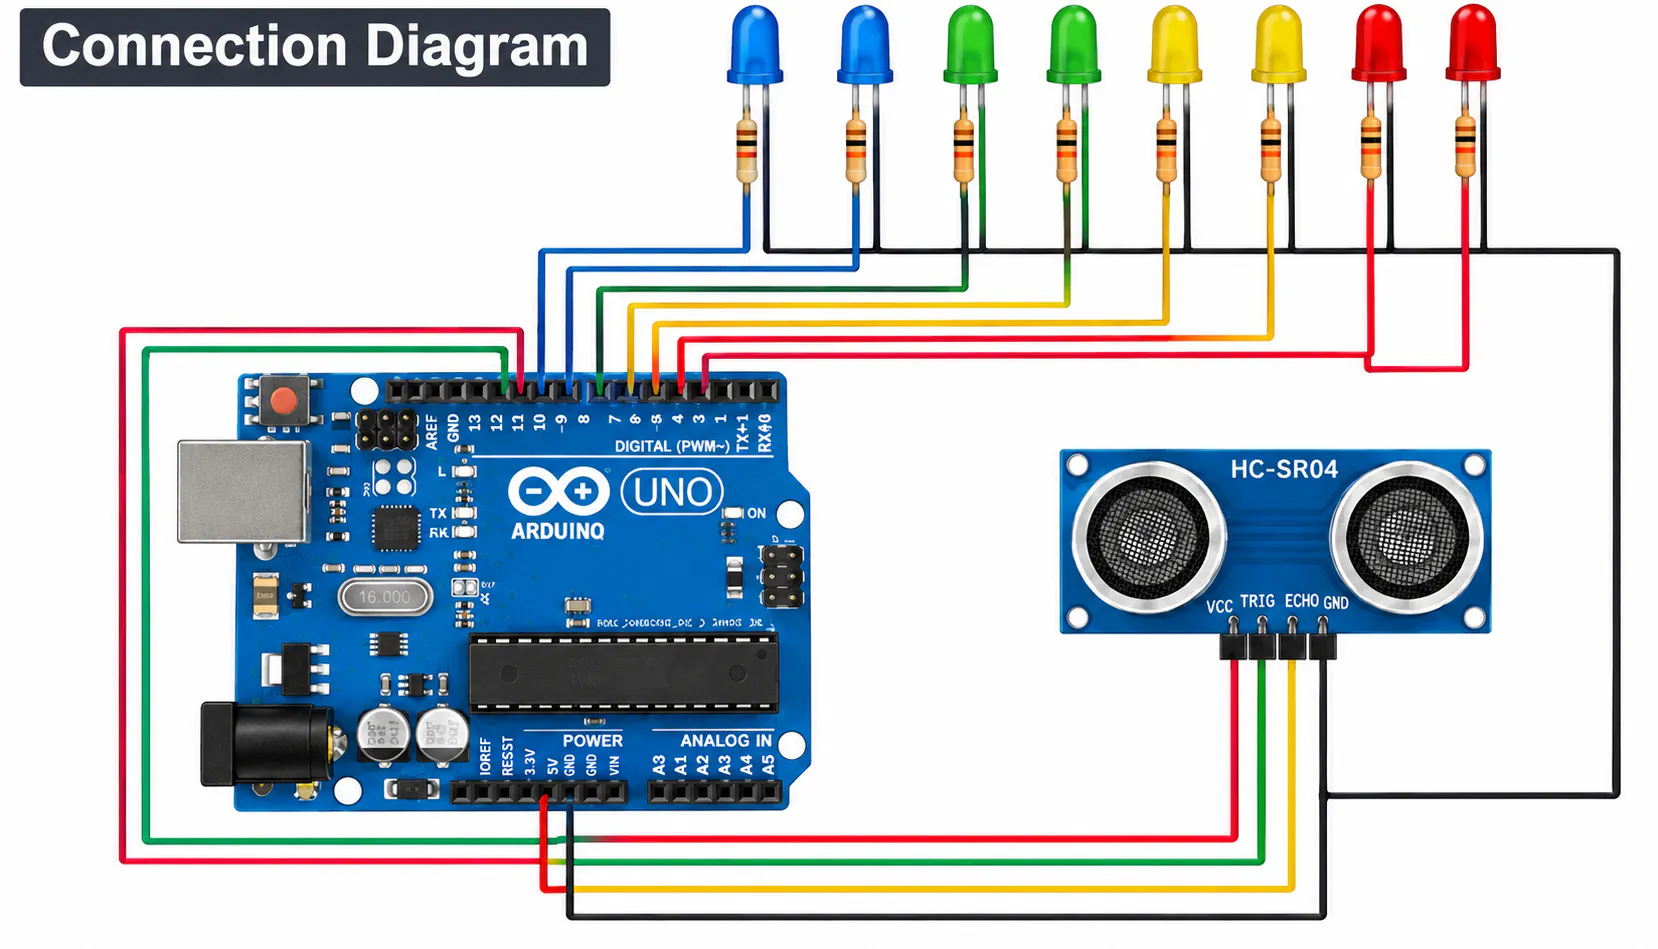
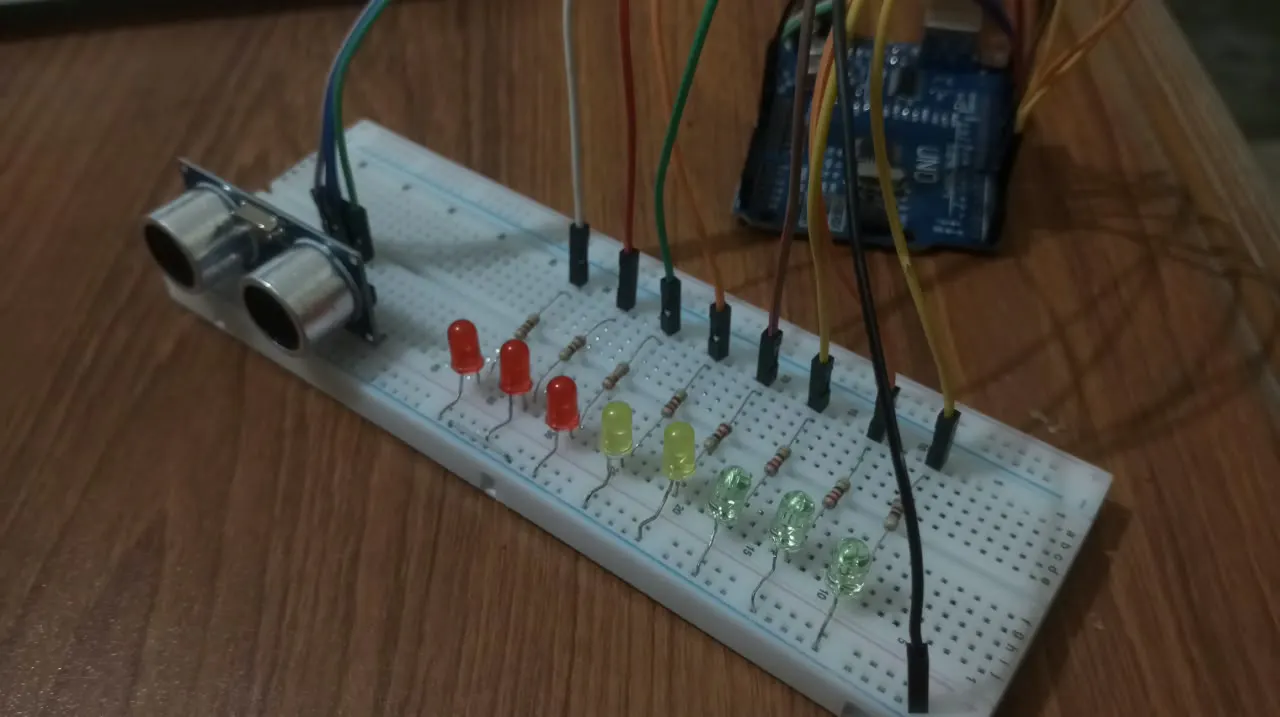
I connected the LEDs through resistors and wired the ultrasonic sensor to the Arduino.
Then came the fun part...
Testing everything. 😭😂
💻 Making the Arduino Understand DistanceThe HC-SR04 works by sending an ultrasonic pulse and measuring the time taken for the echo to return.
The Arduino uses that information to calculate the approximate distance of the object.
I then used different distance ranges to control the LEDs.
The basic logic is:
Object farther away🔵 Blue LEDs
↓
Object comes closer🟢 Green LEDs
↓
Object gets even closer🟡 Yellow LEDs
↓
Object is very close🔴 Red LEDs
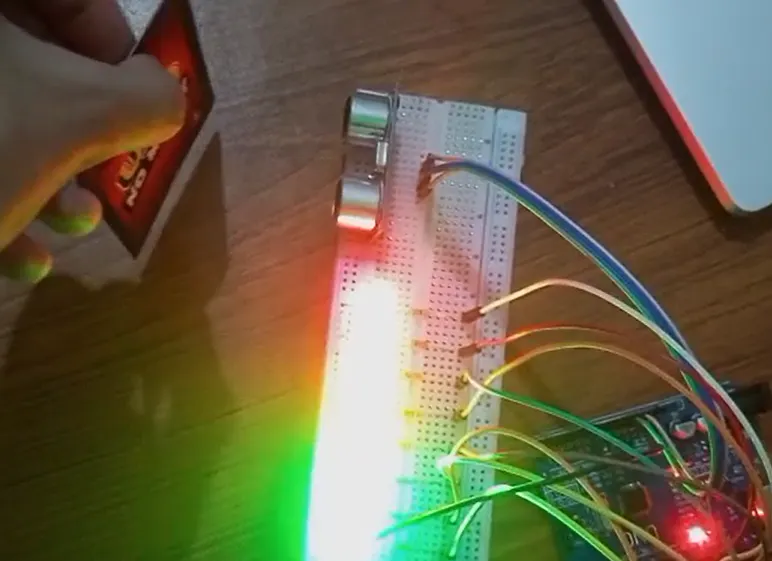
Watching the LEDs change as I moved my hand closer and farther from the sensor was honestly the most satisfying part of the whole build. 😂🌈
😂 The One-Hour BuildOne thing I really enjoyed about this project was how quickly it came together.
I didn't spend days designing some huge complicated system.
It was basically:
Idea 💡 → Components 🧰 → Wiring 🔌 → Code 💻 → Testing 🧪 → “WAIT... IT WORKS!” 😭🎉
Of course, there were moments of checking the wiring and making sure everything was connected properly, but that's also what made the experience fun.
It reminded me that even a small project can teach you a lot when you actually build it yourself.
🧠 What I LearnedEven though this is a relatively simple project, it gave me hands-on practice with several concepts:
How an ultrasonic sensor measures distance
- How an ultrasonic sensor measures distance
Working with Arduino digital pins
- Working with Arduino digital pins
Controlling multiple LEDs
- Controlling multiple LEDs
Using resistors with LEDs
- Using resistors with LEDs
Writing conditional logic
- Writing conditional logic
Connecting hardware with software
- Connecting hardware with software
Troubleshooting a physical circuit
- Troubleshooting a physical circuit
Testing a project in real time
- Testing a project in real time
Most importantly, I got to experience how something I wrote in code could directly control a physical circuit.
And that's honestly one of the things I enjoy most about working with Arduino and embedded systems. ⚡
🚀 What Could Be Improved?This is only a starting point.
There are so many ways I could take this project further:
🔊 Add a buzzer for proximity warnings📺 Add an LCD or OLED to display the exact distance📱 Add Bluetooth connectivity🤖 Integrate it into a robot🚗 Turn it into a parking assistance system📊 Create a graphical distance monitor🔔 Make the buzzer change frequency based on distance
For now, though, I'm happy with this little experiment. ❤️
❤️ Final ThoughtsThis project may be small, but it was a really fun hands-on experience.
I built it independently in around one hour, experimented with the sensor and LEDs, and got to see the whole system respond in real time.
It was a simple reminder that learning doesn't always have to start with a huge project.
Sometimes it can start with:
an Arduino + a sensor + some LEDs + a random idea + one free hour. 😂⚡
And that's exactly what happened here.
💙 Thanks for checking out my project!If you found it interesting, I'd really appreciate your support, feedback, and encouragement! ✨
Feel free to like ❤️, comment 💬, and share your thoughts or ideas for improving the project.
Every bit of support motivates me to keep learning, building, and creating more! 🚀
More little experiments coming soon. 🌷
circuit diagram
Assembly
Result
Seeing the LEDs respond to my hand movement was honestly the most satisfying part! 😂⚡ This small project gave me a fun hands-on experience with Arduino, sensors, and basic embedded system logic.


Comments