Turn your mirror into a modern vanity kit with gen4 5” HMI Display module and LED Strips. This project can be made easily with your creativity. In this project, gen4 HMI Display module will be used as the graphical user interface to control your light. You can customize the looks of the buttons and the arrangement of the LED strip modifying the project code using the Visi Environment.
Step 1: Build- You can customize your own Vanity Mirror light by using different materials, in this project, LED Strip is used. It is divided into three sections.
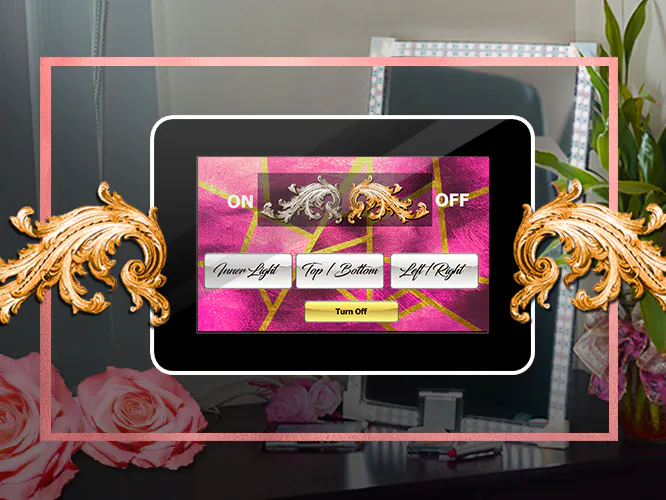
- Put the LED Strips onto your mirror and connect them accordingly. In this version, 3 sections were made, The Inner Light, Top & Bottom Light and the Left & Right Light.
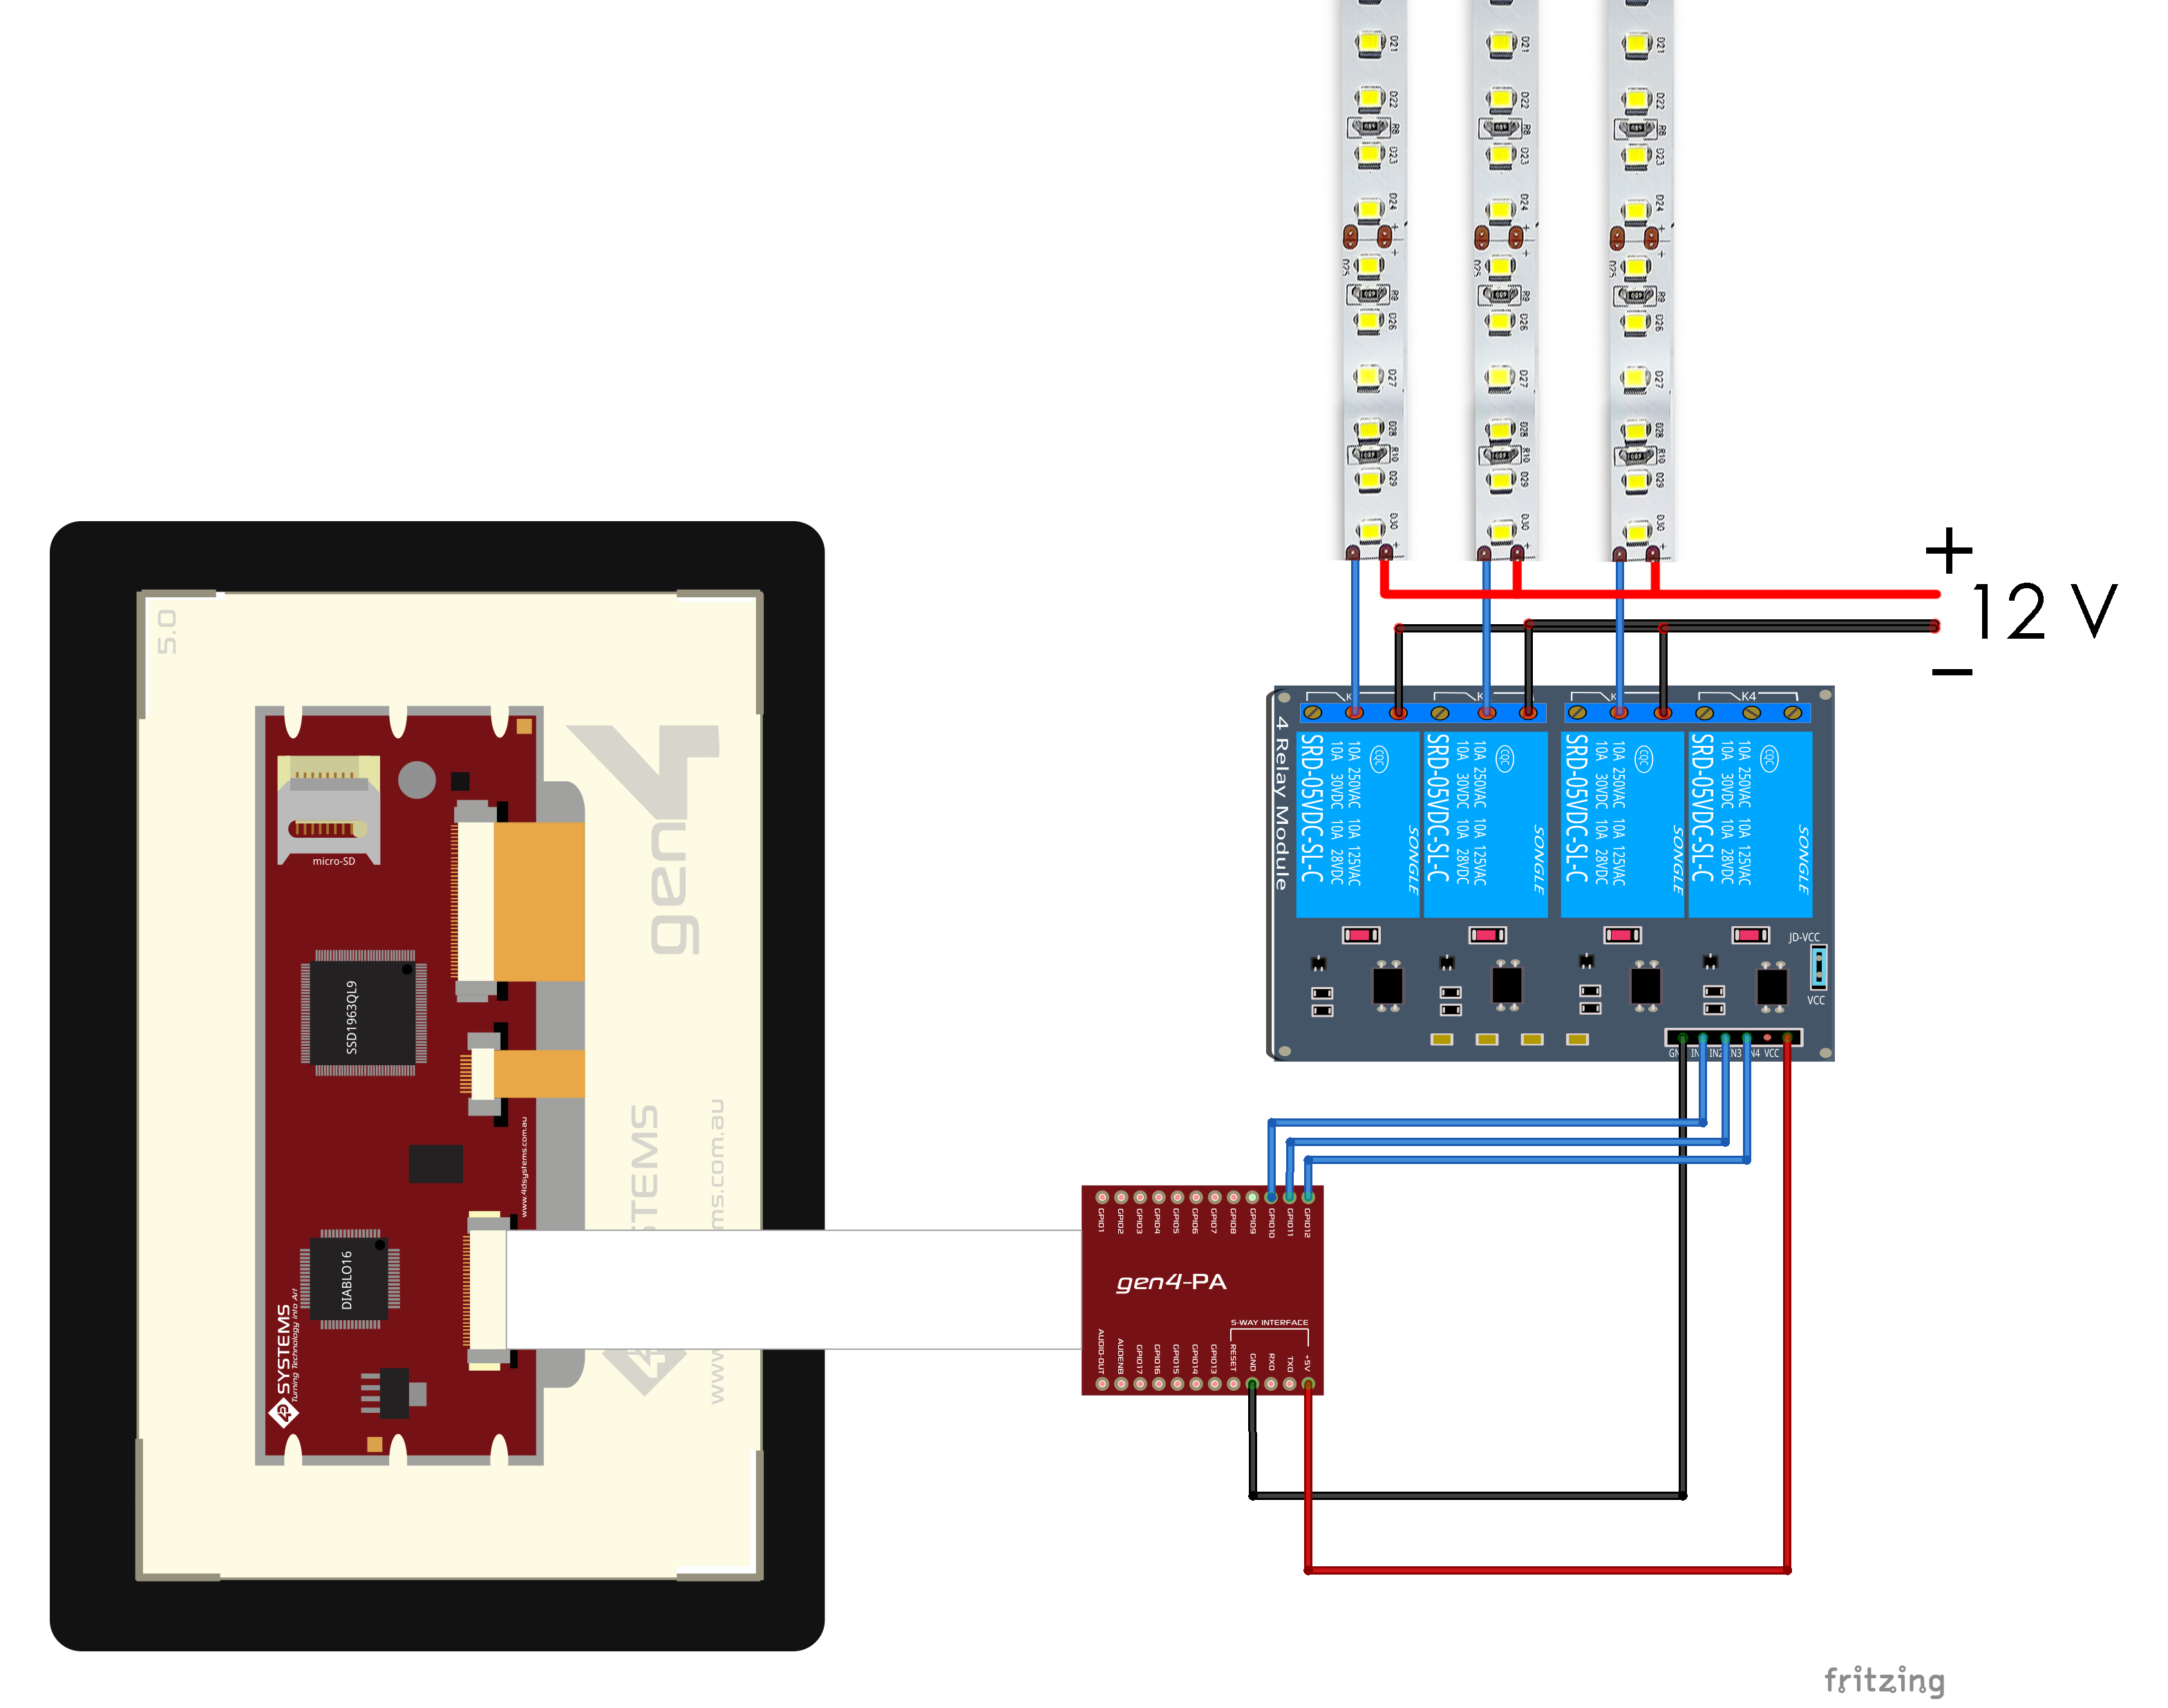
- Build the circuit as shown in the diagram.
NOTE: You can also make your costomized circuit to control the brightness of the LED Strip with the PWM Pins of the gen4-HMI Display Module
Step 2: Program- Open the Visi project using Workshop 4. This project uses the Visi Environment.
- You can modify the properties of each widgets and buttons.
- Three GPIOs are used as pin output.
- You can also check and modify some part of the code according to your preferences. The section below shows the touch and On-Off function of this project:
Step 3: Compile- Click on the “Compile” button.
Note: This step could be skipped. However, compiling is essential for debugging purposes.
Step 4: Comms Port- Connect the display to the PC. Make sure that you are connected to the right port. Red Button indicates that the device is not connected, Blue Button indicates that the device is connected to the right port.
Step 5: Compile and Upload- Go back to “Home” tab. This time, click on the “Comp’nLoad” button.
- Workshop 4 will prompt you to select a drive to copy the image files to a uSD Card. After selecting the correct drive, click OK.
Step6: Mount uSD Card- When the uSD card is not yet inserted, this message will appear on your gen4 Display: "Drive not mounted".
- After inserting your uSD card this GUI should appear on the gen4 Display:


Comments