

The RT-Spark is a development board built around the STM32F407ZGT6 chip, which is a powerful microcontroller used for advanced electronics. This project is just a simple program that makes an LED blink on the board. Even though it seems basic, it's actually an important test. It proves that the hardware is set up correctly and established a connection between the computer and the chip to upload code.
Materials that is used:Hardware
- RT‑Spark Development board
- USB cable
- Windows PC
Software
- STM32CubeIDE
- Git
- GitHub
- Hackster.io
1. Download STM32CubeIDE for WINDOWS(https://www.st.com/en/development-tools/stm32cubeide.html)
2. Download Git for WINDOWS (https://git-scm.com/install/windows)
1. To create a new STM32 project, go to file and click new, there, you can find the STM32 project.
2. Enter "STM32F407ZGT6" into the commercial part number search bar from the MCU/MPU Selector, then select the exact match to from the table below, then click next.
3. Name your project and make sure you select the Targeted Language into "C language", Targeted binary type into "Executable" and Targeted project type into "STM32Cube", then click finish.
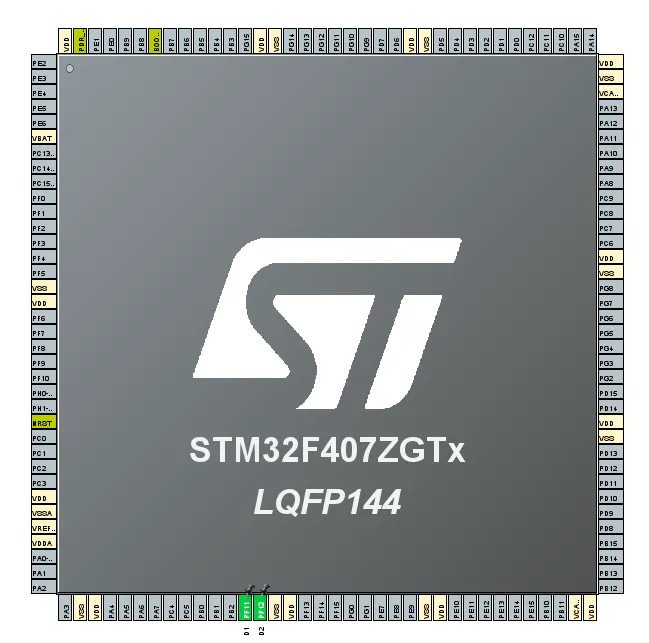
4. Now, you have a STM32F407ZGTx chip
Zoom in and find the pin PF11 and PF12. Click each pins and select GPIO_Output to prepare them for code generation.
5. Under the Configuration panel, open the GPIO menu and click your specific pin. Update the mode to: Output Push Pull, No Pull-up/down, and Low or Medium speed. You can also rename your pins into LED1 and LED2.
6. After setting up your configuration, you are ready to generate your code, go to Project and then click the Generate code. Wait for the program to load and download what is needed.
7. Go to your main function and drop the code inside the while(1) loop.
8. Once the code is added, click the Build icon(the hammer) from the upper right to debug your code and check errors if there's any.
9. After the build is finish, you are ready to test out the ST-Spark board. Connect the RT-Spark board from the USB C port to your PC USB port, press the switch button of the board to turn it on and run your code by clicking the Run icon.
10. Now, if the RT-Spark board is blnking red and green, then it means you are doing it correctly. Now you have a simple blinking LED using RT-Spark board.
RESULTUploading to GITHUBNow, this is where you need the Git app to upload your project to Github.
1. Open your project folder from the file explorer. Click the address bar at the top, type cmd, and hit Enter.
2. Once you press enter, a command prompt will pop up in your screen. Type these commands into the window, pressing Enter after each line:
git initgit add .git config --global user.email "you@example.com"git commit -m "Initial commit: STM32F407ZGT6 Blink LED"
3. Now, go to your github page and create a New Repository. Name your repository and click Create repository.
4. Copy your URL to the command prompt.
5. Connect your project to GitHub. Replace the URL below with your own, then run these three commands one by one:
git remote add originhttps://github.com/yourname/rt-spark-blink-led.gitgit branch -M maingit push -u origin main
The last command might ask for your GitHub credentials. Just follow the prompts to sign in, and your project will be uploaded.


Comments