

Simple SOS Blinking LED using an RT-Spark Development Board (STM32F407ZGT6Microcontroller Chip)
What is an RT-Spark Development Board?
The "RT-Spark Development Board" is a type of board that has a ton of features, and hardware that allows you to code, and create anything you can imagine. They are similar to Arduino Boards, but more advanced, not beginner-friendly, and better for Embedded Systems.
For this scenario, we'll be creating an SOS Blinking Pattern using the Built-in or On-Board LED from the RT-Spark Development Board.
ESSENTIAL MATERIALS
SOFTWARE:
- STM32CUBEIDE
- STM32CUBEMX
- OS (Windows 10 or Windows 11)
- Git (For Distributing the Project to GitHub, optional)
HARDWARE:
- RT-Spark Development Board
- USB to Type C Connector
WEBSITE:
- https://github.com/kinitgwapo/rt-spark-blink-led (My Repository)
- https://www.st.com/content/st_com/en.html
DOWNLOADING & INSTALLING SOFTWARES
1. Download STM32CubeIDE V1.19.0 from [STM32CubeIDE | Software - STMicroelectronics]
2. Download Git from [Git - Install for Windows]
After downloading both software, proceed installing it, and keep the installation in default mode, unless you know what you're doing.
PROJECT CREATION& CONFIGURATION
1. Create a new STM32 Project, and pick a Microcontroller from the MCU/MPU Selector/Tab. (Note that this guide is made specifically for STM32CubeIDE V1.19.0. There will be subtle difference between V2.0.0+ and 1.19.0- due to the official separation of STM32CubeIDE and STM32CubeMX)
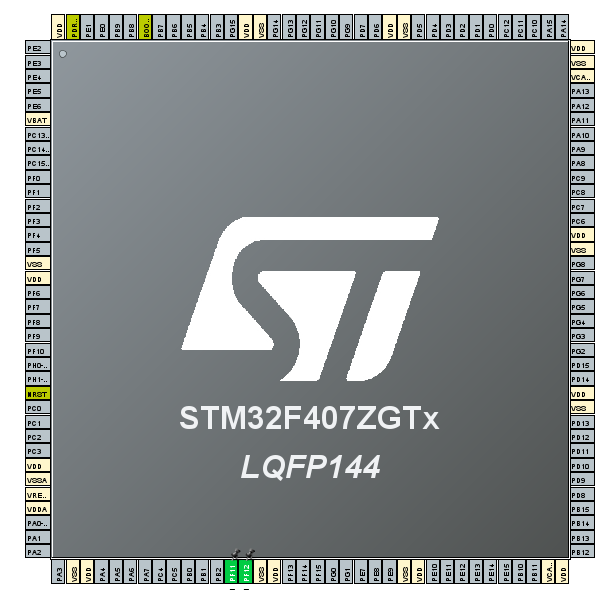
2. Search for "STM32F407ZGT6" from the Commercial Part Number search bar. click the one with the correct commercial serial number from the table given.
3. Let the program download, and install any necessities, you typically need to login to myST from "help > STM32Cube Updates > Connection to myST" so that the program can start gathering anything it needs from its own website.
4. Set 49th, 50th pin "PF11 & PF12" to GPIO_Output for us to code it and produce an output, not input (If CubeMX or the Microcontroller Unit's Pins aren't showing up, open .ioc file that is inside your Project in Project Explorer Tab).
5. Generate code from the .ioc file by right-clicking it and click "Generate Code" or from Project > Generate Code.
6. Find the newly generated main.c by "Generate Code" from YourProjectName > Core > Src > main.c. Insert the SOS Blinking Pattern within the int main(void) function at main.c.
int main(void)
{
    int morseS = 0, morseO = 0;

    HAL_Init(); // Default Code

    SystemClock_Config(); // Default Code

    MX_GPIO_Init(); // Default Code

    HAL_GPIO_TogglePin(GPIOF, GPIO_PIN_12);  // Toggle Red LED
    HAL_GPIO_TogglePin(GPIOF, GPIO_PIN_11);  // Toggle Red LED

    while (1)
    {
        HAL_Delay(1000);
        while(morseS < 6) {
            HAL_GPIO_TogglePin(GPIOF, GPIO_PIN_12);  // Toggle Red LED
            HAL_Delay(250);
            morseS++;
        }

        morseS = 0;
        HAL_Delay(100);

        while(morseO < 6) {
            HAL_GPIO_TogglePin(GPIOF, GPIO_PIN_11);  // Toggle Red LED
            HAL_Delay(500);
            morseO++;
        }

        morseO = 0;

        while(morseS < 6) {
            HAL_GPIO_TogglePin(GPIOF, GPIO_PIN_12);  // Toggle Red LED
            HAL_Delay(250);
            morseS++;
        }

        morseS = 0;
    }
}
7. After doing everything properly, simply build the project by clicking the Hammer Icon above the Project Explorer Tab. Finally, Plug and turn on the RT-Spark Development Board from the USB_Debug port to Computer USB Port, and click Run, which is a green play button at the right side of the Hammer Icon.
DEMO
GITHUB PROJECT PUBLISHING(OPTIONAL)
Note: To distribute the Project onto your GitHub Repository, you need the "Git" software to upload the project.
1. Access your STM32 Project folder, and type cmd onto the address bar then press enter.
2. Enter these Commands from the cmd:
- git init
- git add.
- git commit -m "Initial commit: STM32F407ZGT6 Blink LED"
git commit typically gives you an error because the author is unknown, simply just read the instruction, and choose whether you want the author to be the same for every git commit you do or only for this specific Project. Once done, simply execute the same git commit command to proceed to the next command.
- git remote add origin "Your_Reposity_URL.git"
- git branch -M main
- git push -u origin main
The final command might ask you to enter your GitHub credentials, which holds the repository. Simply follow its instruction, and your Project will be distributed to your Repository.


Comments