

Hardware components | ||||||
 |
| × | 1 | |||
 |
| × | 1 | |||
 |
| × | 1 | |||
 |
| × | 1 | |||
 |
| × | 1 | |||
 |
| × | 1 | |||
 |
| × | 1 | |||
 |
| × | 1 | |||
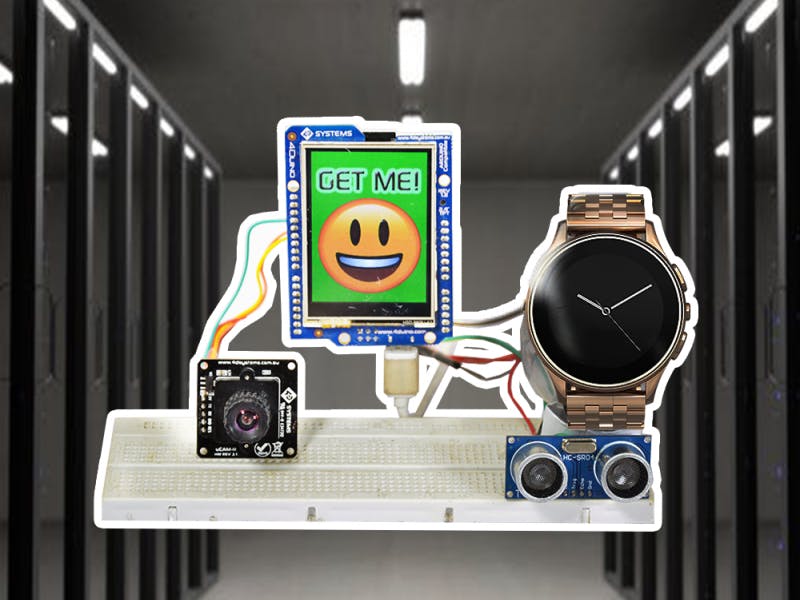
This project will show you how to make a simple valuable things or gadget protector. With the on-board WiFi of the 4Duino-24, we will be able to connect this project to internet and update the twitter of someone when another trying to steal our valuables thru thingSpeak. The uCAM-III will capture the image of the culprit as an evidence.
How it worksAn Ultrasonic sensor detect an object within its range, 4Duino-24 will then send a message to the thingSpeak which will update the twitter if someone is present in front of your device. Then the uCAM-III will capture the image and store it on the SD Card so that the image can be retrieved as an evidence.
Components- 4Duino-24
- uCAM-III
- ultrasonic Sensor
- breadboard
- jumping wires
- micro SD card
- micro USB Cable
- 5V power supply
Build the circuit as shown in the diagram.
Workshop 4 – 4Duino Extended Graphics environment is used to program this project.
Workshop requires that the Arduino IDE installed as it calls the Arduino IDE for compiling the Arduino sketches. The Arduino IDE however is not required to be opened or modified to program the 4Duino.
Open this file using Workshop 4.
Note: Download the project here.
Step 3: CompileClick on the “Compile” button.
Note: This step could be skipped. However, compiling is essential for debugging purposes.
Step 4: Comms PortConnect the 4Duino to the PC using µUSB cable.
Then navigate to the Comms tab and select the Comms port to which the 4Duino connected.
Step 5: Compile and UploadGo back to “Home” tab. This time, click on the “Comp’nLoad” button.
Workshop 4 will prompt you to select a drive to copy the image files to a uSD Card. After selecting the correct drive, click OK.
The module will prompt you to insert the uSD card.
Properly unmount the uSD Card from the PC and insert it to the uSD Card slot of the display module. The image below must appear on your display after completing the steps above.
After uploading, 4Duino will start running the code.

_3u05Tpwasz.png?auto=compress%2Cformat&w=40&h=40&fit=fillmax&bg=fff&dpr=2)
Comments