

Software apps and online services | ||||||
 |
| |||||
This project can be used to capture small objects and models in photography with the feature to control the lightings and the brightness of the setup. It uses gen4-uLCD-43DCT to display the graphical user interface with an interactive touch screen function for controlling the lights.
Users can improve the project by adding more light nodes and op-amps to perform a more complex lightings as to what the user needs.
Components
HARDWARE COMPONENTS
- gen4-uLCD-43DCT-CLB
- gen4-PA and FFC Cable·
- uSD Card·
- uUSB Cable·
- Jumper Wires·
- 12V External Power Supply·
- 5V Power Supply·
- 5050 LED Strip·
- 3 x transistor heatsink·
- 2 x LM324N OP-AMP IC·
- 6 x 10K ohms 1/4W resistor·
- 3 X 1 ohm 5W resistor·
- 3 x 2N222 NPN transistor·
- 3 x D288 / Any NPN power transistor·
- 2 x Breadboard·
- 3 x 0.1 uf non-polarized capacitor·
- 3 x Wire Terminal Blocks 1x2
SOFTWARE APP
IMPLEMENTATION1. Build the circuit as shown in the image below
2. Download the code here.
- Open the project using Workshop 4 IDE. This project uses the Visi Environment.
- You can modify the code according to your preferences. For more details, please go to this link.
3. Connect the display to the PC. Make sure that you are connected to the right port. Red Button indicates that the device is not connected, Blue Button indicates that the device is connected to the right port.
4. Go back to “Home” tab. This time, click on the “Comp’nLoad” button.Workshop 4 IDE will prompt you to select a drive to copy the image files to a uSD Card. After selecting the correct drive, click OK.
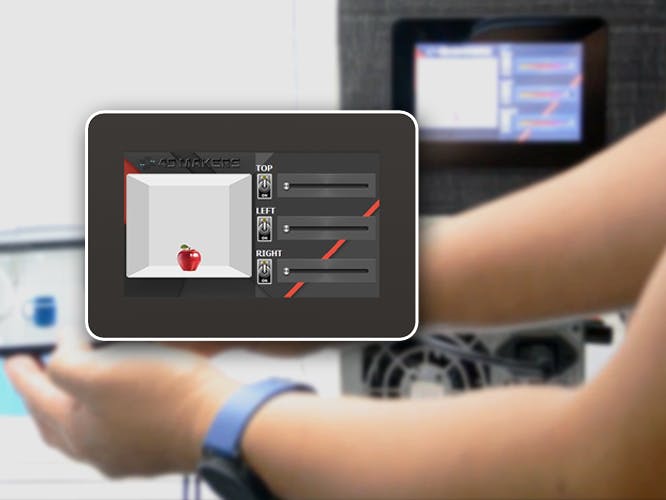
5. Insert your micro SD card to your display, this GUI should appear on the gen4 Display:


Comments