


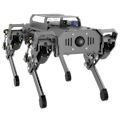
Hardware components | ||||||
 |
| × | 1 | |||
| × | 1 | ||||
| × | 1 | ||||
| × | 1 | ||||
Software apps and online services | ||||||
| ||||||
ROS projects by Hiwonder.
We have launched our JetAutoROS robot car and create some amazing functions. Autonomous driving scenario is one of them. We use Yolo v8 to train robots and test it.
1. Yolo Series Models Introduction1.1 YOLO SeriesYOLO (You Only Look Once) is an one-stage regression algorithm based on deep learning.
R-CNN series algorithm dominates target detection domain before YOLOv1 is released. It has higher detection accuracy, but cannot achieve real-time detection due to its limited detection speed engendered by its two-stage network structure.
To tackle this problem, YOLO is released. Its core idea is to redefine target detection as a regression problem, use the entire image as network input, and directly return position and category of Bounding Box at output layer. Compared with traditional methods for target detection, it distinguishes itself in high detection speed and high average accuracy.
1.2 YOLOv5YOLOv5 is an optimized version based on previous YOLO models, whose detection speed and accuracy is greatly improved.
In general, a target detection algorithm is divided into 4 modules, namely input end, reference network, Neck network and Head output end. The following analysis of improvements in YOLOv5 rests on these four modules.
1) Input end: YOLOv5 employs Mosaic data enhancement method to increase model training speed and network accuracy at the stage of model training. Meanwhile, adaptive anchor box calculation and adaptive image scaling methods are proposed.
2) Reference network: Focus structure and CPS structure are introduced in YOLOv5.
3) Neck network: same as YOLOv4, Neck network of YOLOv5 adopts FPN+PAN structure, but they differ in implementation details.
4) Head output layer: YOLOv5 inherits anchor box mechanism of output layer from YOLOv4. The main improvement is that loss function GIOU_Loss, and DIOU_nms for prediction box screening are adopted.
2. YOLOv5 Workflow2.1 Priori boxWhen inputting image into model, we need to provide the target area of the image to be recognized. Priori box is a box used to mark the target recognition area on image.
Prediction box generates automatically, which is the output of model. As the first batch of training data is fed into model, prediction box will generate automatically. The position where same kind of objects appear in high frequency will be set as the center of prediction box.
The generated prediction box’s size and position may deviate, and anchor box plays a role in calibrating prediction box’s size and position.
Prediction box determines where anchor box is generated. In order to interfere the position of next generated prediction box, anchor box will be placed at the relative center of prediction box.
After data is calibrated, a priori box occur on the image. Next, model generates a prediction box subjecting to the position of priori box. Anchor box is generated whenever prediction box is generated. Lastly, the weight of this training is updated to the model.
Each newly generated prediction box is affected by the last generated anchor box. The above operation will be repeated to eliminate deviation in prediction box’s size and position till the prediction box and priori box coincide.
We need to collect and label data first, since training yolov5 models requires large amount of data.
1) Start JetAuto, then connect it to NoMachine.
2) Run command to stop APP service.
jetauto@jetauto-desktop:~$ sudo systemctl stop start_app_node.service4) Input command to enable camera service.
jetauto@jetauto-desktop:~$ roslaunch jetauto_peripherals astrapro.launch5) Double click 📷 on the desktop to open image acquisition tool.
“save number” refers to picture ID i.e. the number of picture saved. “existing” represents the quantity of pictures saved
6) Change the storage path as “/home/jetauto/my_data”.
7) Place the object to be recognized within the camera field of view. Then click “Save(space)” button or press space bar to capture the current frame of camera image.
JPEGImages folder used to store pictures will be generated automatically under “/home/jetauto/my_data” after you click “Save(space) button”
Note: to increase model credibility, please photography the target from different distances, rotation angles and tilt angles.
8) Having finished collecting images, click “Exit” button.
9) Open file manager. Enter the directory “/Home/my_data/JPEGImages/” where you can view the saved pictures.
Note: the input command should be case sensitive, and keywords can be complemented by “Tab” key.
1) Open image annotation tool on desktop. The functions of buttons on this tool are as follows.
2) Press the shortcut key "Ctrl+U", select the image storage directory as "/home/jetauto/my_data/JPEGImages/", and click "Open" button.
3) Press the shortcut key "Ctrl+R", choose calibrated data storage path as “/home/jetauto/my_data/Annotations/”, and click “Open” button.
4) Press “W” key to create annotation box.
Move your mouse to appropriate position, then drag the annotation box to cover the whole target object by pressing left button mouse. When you finish, release the mouse.
5) Name the target recognized content in the pop-up window, and this image is named as “right”. After that, click "OK" button, or press "Enter" key to save the name.
6) Press the shortcut key “Ctrl+S” to save annotation data of this picture.
7) Follow step 4-6 to annotate the rest pictures.
8) Open file manager, then enter directory “/Home/my_data/Annotations/” to check annotation files of pictures.
1) Open terminal.
2) Input command and press Enter.
jetauto@jetauto-desktop:~$ vim ~/my_data/classes.names3) Press “I” key to enter editing mode. Add the name of target recognized content. One name for one row.
1 rightNote: the name you add must be consistent with the name in image annotation software “labelImg”.
4) After adding the name, press “Esc”, and input “:wq” to save and close the file.
:wq5) Convert data format.
jetauto@jetauto-desktop:~$ python3 ~/jetauto_software/xml2yolo.py --data ~/my_data --yaml ~/jetauto_software/data.yamlIf you receive the following prompts, the data format is converted successfully.
1) Open the terminal.
2) Enter the specific directory
jetauto@jetauto-desktop:~$ cd jetauto_third_party/yolov5/3) Train models.
jetauto@jetauto-desktop:~$ python3 train.py --img 640 --batch 8 --epochs 5 --data ~/jetauto_software/data.yaml --weights yolov5n.pt“--img” in the command refers to image size. “--batch” is number of single input of pictures. “--epochs” indicates training times. “--data” is storage path for data set. “--weights” is storage path for training files. “yolov5n.pt” at the end of command is the model name.
You can modify the above parameters based on the actual situation. To improve model credibility, you can train several times, but the training time will be increased.
4) When you are required to “Enter to your choice”, input “3” and press Enter.
The following content means the model is being training.
The storage path for the generated files will be printed on the terminal after model training. Take down this path.
Note: the storage path for the generated file is not fixed.
5. Call TensorRT Model5.1 Generate TensorRT Model1) Open the terminal.
2) Enter the specific directory.
jetauto@jetauto-desktop:~$ cd jetauto_third_party/yolov5/3) Paste the file “best.pt” generated after model training to current directory.
Note: as it takes a long time to train models, the following instruction is based on the model trained before. If you finished training the model, replace “best.pt” with “yolov5n.pt” or others, but they must be suffixed with “.pt”.
jetauto@jetauto-desktop:~/jetauto_third_party/yolov5$ cp ~/jetauto_third_party/yolov5/runs/train/exp5/weights/best.pt ./You can change the storage path for “best.pt” file in the command.
4) Convert pt file into wts file.
jetauto@jetauto-desktop:~/jetauto_third_party/yolov5$ python3 gen_wts.py -t detect -w best.pt -o best.wtsIf other models are needed, directly replace “best.pt” in the command with corresponding model file name.
Note: if you use the data file under “/home/jetauto_third_party/my_data/” to train the model, you can skip step 6-9, and directly start with step 10.
5) Enter the specific directory.
jetauto@jetauto-desktop:~/jetauto_third_party/yolov5$ cd ~/jetauto_third_party/tensorrtx/yolov5/6) Open specific file.
jetauto@jetauto-desktop:~/jetauto_third_party/tensorrtx/yolov5$ vim yololayer.h7) Locate the code as pictured. This parameter refers to number of categories of content to be recognized. You need to change this number based on actual situation.
8) Completing modification, press “Esc”, input “:wq” and press Enter to save and close the file.
:wq9) Enter specific directory.
jetauto@jetauto-desktop:~/jetauto_third_party/tensorrtx/yolov5$ cd ~/jetauto_third_party/tensorrtx/yolov5/build/10) Compile configuration file.
jetauto@jetauto-desktop:~/jetauto_third_party/tensorrtx/yolov5/build$ make11) Copy the generated file “best.wts” to this directory.
jetauto@jetauto-desktop:~/jetauto_third_party/tensorrtx/yolov5/build$ cp /home/jetauto/jetauto_third_party/yolov5/best.wts ./12) Generate TensonRT model engine file.
jetauto@jetauto-desktop:~/jetauto_third_party/tensorrtx/yolov5/build$ sudo ./yolov5 -s best.wts best.engine n“best.wts” in the command is the storage path for “best.wts” file. “best.engine” is engine file name.
If the hint “Build engine successfully!” shows up, engine file is generated successfully.
1) Copy TensonRT model engine file to specific folder.
jetauto@jetauto-desktop:~/jetauto_third_party/tensorrtx/yolov5/build$ cp best.engine libmyplugins.so ~/jetauto_ws/src/jetauto_example/scripts/self_driving/2) Stop APP service.
jetauto@jetauto-desktop:~/jetauto_third_party/tensorrtx/yolov5/build$ sudo systemctl stop start_app_node.service3) Test model.
jetauto@jetauto-desktop:~/jetauto_third_party/tensorrtx/yolov5/build$ roslaunch jetauto_example self_driving.launch4) Open a new terminal. Input command “rqt_image_view” and press Enter to open camera returned image.
jetauto@jetauto-desktop:~$ rqt_image_viewPlace the road sign within the camera field of view. When road sign is recognized, it will be framed, and its name and recognition confidence will be printed on the camera returned image. Besides, detection information will be printed on the terminal.
“class_name” is name of the object to be recognized. “box” is the starting coordinate and ending coordinate of the box. “score” is the recognition confidence.


Comments