Introduction
Sleep SupervisorDo you feel tired during the day? Your memory is not the same? You are gaining weight? Get sick easily? Your blood pressure is deregulated? The performance in the gym is decreasing? Are you grumpy?
Your problem may be related to poor quality of sleep. The amount of sleep a person needs varies greatly, however, it need to be well used. A good night's sleep means a day of great productivity, but how to know if we're sleeping well?
If you want to know what disturbed your sleep, this project is perfect for you. With it you will be able to have full control over all of the noises that occur over the night. With a few clicks, you will be able to precisely know when and which noise corrupts your deep sleep cycle.
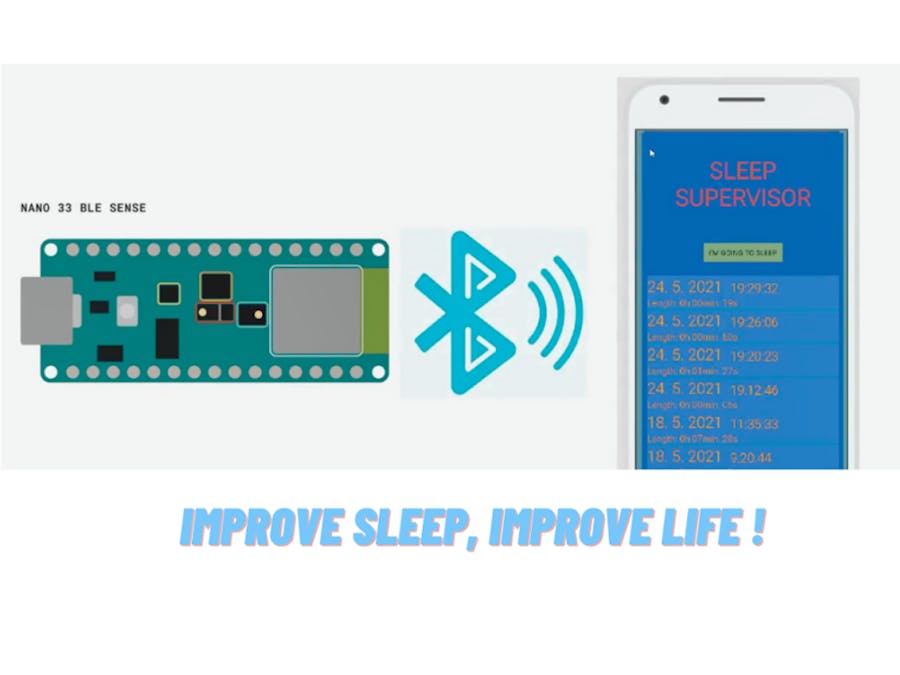
Arduino Nano 33 BLE Sense connects with your device running our app and records disturbances while you are sleeping. After you wake up, you can view the disturbances that happened last or any night before and take actions accordingly by removing or suppressing the sources of those detected disturbances. The recording happens when you click on "I'm going to sleep" button, and stops when you press "I woke up" button. Main screen shows you the dates of your past recorded sleeps with exact time when you went to sleep and how long you were sleeping for. By selecting any of those dates you are shown which disturbances and when exactly they happened that night.
HARDWARE
Arduino Nano 33 BLE Sense
The Arduino Nano 33 BLE Sense is an upgraded version of a well-known Arduino Nano board, with added sensors and more powerful processor, which also includes Bluetooth® pairing via NFC and ultra low power consumption mode.
Sensors included on this board are 9 axis inertial sensor, humidity and temperature sensor, barometric sensor, microphone, gesture, proximity, light color and light intensity sensor.
The main feature of this board, which we will be using on this project, is the possibility of running Edge Computing applications (AI) on it using TinyML. The only sensor we will be using is the microphone.
To upload the program on the Arduino Nano 33 BLE Sense board you will firstly have to connect it with a cable to the PC. The next thing you will need is a program called Arduino IDE. The instructions for that are written in the Arduino IDE chapter below.
SOFTWARE
Edge impulse
The trend to run ML on microcontrollers is sometimes called Embedded ML or Tiny ML. TinyML has the potential to create small devices that can make smart decisions without needing to send data to the cloud — great from an efficiency and privacy perspective. Even powerful deep learning models (based on artificial neural networks) are now reaching microcontrollers. Over the past year great strides were made in making deep learning models smaller, faster and runnable on embedded hardware through projects like TensorFlow Lite for Microcontrollers, uTensor and Arm’s CMSIS-NN; but building a quality dataset, extracting the right features, training and deploying these models is can still be complicated.
Using Edge Impulse you can now quickly collect real-world sensor data, train ML models on this data in the cloud, and then deploy the model back to your Arduino device. From there you can integrate the model into your Arduino sketches with a single function call. Your sensors are then a whole lot smarter, being able to make sense of complex events in the real world. The built-in examples allow you to collect data from the accelerometer and the microphone, but it’s easy to integrate other sensors with a few lines of code.
ArduinoIDE
Arduino Integrated Development Environment or shorter Arduino IDE is an open-source program which enables you to write code and upload it to your Arduino board.
To use the code for the Arduino Nano 33 BLE Sense, you will firstly have to install the library. If you don't know how to do that, here is a great guide for that. After that, install the included.zip file as the library by going to Sketch -> Include library... -> Add.zip library, and select this downloaded file as your library. Then go to File -> Examples -> Sleep_Supervisor -> Sleep_Supervisor_MAIN. Upload the code to your connected Arduino board by clicking the upload button (circle with right pointing arrow on the left top corner). The code will then be compiled and uploaded. Be patient as this may take a while.
Android Studio
Android Studio provides a unified environment where you can build apps for Android phones, tablets, Android Wear, Android TV, etc.
We'll be using it to create an app for our project. All you have to do is to import included project and upload it to your Android smartphone.
If you want to view and edit the code for this app read the A next part, otherwise go to the B set of instructions.
A) Install Android Studio on your PC following those instructions. Import the project by going to File-> New -> Import Project... and selecting the downloaded file included at the bottom of these instructions. Then you can view and edit the code to your liking. When you are ready to upload the app to your phone, connect your Android phone to the PC, select it in the drop down menu on the top right corner and click the green triangle next to it.
B) If you want to skip the complicated part with Android Studio, you can download already built app to your phone and install it by clicking on it in your phone's file explorer.


Comments