


Hardware components | ||||||
 |
| × | 1 | |||
 |
| × | 3 | |||
 |
| × | 3 | |||
 |
| × | 1 | |||
Software apps and online services | ||||||
 |
| |||||
Hand tools and fabrication machines | ||||||
 |
| |||||
 |
| |||||
 |
| |||||
Cases have shown that elevator is a danger during covid-19 outbreak.
During covid-19 outbreak in China, there were some ways for people to select floors without touching a physical button, such as holographic laser projection and infrared sensors. But they were used only in a limited number of buildings and couldn't spread out due to their high costs.
One common way in my country to combat covid-19 in elevators was to use plastic wrap to cover all buttons and change it everyday. Another common way was to use toothpicks or other item to push the buttons. All of these ways has their disadvantage: either being unable to eliminated all risks or creating a great amount of waste.
Thus, as long as we need elevators, an affordable and easy solution for touch-free elevators is urgent.
How Does It Work?The main idea behind this project is to create an affordable, easy-to-build, and easy-to-use touch-free elevator "button". Thus, the solution we created was to detect objects (fingers in this case) in a hollowed space within a frame.
To achieve that, we 3D modeled a frame (image 1 & 2), or "block" as we call them. The
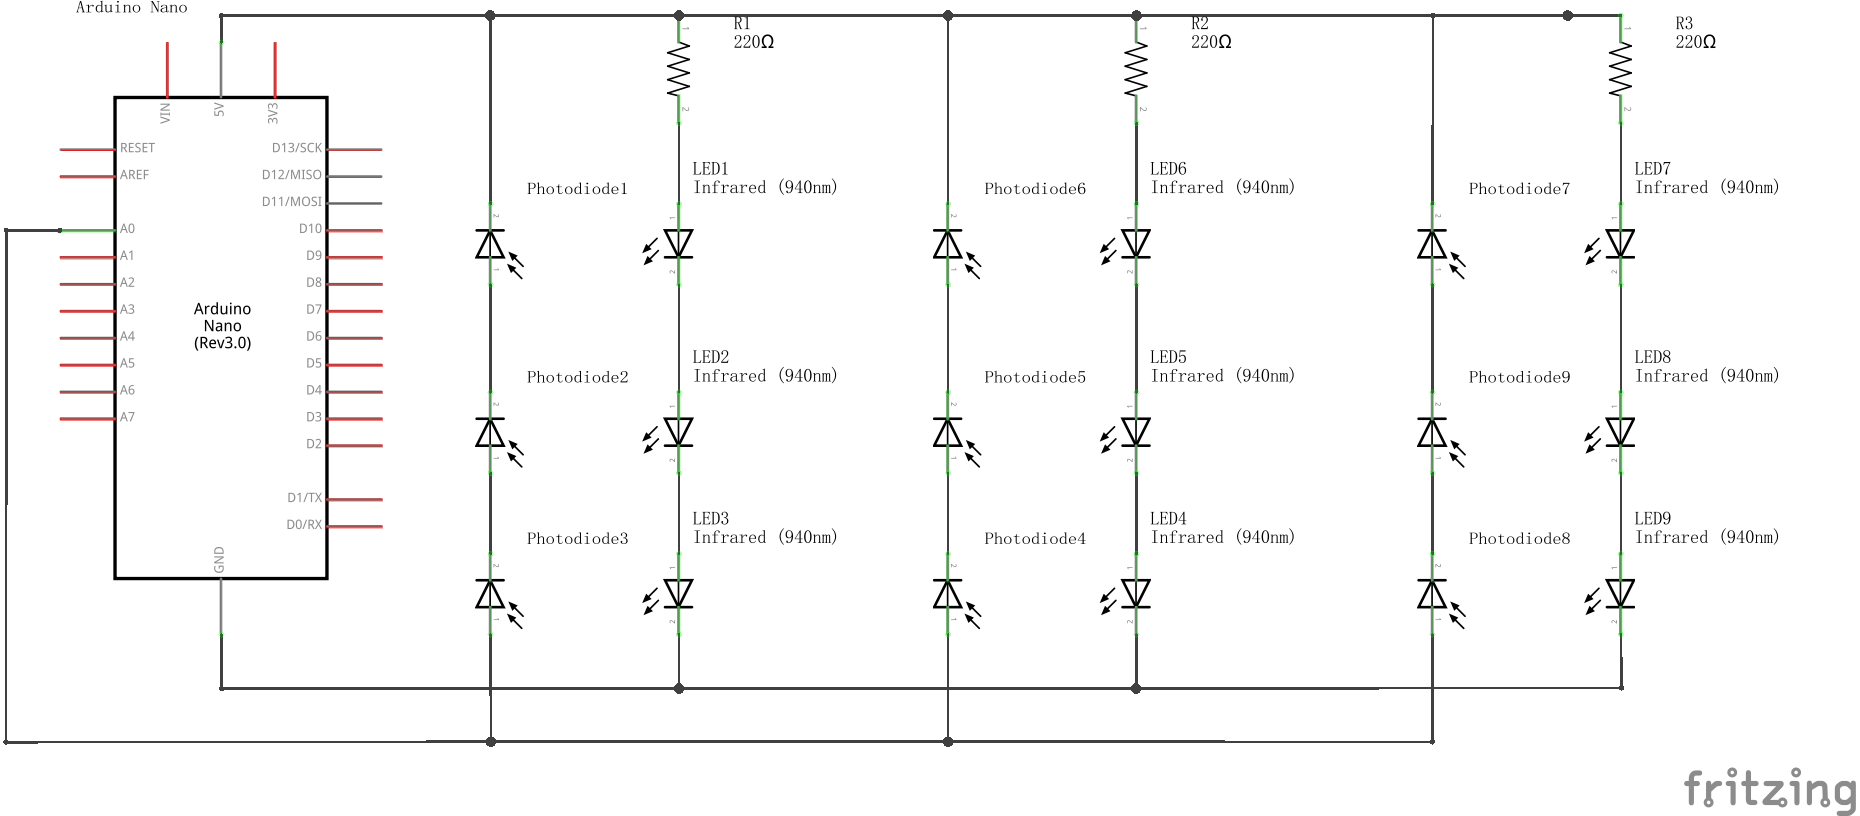
We use 3mm infrared emitters and 3mm photodiodes as the detection method The holes on the blocks are for them. Mont 3 emitters on the bottom holes and 3 photodiodes on the top holes. That is the most stable solution we could find right now.
And the final effect looks like this:
The box on the bottom is for placing Arduino Nano board and cables that connect it to the control unit of the elevator.
When a finger is inserted into a block, the pathway between infrared emitters and photodiodes is disconnected, causing the Arduino Nano to detect and select the corresponding floor. When the floor is selected, the light will light on the physical button as a feedback
Before the assembling, you should measure the size of the button and spacing of the buttons of your target elevator. Adjust the model to fit that. The assembling process is fairly easy as well. You just need to solder the infrared emitters and photodiodes on the 2 PCBs or prototype boards and insert them into the the corresponding holes of the blocks (top and bottom). Then glue them up. Glue multiple of these finished blocks with circuits up to match the button positions for your target elevator.
Our Feature?- Affordable. The main structure is based on 3D printing and uses only little material.
- Easy to produce. Anyone with a 3D printer, even the very beginners, can produce quickly. Create a local community to produce for your neighborhood; or print it and sell it online. Possibility is endless!
- Easy to install. Install similar to any existing solutions with a greater alternative!
- Easy to operate. Little learning is required for operating this system. Just put up your finger just as before!
- Notveryefficient. Our solution at this time require 3 paired photodiodes and infrared emitter for each block to gain the maximum stability. There are several potential solution to that. For example, we can use one 170° or 160° infrared emitter instead of 3 15° emitter we are now using. However, due to time limitation, we were not able to test it out.
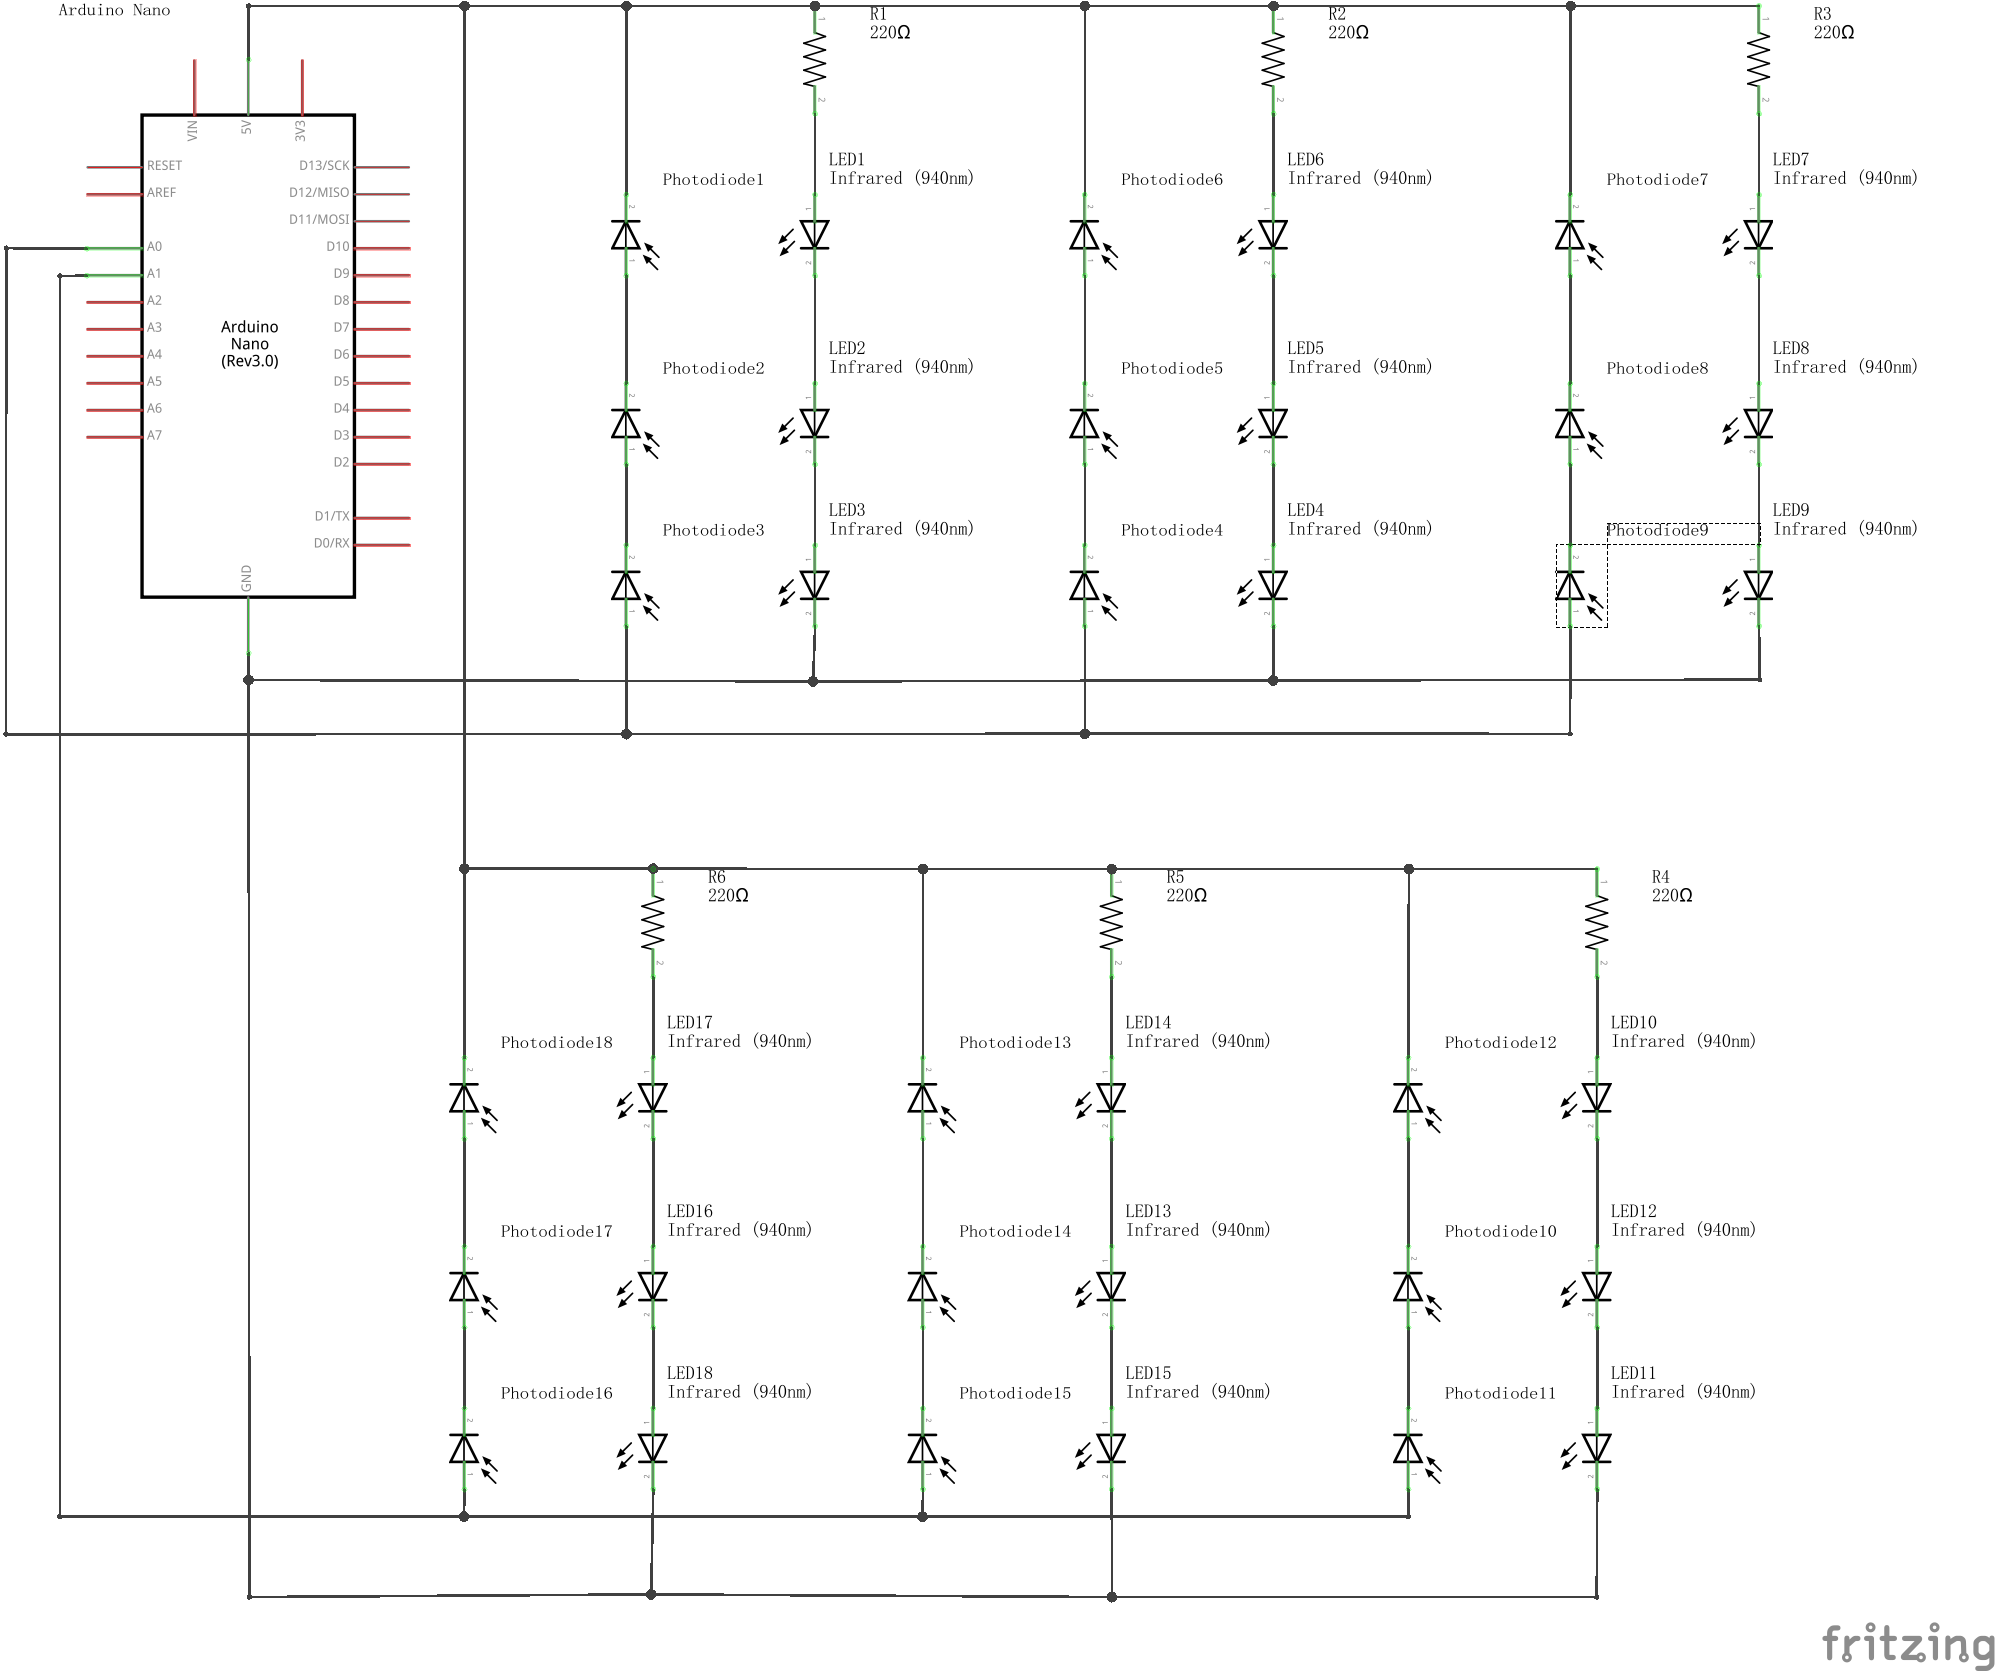
- Boarddemanding. Now each analog input can only support 1 block, meaning that one Arduino Nano board can only carry 8 blocks for 8 floors. We could use ICs to make our system to work with digital (1 and 0) due to the significant voltage change of the photodiode in both states. However, due to time limitation, we were not able to test it out.
- Radar/Ultrasonic. These 2 devices can measure distance between an object (a finger in this case) and the receiver. This means we can use triangulation location to pinpoint the block a person is pressing. We were not able to test it out, due to time and material limitation.
Again, the main idea of this whole project is the "detection in an enclosed frame". And the block we design gave us a good modular capability. With these two ideas derives all our advantage: affordability, easy-to-use, easy-to-build, and so on. This project is now highly complete but the main idea is established and a preliminary workable solution is proposed. In the future, based on our block system, by testing other possible sensors, such as ultrasonic and radar, we can simplify the system and make it more efficient.


Comments