The Problem:The SARS-CoV-2 virus, as is currently known, spreads through water droplets expelled by those infected. The virus can then survive on metal surfaces for up to 5 days and on plastic surfaces for 2-3 days. Coins that are made up of metal and bills made up of a mixture of plastics and cloth can, therefore, be carriers of the virus. In economies where digital payment is available, this isn't much of an issue. But in many areas, physical cash is key to the function of local economies. Therefore, a solution that can disinfect physical currency for safe handling will be able to reduce the economic impact of Covid-19 in many hard-hit communities.
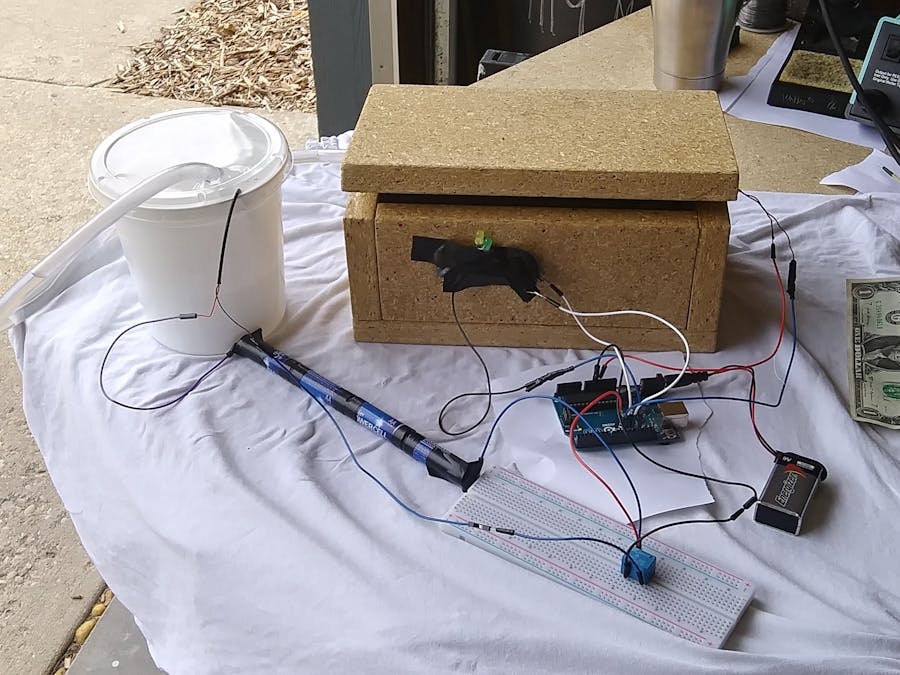
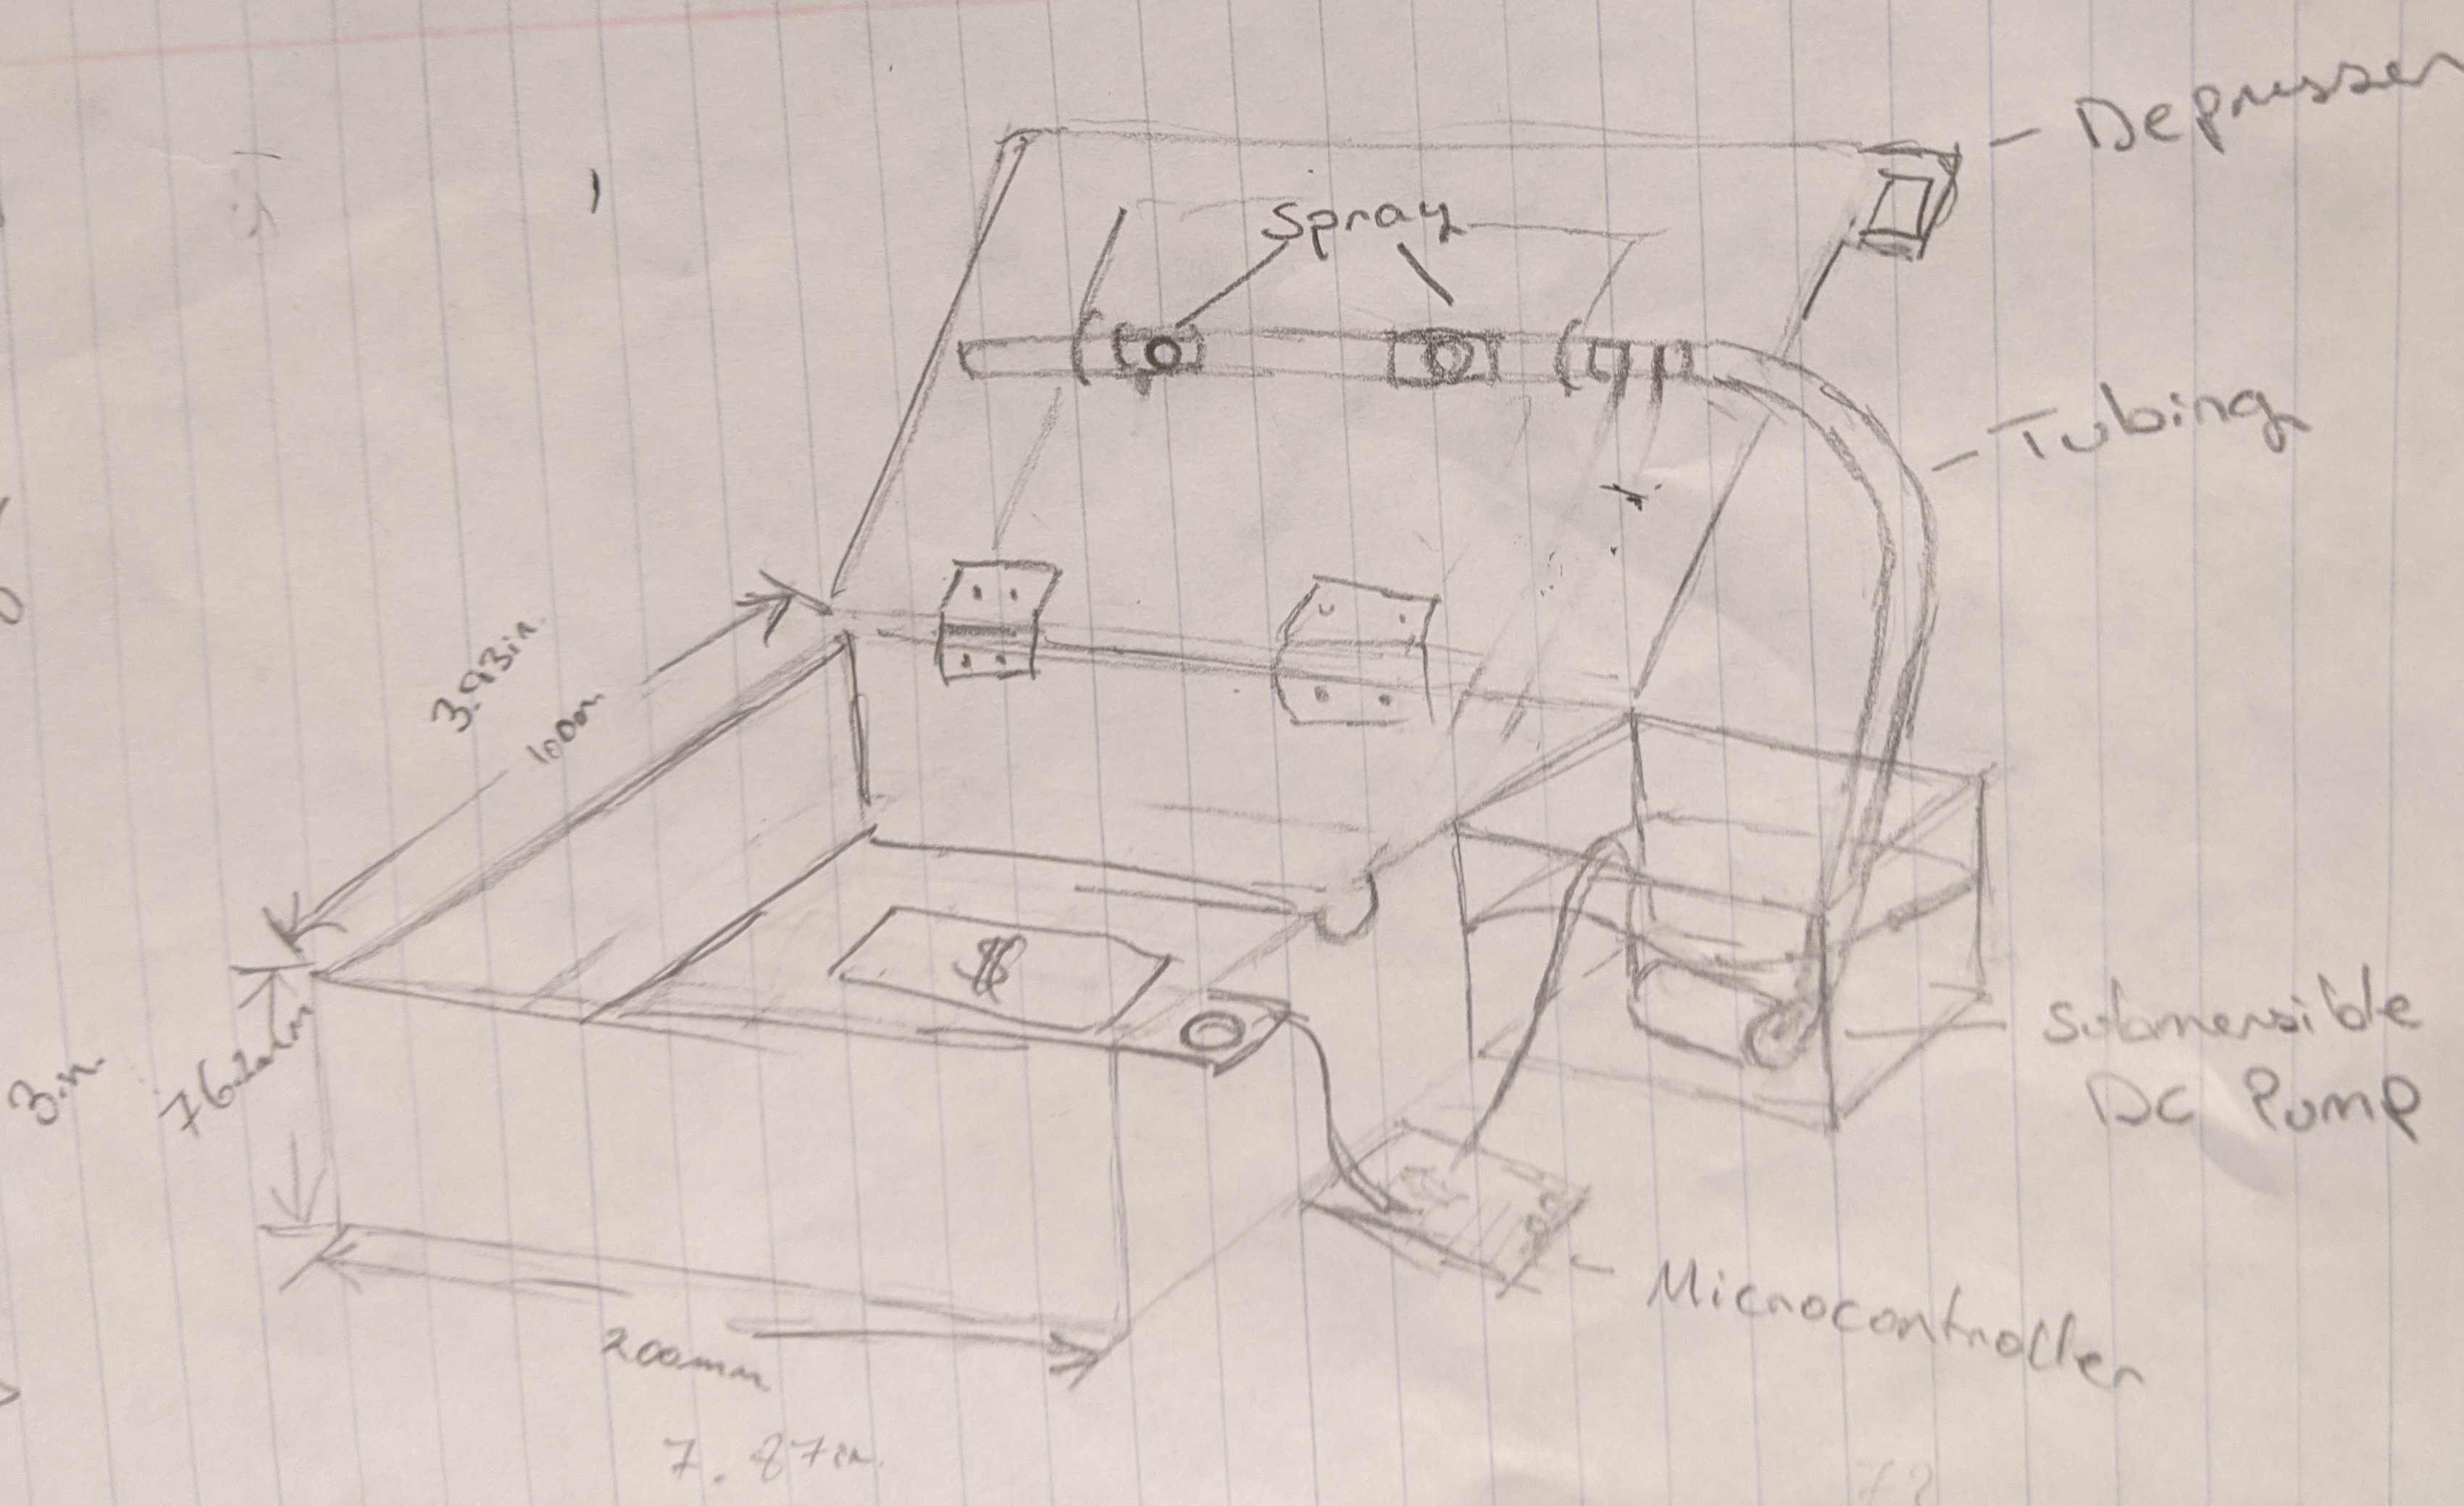
Solution - The Money Launderer:The Money Launderer was the solution that our team came up with to address the issue of disinfecting currency. The wooden box with close-able lid is able to disinfect both bills and coins safely within it. The user can open the box to store currency and then close the lid, which triggers a bump switch. The switch sends a signal to the Arduino UNO which executes the code. The Arduino directs the pump, submersed in a separate container filled with disinfectant solution, to pump the solution into the box through the aquarium tubing. The tubing has small holes for the solution to spray out of, covering the currency in a copious amount of disinfectant. The pump operates for 8 seconds before being shut off. A yellow LED indicates that the pump is operating and that the lid should not be opened and is succeeded by a green LED that indicates the lid is safe to open again.
The box itself has the inner dimensions of 20cm x 10cm x 8 cm. We used 1/2" particle board cut into two 14 cm x 8cm pieces, 2 20cm x 8cm pieces, and 2 24cm x 8 cm pieces to fashion the box. We sprayed the entire box with clear polyurethane to make sure that the liquid disinfectant would not cause the particle board to swell or deform. The box was then assembled with the top panel being attached with a metal hinge. Two notches were filed the sides to allow the aquarium tubing and any wiring to go into the box.
1 / 4 • The panels ready to be assembled
The disinfectant system was created using a 5V submersible pump. The disinfectant and pump were stored in a yogurt container with a hole through the lid for the wiring and aquarium tubing. One of the ends of the aquarium tubing was hot glued shut.
The pump inside the yogurt container with the aquarium tubing attached
The tubing was attached to the lid of the box and holes were punched using a sewing pin to allow the water to squirt out when the pump increased the water pressure in the tube.
Tiny holes are punched through the tubing
Using hot glue and tape, a bump switch should then be attached to the inside of the box. The switch should be positioned as such that the switch is triggered when the box is closed. Wiring can then be fed through one of the pre-drilled holes into the Arduino.
View of the bump switch from inside the box
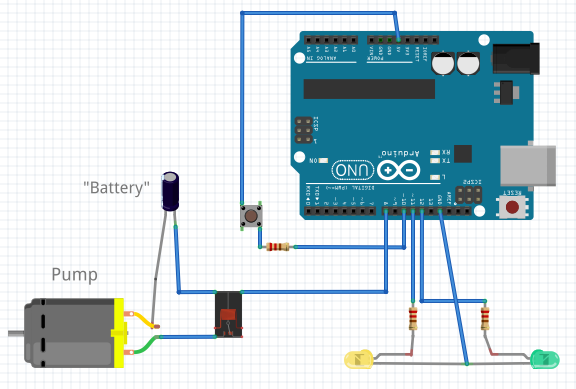
The parts then need to be connected electrically to the Arduino UNO. Jumper cables soldered together were used. As per the circuit diagram.
NOTE: The ground isn't connected in the diagram due to clarity issues.
The pins to which the various components are connected are as follows:
- Digital Pin 8: Pump/Relay
- Digital Pin 10: Switch
- Digital Pin 11: Yellow LED
- Digital Pin 12: Green LED
Note that the Pump is connected to a Relay, which provides power from another battery. This is due to the fact that the Arduino cannot supply ample current to the pump. The motor should be connected to the closed pin on the relay. One of the coil pins should then be connected to the Arduino. The other coil pin should then be grounded.
The circuit may be wired with a breadboard, or soldered together.
1 / 2 • The Arduino connected to the components, including the relay
The code was programmed with Python, with pyFirmata allowing us to interface with the Arduino. However, we also created code in C so that the code could be stored.
See the following video of The Money Launderer in action!


_ztBMuBhMHo.jpg?auto=compress%2Cformat&w=48&h=48&fit=fill&bg=ffffff)


Comments