


Hardware components | ||||||
 |
| × | 1 | |||
| × | 1 | ||||
| × | 1 | ||||
| × | 1 | ||||
Software apps and online services | ||||||
 |
| |||||
| ||||||
Following the book "IoT in five days" and the examples provided by Antonio Lignan, I created this application to display the current consumption of an electric device, and create alarms in cases the power was down, etc.
These alarms could help us to see if our system is functioning properly or if it has any problems. We can detect both over- and under-current. It would be possible to prevent fire hazard situations or detect if the system has stopped for some reason.
A 6LoWPAN/IPv4 router was used to translate the 6LoWPAN/IPv6 data from the wireless network to a remote MQTT broker on the "cloud". You can build your own using the following guide or buy a Zolertia inRout (see component list).
Next I built the application re-using the "mqtt-node" example, and just adding a new type of device. Follow the next guidelines.
- The file name and the processes/events must be the same so that there are no compatibility problems with the driver.
- The application creates two type of events: a data event (sensor readings published periodically); and an alarm event (sensor readings over/below a given threshold, published right away as the event happens)
- The sensor data is read every second (this is configurable), thus we check for alarm events every second, and publish periodically.
- In the
headerfile specify the minimum and maximum values for each sensors, as well as the alarm thresholds: the application checks for valid data to avoid publishing bad readings.
We will have to include the application in the Makefile.
ifeq ($(MQTT_SENSORS), smartcities)
 PROJECT_SOURCEFILES += smartcities.c
 CONTIKI_TARGET_SOURCEFILES += adc-sensors.c
 CFLAGS += -DMQTT_SENSORS="smartcities"
 CFLAGS += -DDEFAULT_SENSORS_NUM=1
endif
Now we need to configure the platform that we will use. In my case as I decided to use Ubidots, we have to get an account and get the token, then we will need to set the Default token as shown:
.
This token will include it in the header of the platform ubidots.h
#define DEFAULT_CONF_AUTH_TOKEN       ""  /* Not used */
#define DEFAULT_CONF_AUTH_USER        "O0fH1EzENtXXXXXXXXXXXXXXXXXXXX" /*Your default token here */
When we have the application included in the Makefile and Default token set,
specify both the platform and the app that we will use.
# Platform options: relayr, thingsio, bluemix, ubidots
MQTT_PLATFORM ?= ubidots
# Sensor options: fridge, agriculture, remote, irrigation, coldchain, smartcities
MQTT_SENSORS  ?= smartcities
Now we can flash the program on RE-Mote.
make clean && make TARGET=zoul BOARD=remote-revb mqtt-client.upload
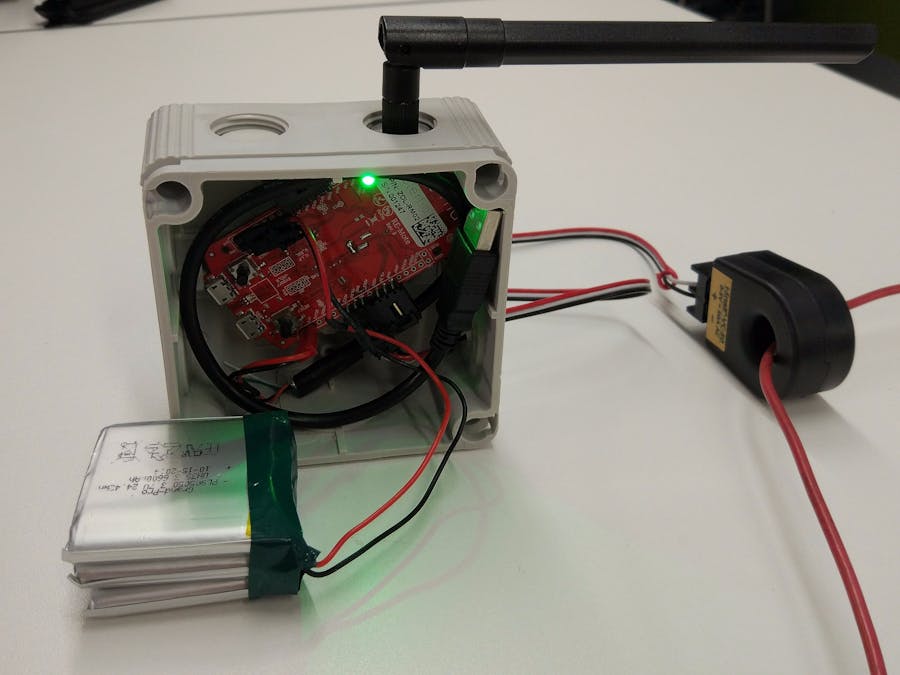
Connecting the sensor:
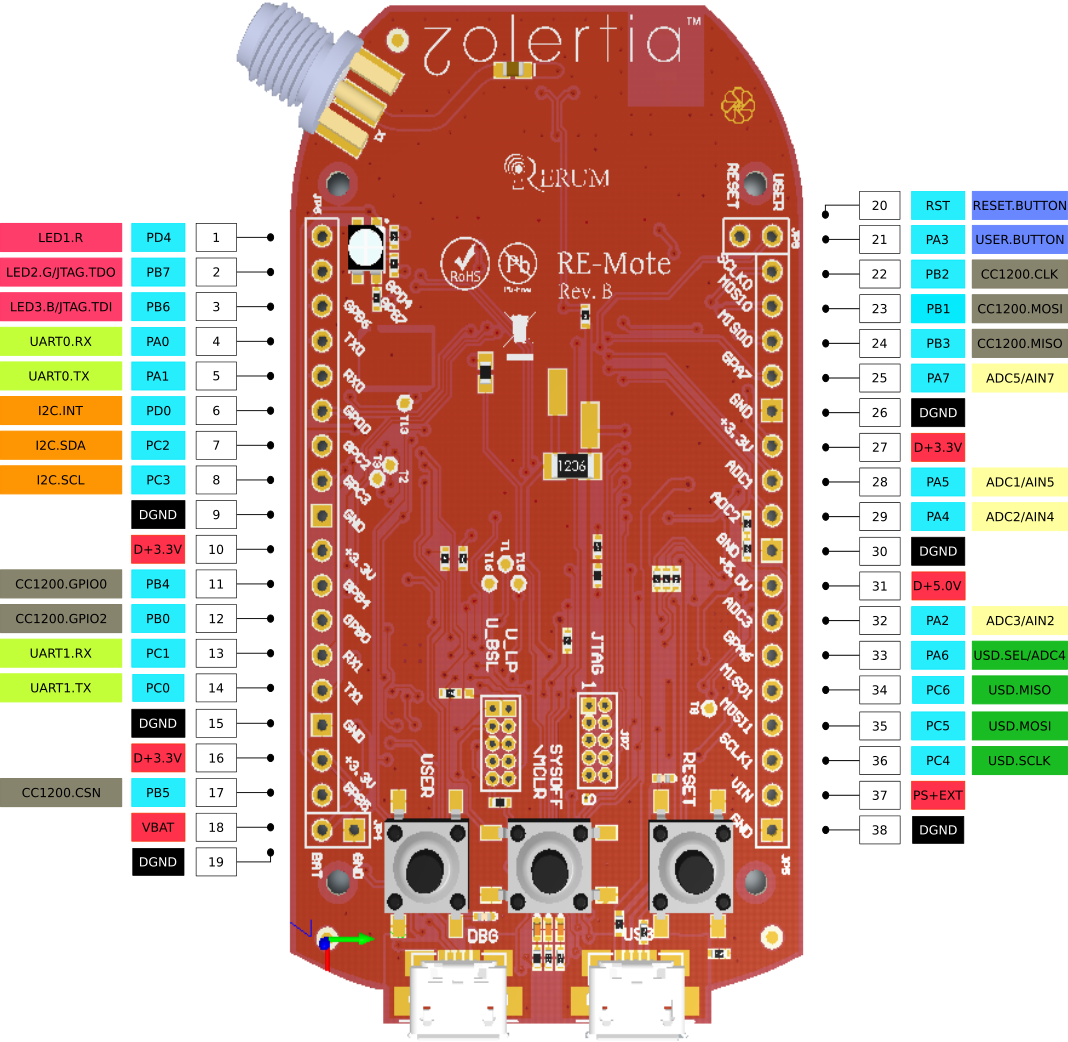
Because the sensor operates using 5V (maximum value when it detects a current of 50A), we use the ADC 3 pin of the RE-Mote (it has a voltage divider down to 3V as the device operates at 3V).
In the part of the sensor cable the only ones you will have to put the GND of the RE-Mote to "-" of the sensor and the pin ADC3 to the "+".
The Li-Ion 3.7V battery will be connected to the specific port of the RE-mote for this purpose. Plugged both and they have Internet. voilá.
Automatically, Ubidots parses and creates the variables and values published to its MQTT broker:
Now we just need to create the dashboard as you want.


Comments