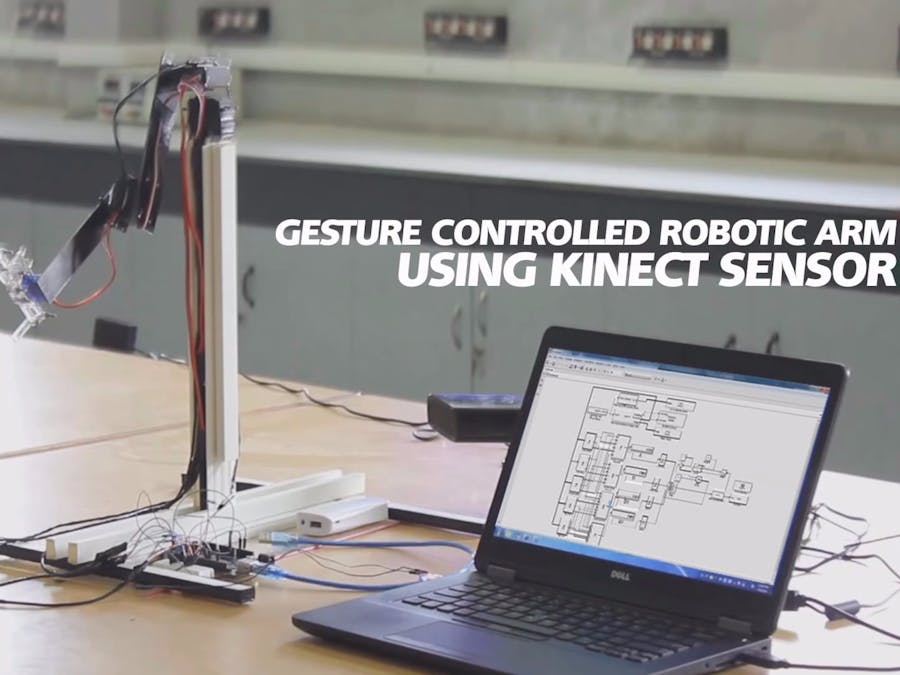
AboutThis is a Simulink model to control a robotic arm by gestures that are captured using a Kinect sensor. This robot arm is developed using servo motors that replicate the right arm shoulder, elbow and hand movements.
My file at Mathworks File Exchange: https://in.mathworks.com/matlabcentral/fileexchange/58189-gesture-controlled-robotic-arm-using-kinect--simulink-support-for-kinect--and-arduino
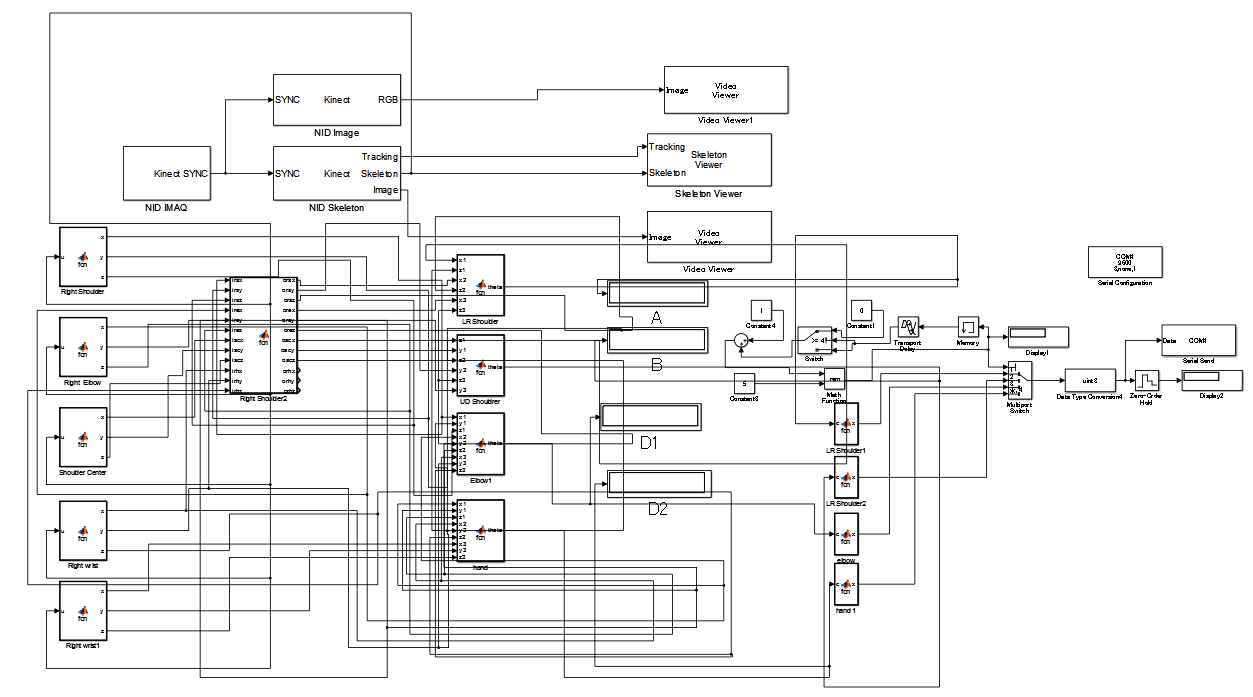
Simulation Window in Matlab and the Arm Position According to our Gestures
- Matlab 2013a or later
- Arduino IDE
Components Required- Kinect Sensor
- Arduino Board
- Servo Motors
- Matlab 2013a
This is a project by B.Avinash & J.Karthikeyan
The Zip file contains the Matlab Simulink Support for Kinect and the Simulink model named "GestureControlledRoboticArm" that we have created as well as the Arduino code and wiring diagram. The Simulink Support for Kinect was downloaded from Mathworks File Exchange and the full credits go to "Takashi Chikamasa" for providing it. We do not own the copyrights or have developed the Simulink Support for Kinect.
Simulink Support for Kinect consists of IMAQ, Image, IR, Depth, Motion and Skeleton blocks to achieve real-time image data acquisition from Kinect devices such as Microsoft Kinect or ASUS Xtion PRO under Simulink simulation environment. It works with 32bit/64bit version of MATLAB R2010b or later in Windows 7 32bit/64bit and it requires the following 3rd party software:
- C MEX Compiler: Microsoft Visual Studio 2010 Express Edition (VC++) - Microsoft Windows SDK 7.1
- To use OpenNI: http://openni.ru/ - OpenNI - PrimeSense NITE - PrimeSensor Module
- To use Microsoft Kinect SDK: http://www.microsoft.com/en-us/kinectforwindows/ - Microsoft Kinect for Windows SDK v1.6
For more detailed information, please refer to document in the zip file and help of the blocks.
Optional MATLAB products:
- Computer Vision System Toolbox (highly recommended)
- DSP System Toolbox (to acquire Kinect Microphone Array data)
- Simulink Coder (to generate *.exe file)
Acknowledgements: Kinect Matlab, Simulink Support For Kinect, and Kinect Microsoft Sdk inspired this project.
Awards and Recognitions
- "Gesture Controlled Robotic Arm Using Kinect (Simulink Support For Kinect) and Arduino" has been chosen (29/10/2016) as Pick of the Week! - Matlab Simulink Hardware Challenge 2016 : http://blogs.mathworks.com/pick/2016/10/28/2016-matlab-and-simulink-hardware-challenge/
- Won the 4th place in "MATLAB International Simulink Hardware Challenge 2016" : https://in.mathworks.com/matlabcentral/fileexchange/58189-gesture-controlled-robotic-arm-using-kinect--simulink-support-for-kinect--and-arduino


_wzec989qrF.jpg?auto=compress%2Cformat&w=48&h=48&fit=fill&bg=ffffff)


_3u05Tpwasz.png?auto=compress%2Cformat&w=40&h=40&fit=fillmax&bg=fff&dpr=2)
Comments