


Hardware components | ||||||
 |
| × | 1 | |||
| × | 1 | ||||
| × | 1 | ||||
 |
| × | 1 | |||
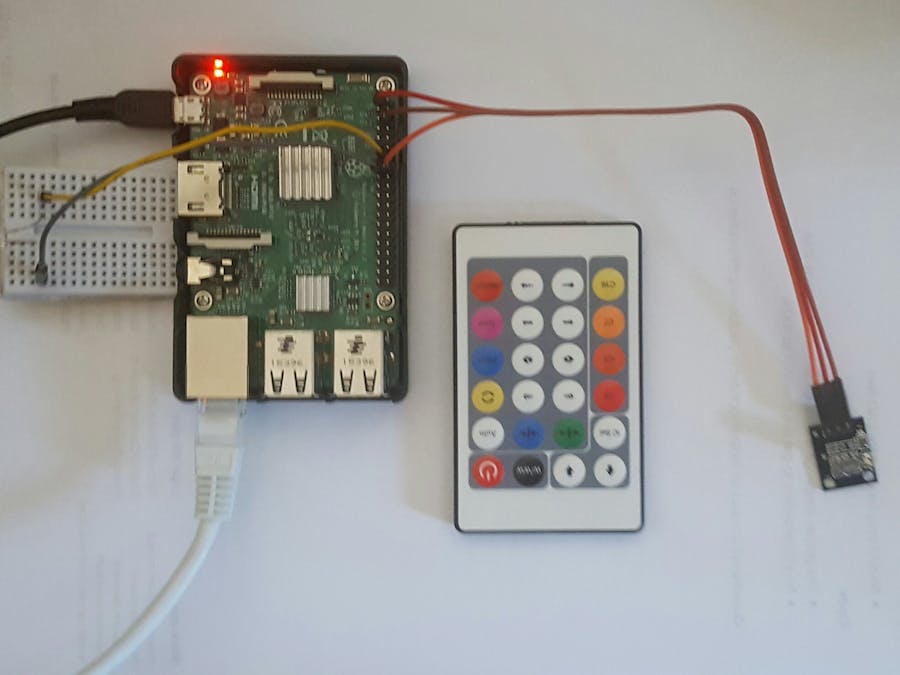
After having seen several tutorials, how to wire and control a RGB-LED I found relatively less about how to control just a normal LED-Strip like mine.
One possibility is to control it with the help of Infrared, which I will present. When this is finished I will set up a webserver to send orders like ON/OFF or to change the color. The Raspberry Pi is wired with a infrared transmitter which will replace your remote. Through the web interface the Raspberry Pi will send a infrared command to the receiver in your led.
The requirement for that is having installed LIRC and to have a valid configuration file. In my case I have three keys (KEY_O,KEY_C,KEY_W) and the name of my config file is led_remote. The tutorials I used to set up LIRC can be found here, here and here.
The prompt to send the keys in my case with my name:
irsend SEND_ONCE led_remote KEY_O
# irsend SEND_ONCE configfilename keyname
Software
The software I decided to use is node-red. It is pre-installed on all of the actual Raspbian Jessie Image, but you must install it on yourself if you use Raspbian Jessie Lite just like I do ( then check this out).
Type this in to start the node-red service:
node-red-start
and this to autostart it:
sudo systemctl enable nodered.service
As the next step open your Web browser and type in your IP-address then a colon and the port 1880. In my case http://192.168.178.67:1880.
Before we integrate our console commands into the Web UI, we first need to install a UI extention for node-red. So type in:
cd ~\node-red
npm install node-red-contrib-ui
Then restart the service or just let your Raspberry Pi reboot.
Open your Node-Red website on your network
Search on the sidebar for ui and drag and drop three buttons in the middle.
Search for advanced and drag and drop three "exec"-blocks in the middle.
Double click on the first button.
Click on Tab and create a new ui_tab. Then click on the pen and assign it a name. Then click add.
Give it a name like "POWER" or "COLOR". The group can be called something like LED-Strip or Light. The order describes which button is on the top and so on. The rest can be left empty. Do this to all of the three buttons and connect them with the exec blocks.
Now double click on the exec block.
Type in your console command in the command field and give it a name which is rather unimportant. Do not mix the commands up so you have the wrong command for one button.
The end result should look like this.
Now click on deploy in the right upper corner.
If no error occurred, add behind your url to enter the editor /ui, so in my case I now open 192.168.178.67/ui
And that is the end result. You can easily control your basic LED-Strip over a Web-Interface which can be accessed by any device in your network.
Write a comment or a private message if you need some help!


Comments