

Hardware components | ||||||
 |
| × | 1 | |||
| × | 1 | ||||
| × | 1 | ||||
| × | 1 | ||||
| × | 1 | ||||
| × | 1 | ||||
| × | 1 | ||||
| × | 1 | ||||
Software apps and online services | ||||||
 |
| |||||
 |
| |||||
This project is in partnership with PCBWay PCB Manufacture with excelents boards electronics in its production.
In this project you'll learn how to develop the mini datalogger using only resources of the Arduino. Through this project you'll learn various techniques of programming.
You can see all project in the video 1.
Read the second part of the project.
Now, we'll explain how works this Arduino Project.
How works this Project ?You will learn the first steps to developing a data logger using the basic features of Arduino and its microcontroller. In these firts part, you will learn how to implement some functions.
The datalogger is a device used to store occurrence data of certain events or sensor data in a certain time interval, so that it can be analyzed later.
For learn more about how to construct your datalogger with Arduino, do you need follow our profile, for receive news for next contents.
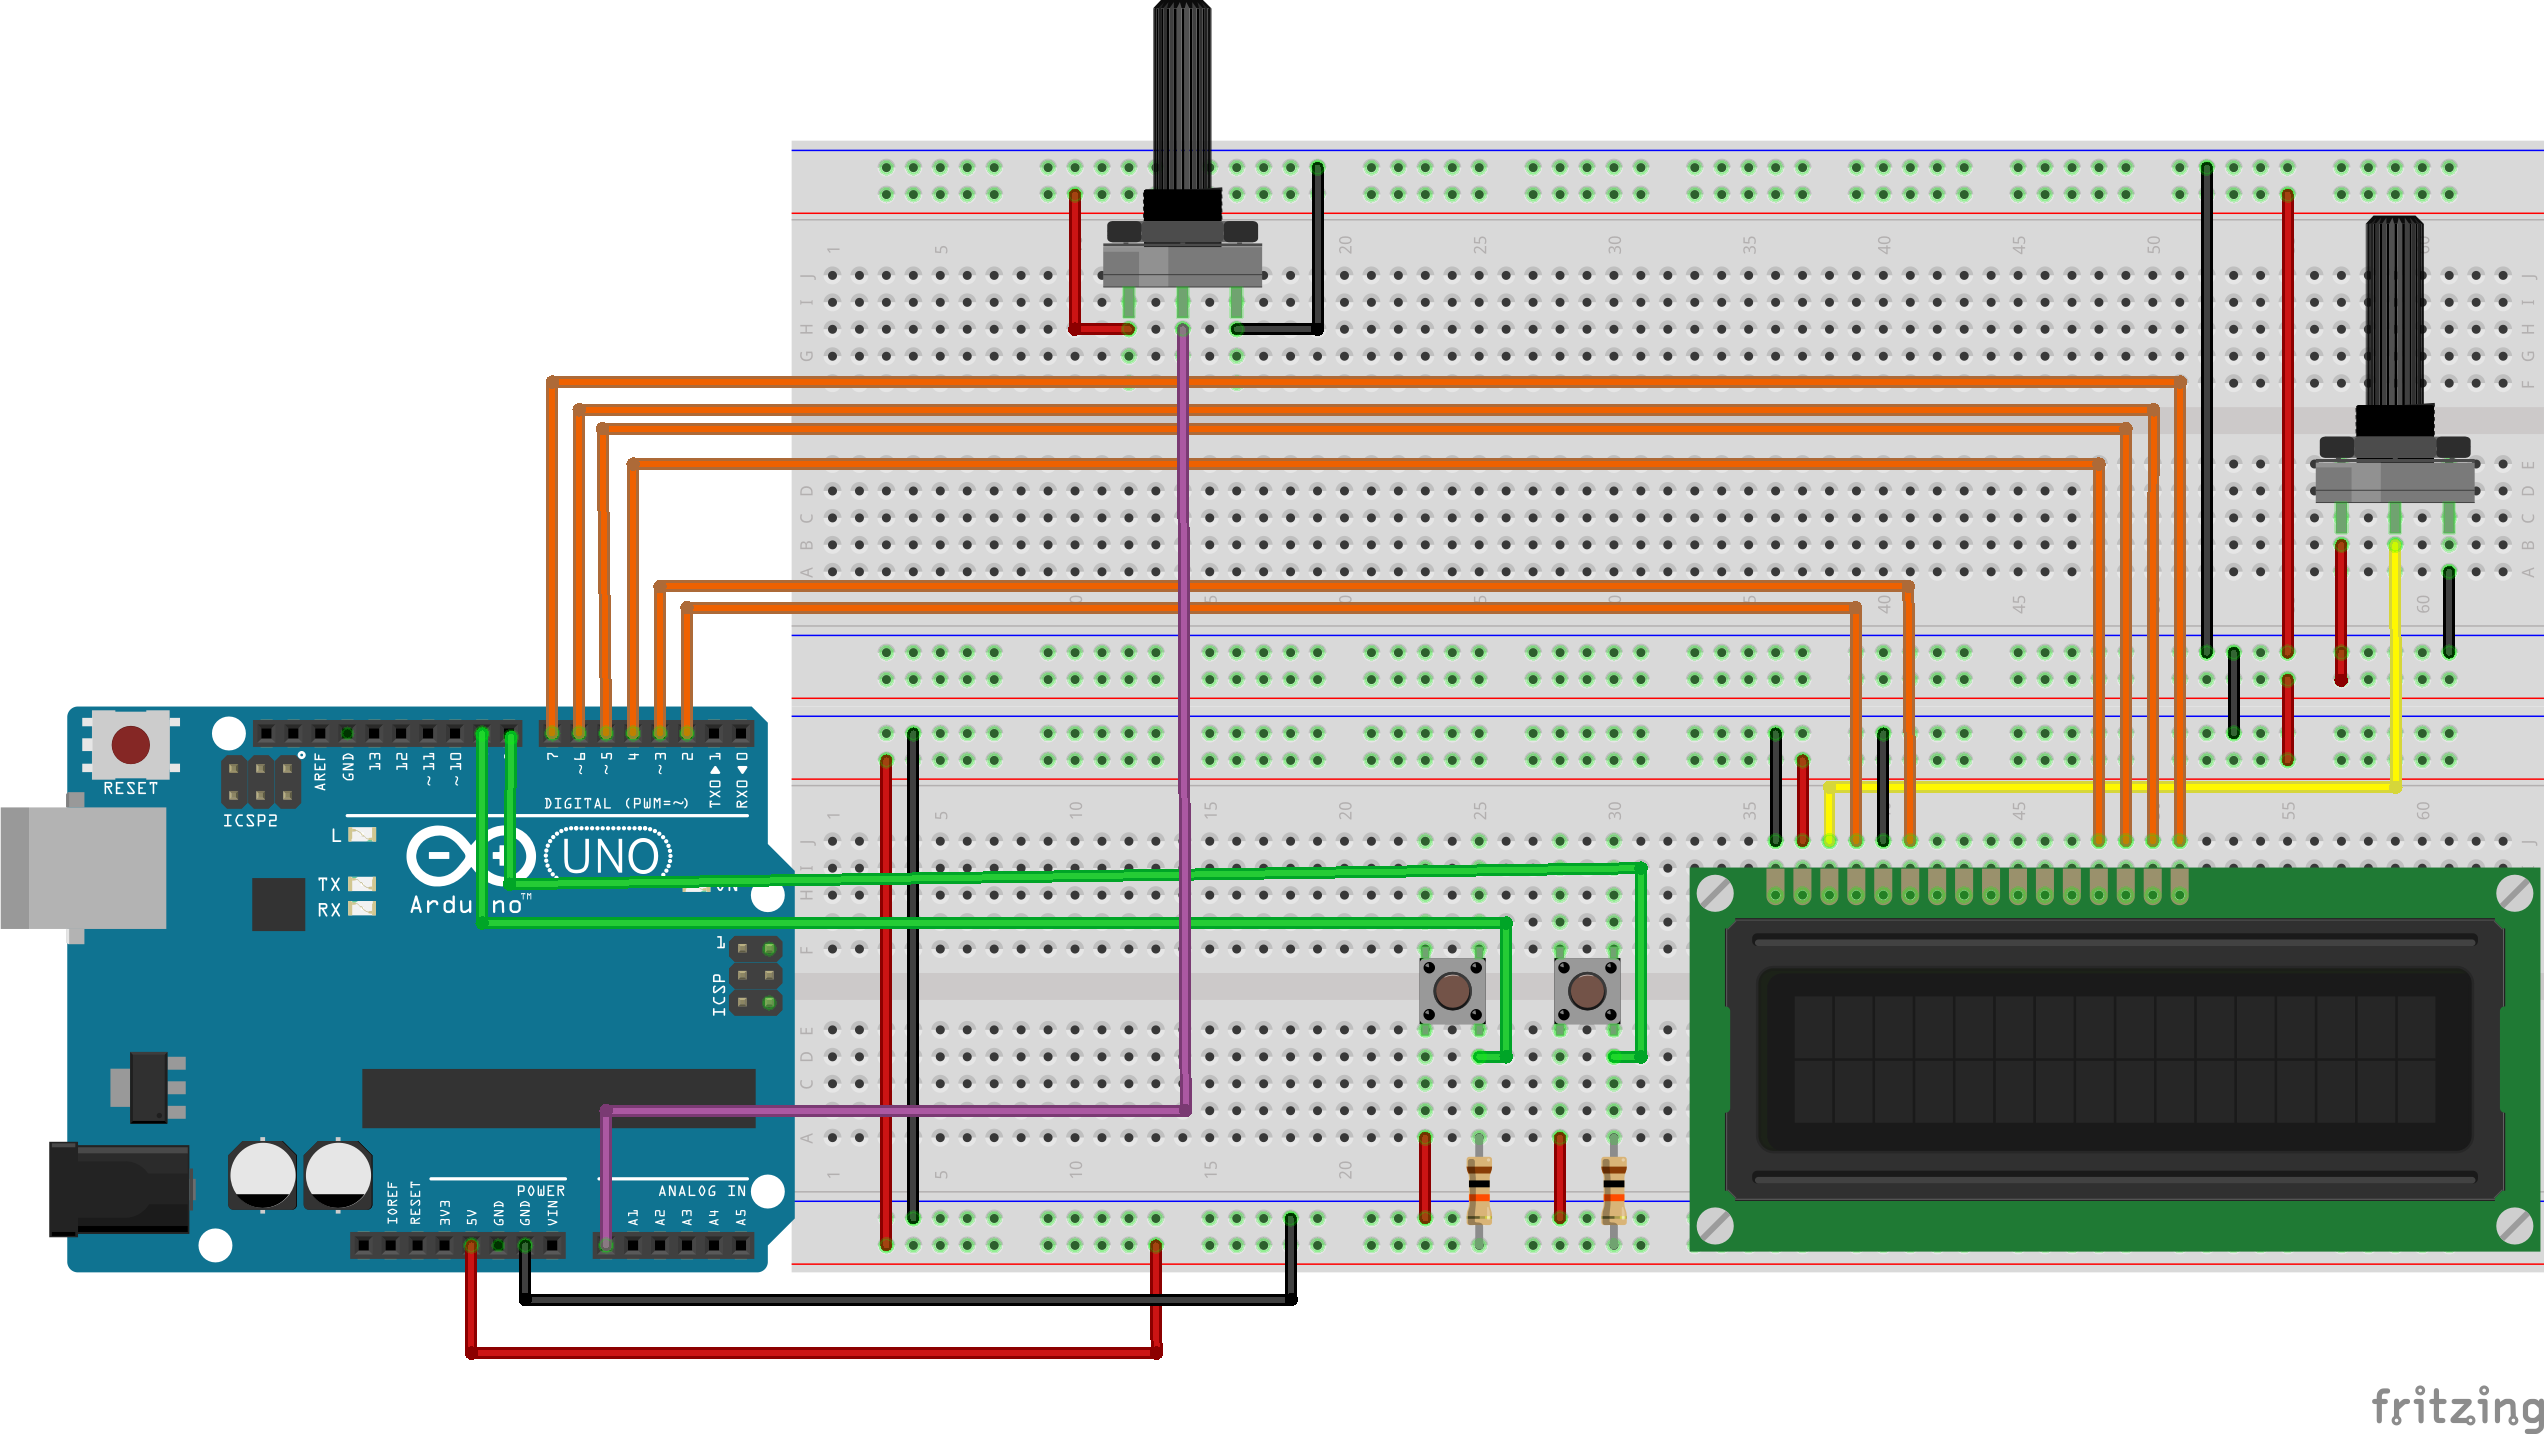
Electronic CircuitIn this first part of developing, was implemented two functionalities:
- Save Values: Through this function, when the button is pressed, the value is saved on the memory.
- Show Values: Through this function, when the button is pressed, the values stored on the memory will be shown.
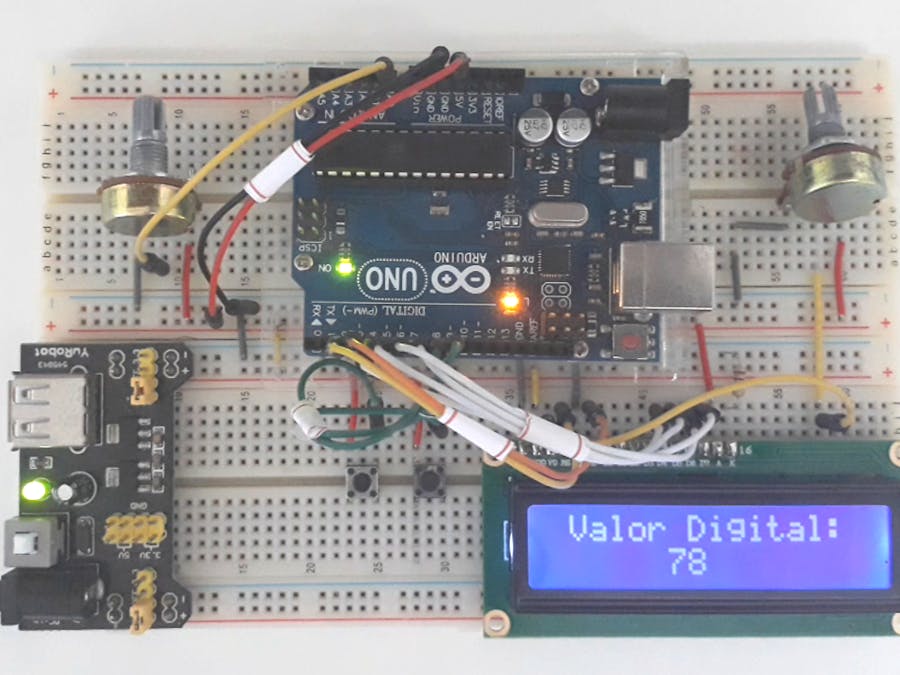
The circuit of the project is presented in Figure 1. Based on the circuit, was used a potentiometer to simulate the sensor value.
Based on the circuit, when the potentiometer position is changed, the digital value is presented in the LCD 16 x 2.
When the "Show Button" is pressed (Digital Pin 9), are presented various values on the LCD. But, the case doesn't exist value in the EEPROM Memory, doesn't is shown value and is presented the message: "The memory is empty".
And, when the "Burn Button" is pressed (Digital Pin 9), the read value is stored in the EEPROM Memory.
In this system, is possible to store only 10 values, but you can change the quantity in the code.
After you burn ten values in the EEPROM Memory, the system doesn't allow add new values. Case you try a new value, the system will inform youthat don't is possible toadd new value with the following message: "Full Memory".
Acknowledgments
The Silícios Lab thanks the PCBWay printed circuit board manufacturing company to offer the printed circuit board.
The Silícios Lab thanks UTSOURCE to offer the electronic components to develop this project.


Comments