


Hardware components | ||||||
 |
| × | 1 | |||
| × | 1 | ||||
A Classic Game Rebuilt with a Joystick and a 12×8 LED Matrix
With the release of the Arduino Uno R4 WiFi, Arduino introduced a powerful new MCU and a surprisingly fun feature: a built-in 12×8 LED matrix. While small and monochrome, this display is perfect for retro games especially Pong, one of the earliest video games ever created.
In this project, I built a fully playable Pong game using:
- Arduino Uno R4 WiFi
- On-board LED matrix
- Joystick module for paddle control
The result is a smooth, responsive, and surprisingly addictive micro-game that fits entirely on the board itself.
Why Pong?Pong looks simple but it’s a fantastic embedded systems challenge. It forces me to think about these,
- Real-time input (joystick → paddle)
- Frame timing and animation
- Collision detection
- Game state management
- Display constraints (only 96 pixels!)
On a 12×8 matrix, every pixel matters. There’s no room for waste, which makes Pong a perfect test of clean logic and thoughtful design.
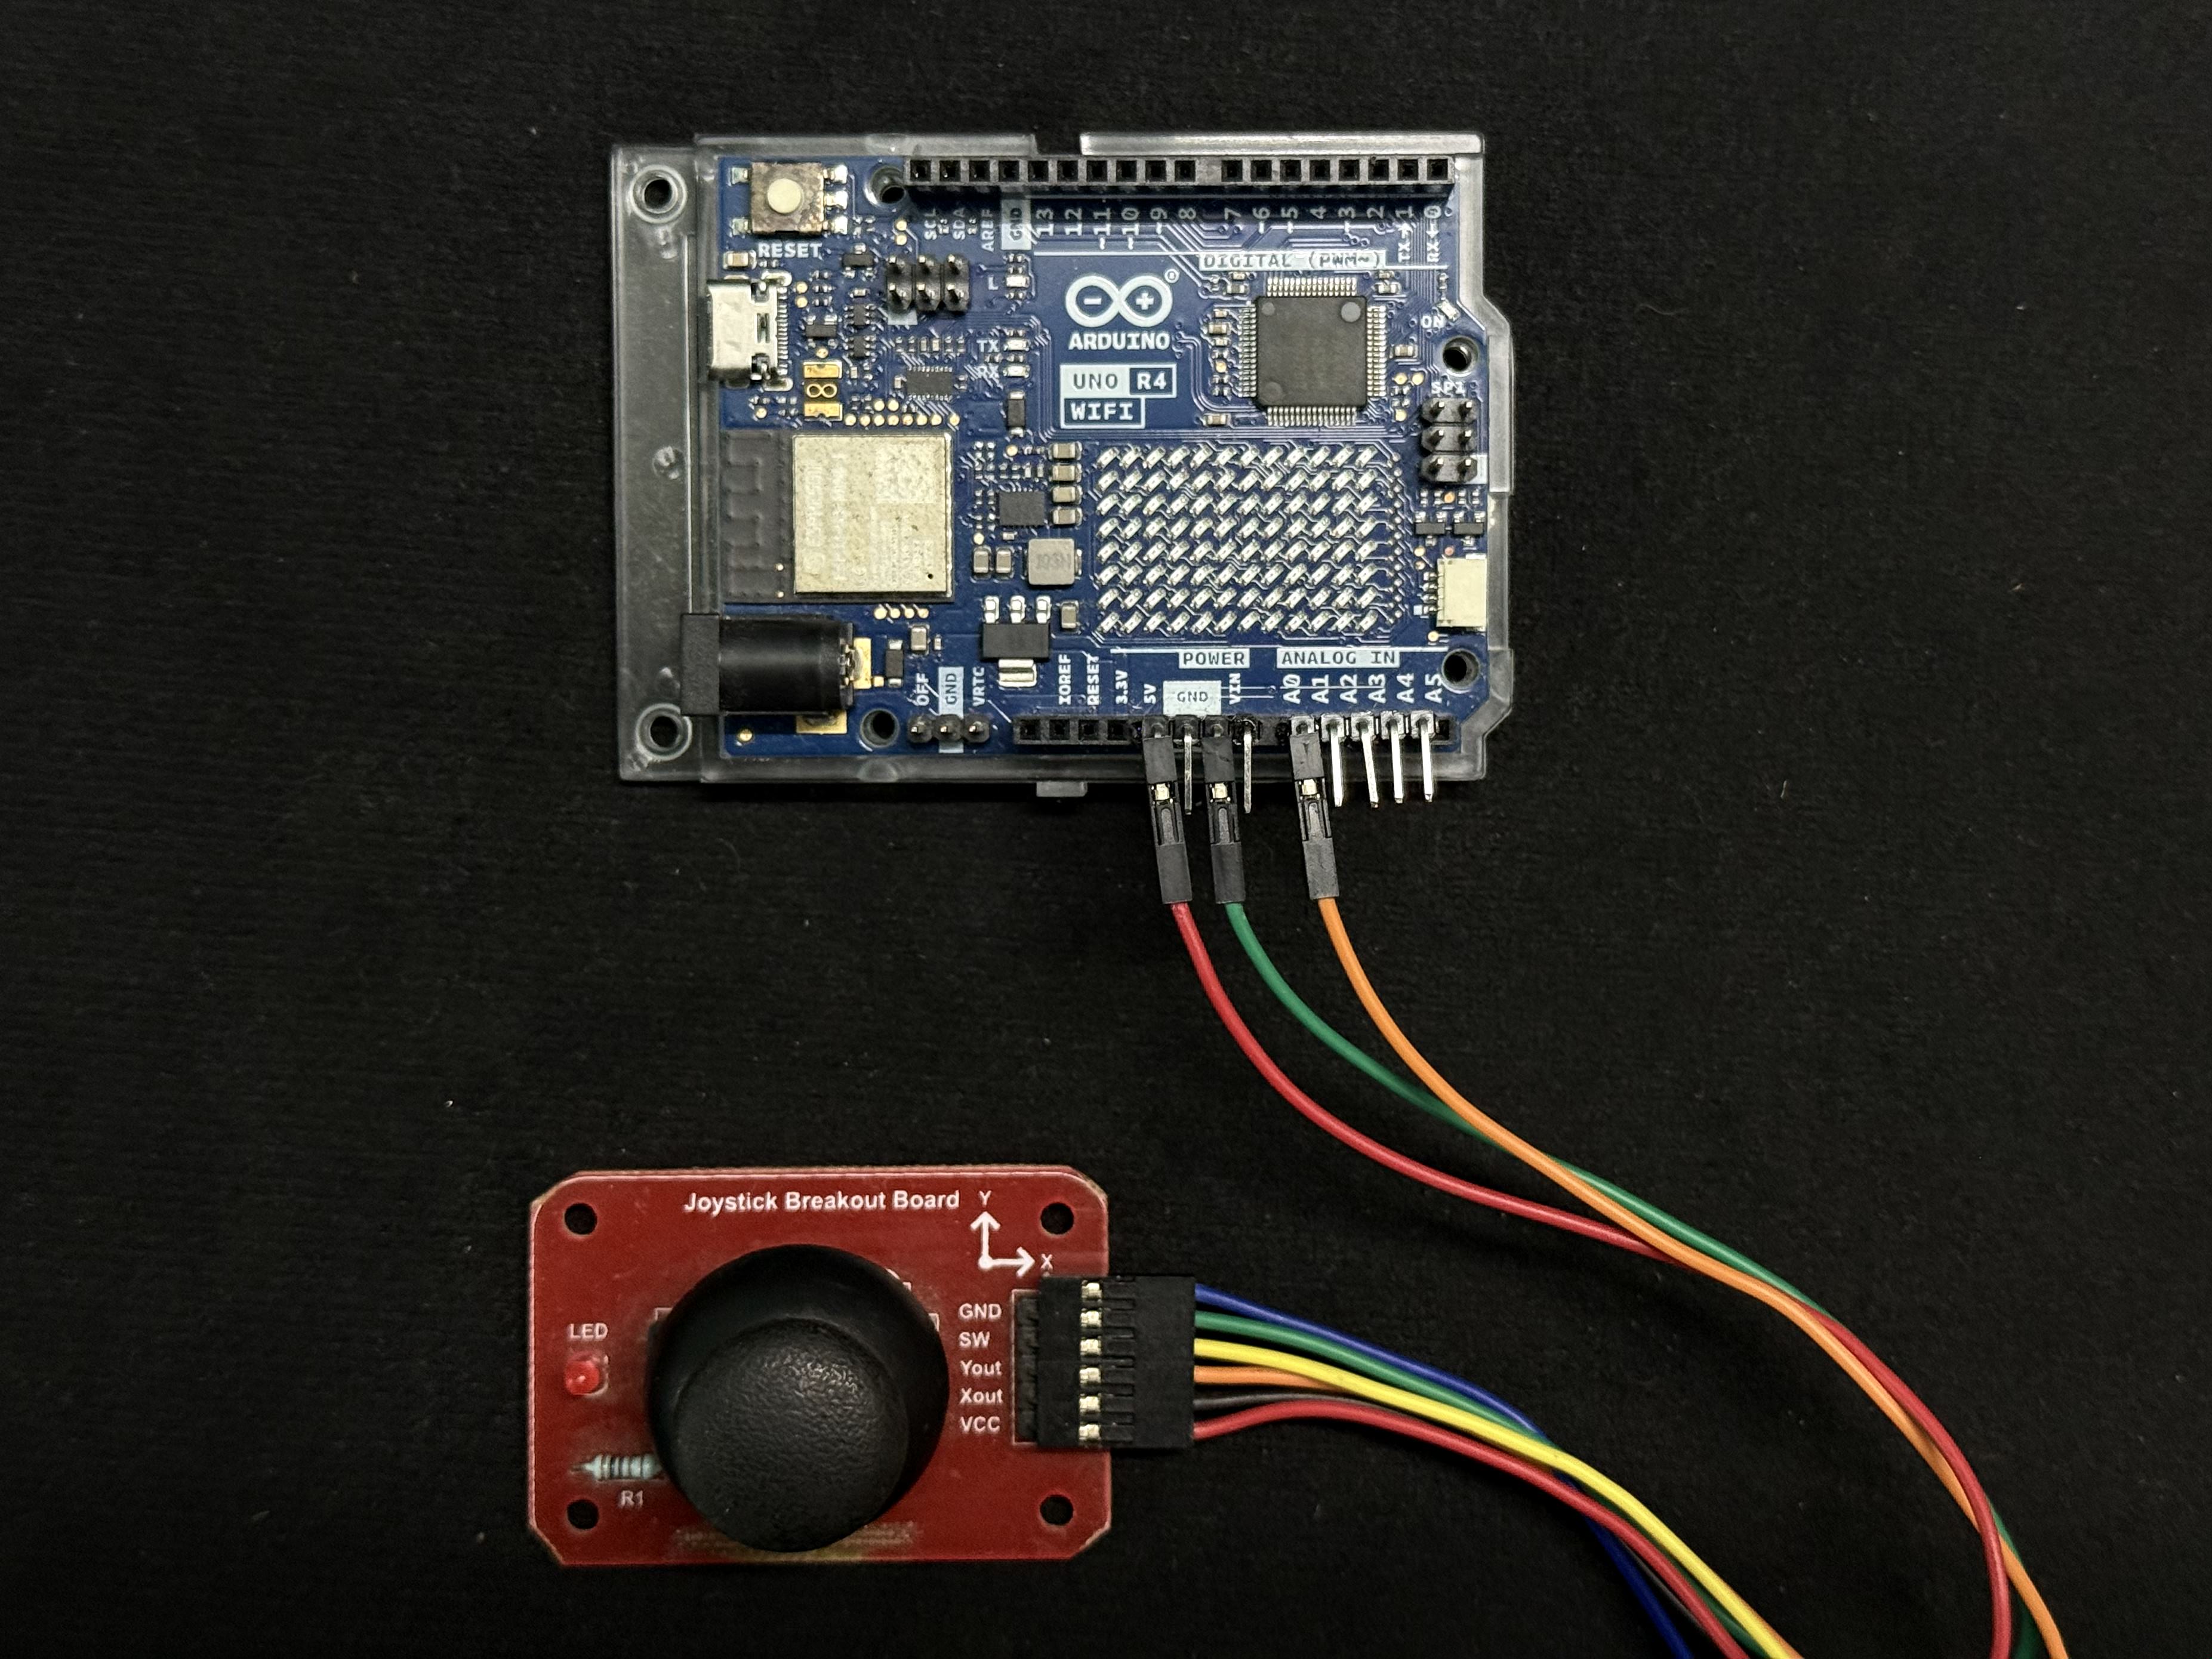
Hardware UsedThe hardware setup is intentionally minimal:
- Arduino Uno R4 WiFi
- Joystick module
- USB cable for power and programming
Wiring: It's really a simple connection between Arduino R4 & Joystick.
Arduino      Joystick Pin
5V               VCC
GND              GND
A0               Yout
Only one axis is needed, making the joystick behave like a potentiometer but with a much better tactile feel.
Understanding the LED MatrixThe LED matrix on the Arduino Uno R4 WiFi is entirely bitmap-driven. It has a fixed resolution of 12 columns by 8 rows and is monochrome, meaning each pixel can only be ON or OFF. There is no built-in support for text rendering, fonts, or graphics primitives. As a result, everything shown on the display must be drawn manually.
Each frame is represented as a 2D array: uint8_t canvas[8][12];
To display a frame: matrix.renderBitmap(canvas, 8, 12);
This low-level control is exactly what makes game development possible and fun.
Out of context, Just some love to the readers!!
Game ArchitectureThe Pong game is structured around a simple and reliable state machine with two main states. In the PLAYING state, the joystick controls the paddle, the ball moves using floating-point physics, and the score increases with each successful paddle hit. In the GAME_OVER state, a visual “X” is displayed on the matrix, followed by the final score scrolling across the screen, after which the game resets automatically. This clear separation of states keeps the logic easy to reason about and helps avoid timing bugs or unintended behavior.
Game States - The game runs in two clear states: PLAYING & GAME_OVER
PLAYING
- Joystick controls the paddle
- Ball moves using floating-point physics
- Score increases with each successful hit
GAME_OVER
- A visual “X” is shown
- Final score scrolls across the display
- Game resets automatically
This simple state machine keeps the logic predictable and bug-free.
I. Joystick Control
Rather than directly mapping raw joystick input to paddle movement, the code carefully processes the analog signal. Noisy values are clamped to a safe range and then mapped cleanly to the paddle’s vertical position. The paddle height is set to three pixels, which provides a good balance between playability and difficulty on such a small display. This approach results in smooth motion, no visible jitter, and fast reaction times exactly what you would expect from a responsive Pong paddle.
II. Ball Physics & Difficulty Scaling
The ball uses floating-point positions and velocities which allows Smooth diagonal movement, precise collision detection and gradual difficulty increase.
Each successful paddle hit slightly increases speed:
ballVX = abs(ballVX) * 1.03f;
ballVY *= 1.03f;
This creates a natural difficulty curve easy to start, challenging to master.
III. Visual Feedback - Game Over
When the player misses the ball, a large “X” graphic is displayed and the final score scrolls across the matrix. Finally, the game resets automatically after 5 seconds. This gives clear visual closure without needing buttons or menus.
Demo VideoLet's see a short demo on the Arduino Uno R4 WiFi.
Future Improvements - There are many ways this project could be extended further.
- Add a second paddle (AI or multiplayer)
- Store high scores in non-volatile memory
- Add sound effects with a buzzer
- Use WiFi for remote control or scoreboards
- Add difficulty levels or power-ups
- The foundation is already solid.
Building Pong on the Arduino Uno R4 WiFi is more than a nostalgia project, it’s a practical exercise in real-time embedded game design. With just a joystick, 96 LEDs, and clean logic, it’s possible to create something that’s both fun to play and satisfying to build. If you can make a game feel good on a 12×8 display, you can build just about anything.
Happy hacking 🎮✨


Comments