


Hardware components | ||||||
 |
| × | 5 | |||
 |
| × | 5 | |||
 |
| × | 1 | |||
 |
| × | 1 | |||
| × | 1 | ||||
 |
| × | 6 | |||
 |
| × | 5 | |||
 |
| × | 5 | |||
 |
| × | 5 | |||
 |
| × | 5 | |||
| × | 5 | ||||
 |
| × | 5 | |||
Hand tools and fabrication machines | ||||||
 |
| |||||
 |
| |||||
I do camping (Yosemite mostly) and sometimes it's good to be warned that some creature bigger than a mouse is wandering around your camp. Also using this at home, now I always know when raccoons or a mountain lion are on my deck.
The basic idea is: ESP8266 modules equipped with PIR sensors (probes) report motion detection to the ESP8266 based web server. Main module (server) has a touchscreen so you can change setting and views, see probes status (online, lost signal, offline), see and hear alarms.
How probes work in detail
Once powered on, it will try to connect to the server and get SleepTime as a response and then will go into deep sleep for SleepTIme minutes. Each probe has its ID (1 to 5) and fixed IP address (that makes it connect to the AP much faster). PIR sensor is always powered on, so if the motion is detected it will wake ESP from the deep sleep and report event to the server, then it will sleep again.
How the server works
Once powered on, it will create an access point and web server. Web server handles requests from the probes and tells them for how long they should sleep. When the probe connects for the first time it's status will be changed from offline to online. If the probe doesn't connect within given SleepTime+20 seconds, it's status will be changed from online to lost signal. Server is also logging event counts for each probe and the time of the last event.
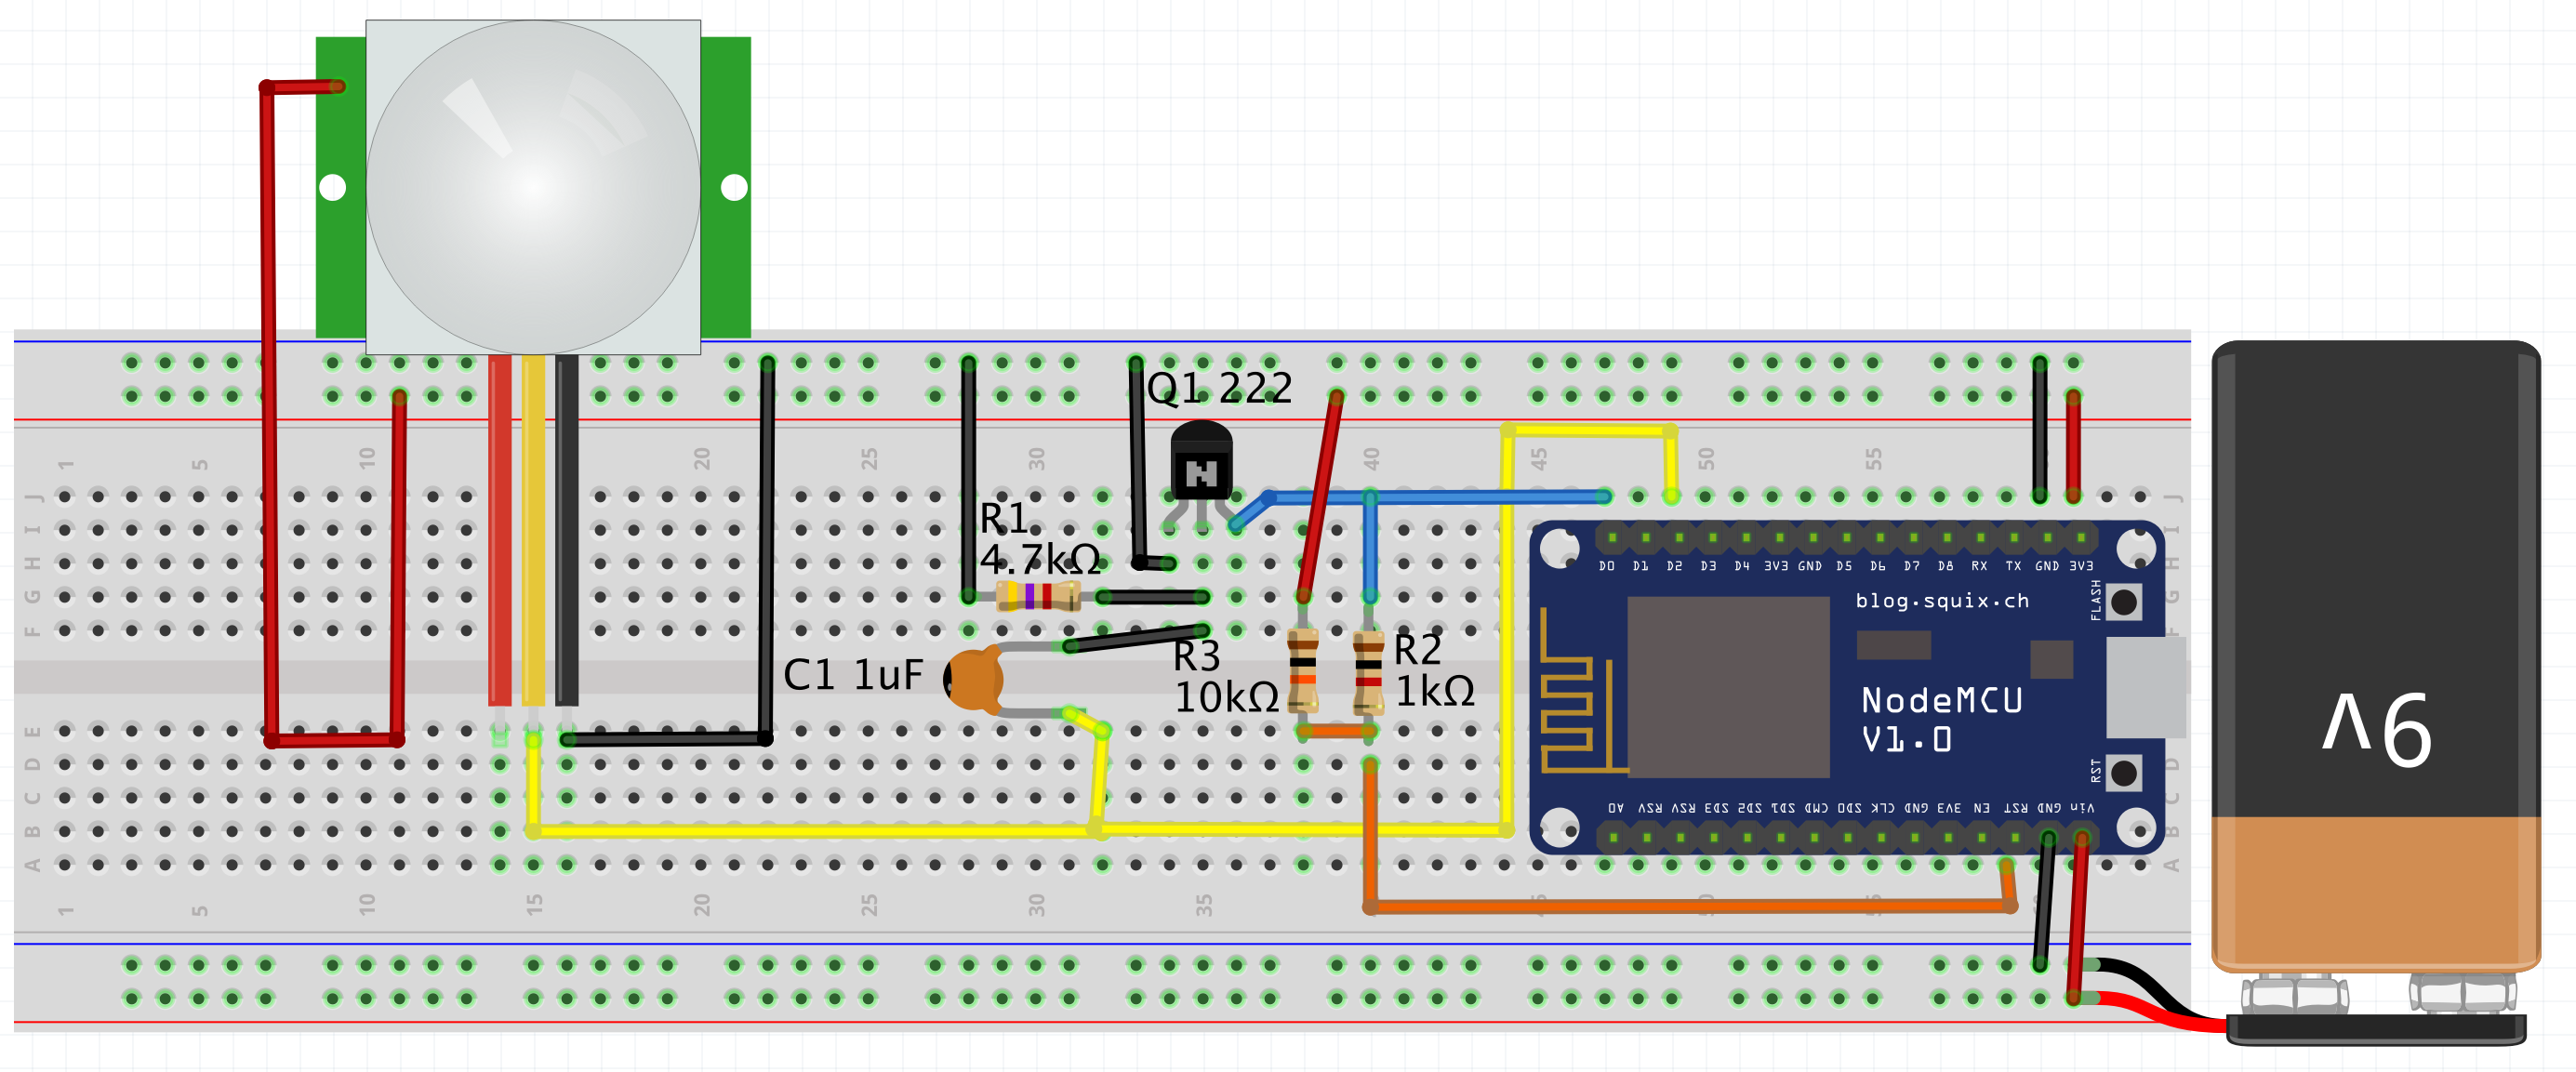
HardwareThe initial plan was to use the basic ESP8266 module as a probe. You have to make a slight modification in order to enable the deep sleep feature, see pic.
To be honest I've failed this simple soldering task. There were some ESP-12E modules handy, so I switched to them. ESP-12Es are much friendlier in soldering and prototype board terms. They have voltage regulator onboard also, so you don't have to care much about the power source voltage.
PIR sensor operates at 5V by default but it has it's own voltage regulator apparently, it converts the input to 3.3V. In order to save some battery juice you may want to skip this regulator and power it directly from ESP-12E 3.3V pin. PIR's OUT and GND pins are used as usual, see the pic.
ESP-12E module is powered by 9V 800mAh rechargeable battery and in my tests it lasted for at least 72 hours with moderate raccoon traffic on the deck.
Couple weeks ago I bought this Weather Station kit by Squix. It's a great kit but I realized that the kit's hardware and parts of SW can be reused in my project with minor modifications. The only available not used I/O pin is D0, so I used it for the buzzer. This kit is using Wemos D1 mini and the great thing about it is the fact that you can use external antenna to boost the WiFi signal. Wemos is using its internal ceramic antenna by default, here is the video explaining how to fix that.
The case for the server is also 3D printed.
Power comes from four 1.2V 2700mAh rechargeable batteries. I will run more tests with the fresh ones but my 4-year-old batteries lasted for 48 hours.
Currently waiting for my cases to be 3D-printed and will update the post with images and videos.
P.S. You have to install the Wemos D1 mini and ESP 12E in Arduino, also install all the libraries required for the Weather Station project.
Things to do:
- last event timer is incorrect after several hours
- add HTTP connect check on probe
- add correct VCC reading on probe, warn when level is low
- Improve the cases desigh, make probes waterproof
Possible extensions:
- make a mesh of sensors, so you can cover bigger area
- phone app
Next project:
- use smaller PIR sensors and ESP8285
- get rid of the batteries in Server, you always take your power bank with you while camping, don't you?
- use radar sensors mixed with PIR sensors
- some sensors will be equipped with camera, will send images to Server
Comments and suggestions are highly welcome!


Comments