


Hardware components | ||||||
_ztBMuBhMHo.jpg?auto=compress%2Cformat&w=48&h=48&fit=fill&bg=ffffff) |
| × | 1 | |||
| × | 1 | ||||
| × | 1 | ||||
| × | 1 | ||||
This project was an interesting endeavor, as it was mostly a guess and check routine until I found out what worked for me in the long-run. I used the Adafruit Bluetooth LE tutorial to figure out how to hard-wire this setup, and used Michael's hybrid code to power the motors and steering.
First off, here is the video of the working car!
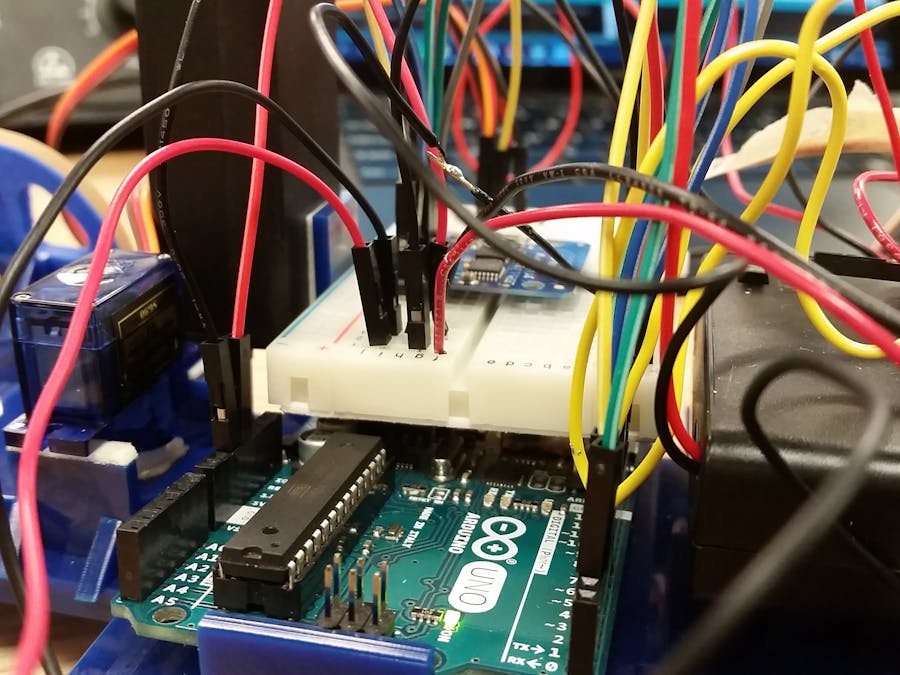
The hardware setup for the Bluetooth module is as follows:
Fritzing diagram (from the Adafruit tutorial):
The L298 Motor Controller was connected to a 9V battery, the Arduino ground and 5V, and pins 6, 7 and 8 (to pins enB, in4 and in3, respectively). The microservo used for steering was connected to digital pin 3, and the Arduino ground and 5V connections.
The code is attached below. The idea was to use the case statements in Michael's code to turn the motors on or off, or have the servo rotate left or right. These functions would obviously correlate to their respective case statements (i.e. "turn left" under case 55). I initialized everything (like the servo, setting pins to output pins, etc.) under the setup loop, and put the repeatable functions in the loop function.
If you recall, I have a servo in front of my car like this:
I added the input "degrees" that my servo interpreted.
The way I got my car to steer and go forward was the following:
Forward/up: set an output pin to high, and the other pin to low. the enable pin sets the speed
case 53:
Serial.println ( "up");
digitalWrite(in3, HIGH); // sets motor to forward.
digitalWrite(in4, LOW);
analogWrite(enB, 255); // write enable pin to highest speed (0-255)
break; // will stop the code so that the following code in the loop does not run
Reverse/down: since the motors are connected in series, I simply needed to reverse the direction of the output/input. Enable pin still needs a value to set the speed of this reverse direction. Since my car is slow, I set it to the maximum.
case 54:
Serial.println ( "down");
digitalWrite(in3, LOW); // sets motor to backwards.
digitalWrite(in4, HIGH);
analogWrite(enB, 255); // write enable pin to highest speed (0-255)
break;
I have two methods of steering in my code (one is commented out at the moment):
1) incremented (current): The servo is initialized at position x, in the middle of its radial span (for me, this position was 90 degrees). Under each case statement, I first incremented the value of the position x by 5 degrees in the respective direction, then wrote that to the servo. It looks like this:
case 55:
Serial.println ( "left");
pos +=5;
myservo.write(pos);
break;
2) move to a finite position: This is easy, as rather than including the position values, you just write a position to the servo. I chose 160 for left, and 20 for right:
case 56:
Serial.println ( "right");
myservo.write(20);
break;
And that's the extent of the modifications I made to this code.
I'll never get tired of saying this: my motor controller still has broken enable pins on one side, and I am forced to connect the motors in series- they go much slower as a result. This, however, I will resolve by using
a new motor controller.
I played around with using if, while and case statements in the code to increment the steering. The issue mainly was making sure I was putting the right things in the setup and loop codes, or else the same thing could be inadvertently repeating every time the Arduino runs its loop function.


Comments