


Hardware components | ||||||
 |
| × | 1 | |||
| × | 1 | ||||
This is the child of DreamGlass, a glasses-mounted lucidity tool that I never finished... mainly because I got tired of having prototypes on my face. So, I'm forking it into two projects: this pendant, and the upcoming Nyx Scarf.
Hypnos was the ancient Greek personification of sleep, and watches and pendants are culturally associated with hypnosis.
There was a brief trend at AHA for measuring time in ke, an ancient Chinese chronological unit. I made a Ke clock in Python, which sits on your Mac desktop, with the help of GeekTool.
This pendant vibrates briefly every 864 seconds (1/100 of a day, about 14.4 minutes). When it does, take stock of how you've been spending your time. Doing "nothing" is still doing something – sitting, derping around on the internet, sleeping... It will run for about a week on a standard CR2032, but I'd like to replace the coin cell with something rechargeable.
This is also a good time to check whether you're dreaming, which is a popular method for increasing lucidity.
Step 1: Hardware
Get yourself a Bean and a small vibrating motor. (We are making a pendant, but I won't judge you.)
My motor came with a flexible ribbon cable attached to two contact pads. I soldered a tiny length of cable to each of these, and attached them to d4 and GND. (You can hook these motors up either way around, since it feels the same whichever way it's spinning.)
With lead-free solder, I found that the easiest way to solder the cables in was to cover the hole with a blob, and keep it liquid while pushing the tinned end of the wire through.
I clipped off most of the attached protoboard, being careful not to nick anything important, because I want to fit this into a small enclosure. I could've left an extra row so I could use the holes as physical attachment points, but size was of the essence.
I removed the paper tab covering the adhesive on one side of the motor, then folded the ribbon cable over the clipped edge and stuck down the motor on the front of the board. Finished!
Step 2: Software
Uploading code to the Bean is incredibly simple. I made this little app by adapting my DreamGlass code for the Bean, and so that it would go every 864 seconds, instead of at random intervals. It goes right when you first power it on, so you can c that the power and components are working. Check out the code on GitHub:
Step 3: Enclosure and Usability
It's still too big to fit inside any pocket watch or pendant that I own, so for the time being, I stuck the pendant in a little Ziploc bag, shoved the ends of the board into a dogtag protector thingy as it's about the right shape and size, then threaded it onto a chain.
I wore it for a couple of days, and it was definitely interesting! I noticed myself unintentionally keeping track of how many ke I spent in different situations: seven at a table having dinner with friends; three in a meeting...
I had to tuck the pendant inside my shirt in order to feel the haptics, and even then, it wasn't noticeable while I was biking. It might need to be a choker... or something.
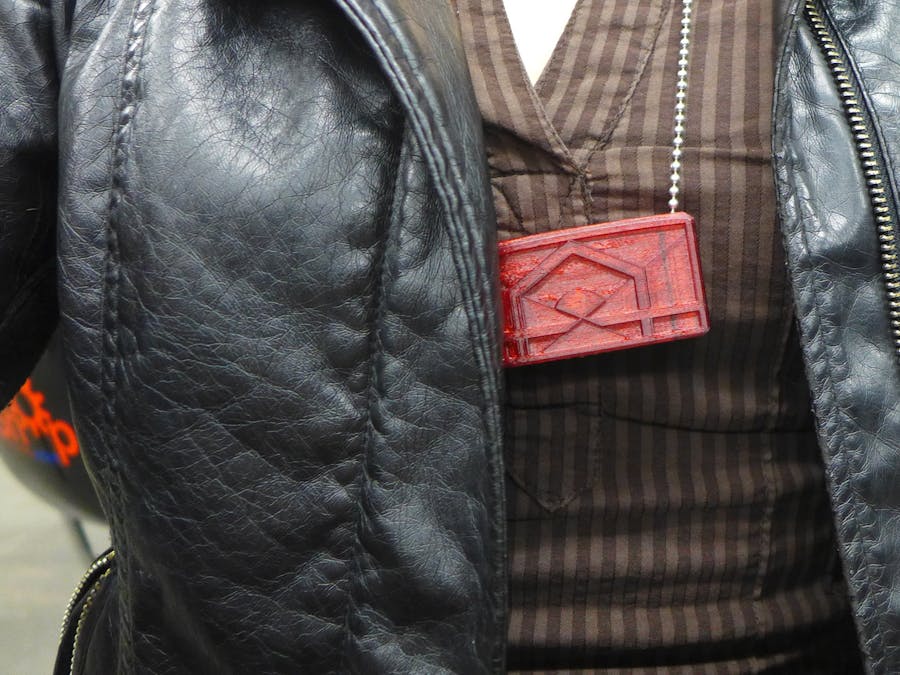
The enclosure I designed has an opening on the bottom for the Bean, which is held in place by a necklace cord, threaded through the sides and along the base. The front design is based on an emblem for curiosity and intellectual exploration.
My friend Jono helped me print it in translucent Ruby PET+ on a Type A Machines model. I oriented it upside-down, to eliminate cantilevers.
It came out almost perfectly – except for a little warping because it lifted during the print. I only had a chain that would fit through the holes, but the slot was a little big anyway (I tend to add padding), so I wrapped the Bean in ribbon to insulate it and help with the friction-fit.
Here's the model, in its native Fusion 360: http://a360.co/1IsWLda
Here's an STL, and a GCode version, which you can use with Type A Machines – optimized for PET+ (260º).


Comments