

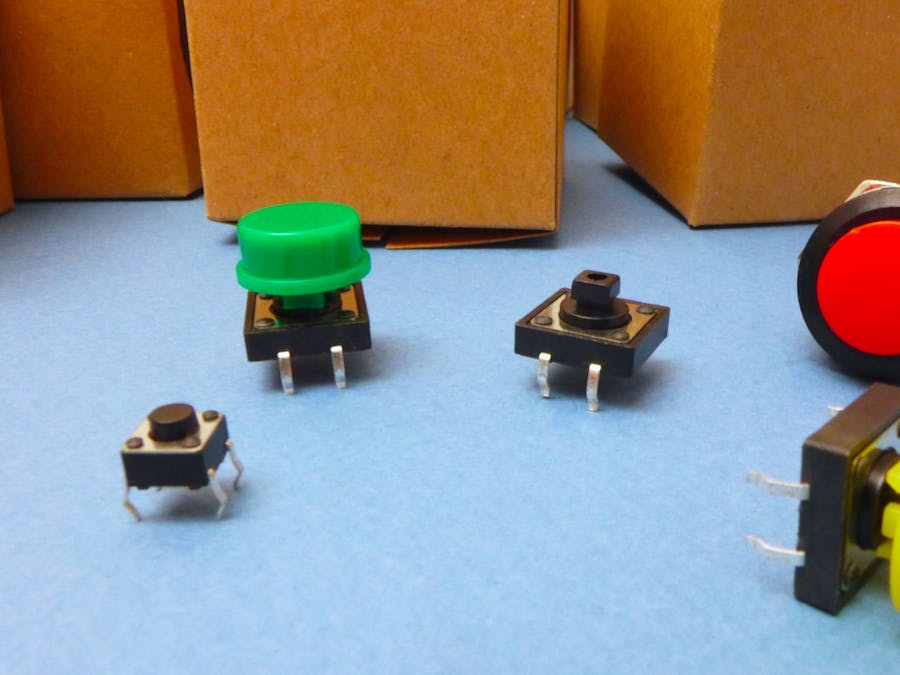
Hardware components | ||||||
_baVEVgguW1.jpg?auto=compress%2Cformat&w=48&h=48&fit=fill&bg=ffffff) |
| × | 1 | |||
 |
| × | 1 | |||
 |
| × | 1 | |||
 |
| × | 1 | |||
 |
| × | 1 | |||
 |
| × | 1 | |||
 |
| × | 1 | |||
Software apps and online services | ||||||
 |
| |||||
Hand tools and fabrication machines | ||||||
 |
| |||||
This project adds user input: a way to send a message to your Arduino, in the language of hardware.
Let's load up File > Examples > Digital > Button
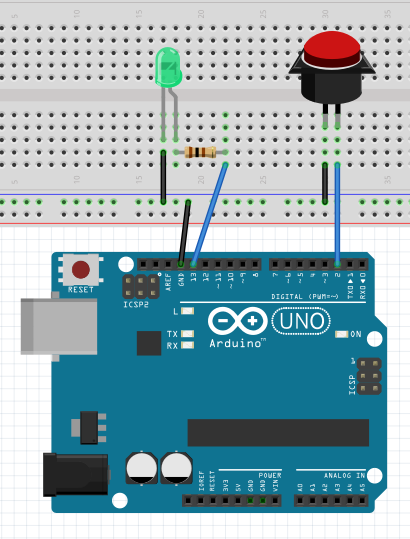
This sketch includes a great description of the circuit right in the opening comments. Hook it up like so:
Notice how the LED's part of the circuit looks now. Most breadboards have power and ground rails running their entire length. That makes it easier to hook up circuits with just a single wire for each running back to your controller. So, both the resistor from the button and the LED are hooked back into this ground rail – instead of taking up both of the Arduino's GND pins.
The resistor we've just added is a pulldown resistor. Our code is going to check to see whether or not our digital pin 2 is connected to power, via the button-press. But while unconnected, the pin's value floats somewhere between HIGH (powered) and LOW (grounded). So, we let a bit of power flow to the ground pin all the time, through this 10 kΩ resistor, which "pulls it down" LOW. But when the button is pressed, power starts flowing between the 5V pin and pin 2, so it goes HIGH.
CODEThis time, we begin with some declarations of different variables that we'll be using. In the Blink sketch, if you wanted to change which pin the LED was on, you had to change pin 13 in three different places. This time, we tell the Arduino that we'll be using "buttonPin" to represent pin 2, and "ledPin" to represent pin 13. Now, anytime we swap things around physically, we just need to change that pin number in one place.
Those variables are going to stay the same the whole time the program is running, so we call them constants – hence the const int. The other variable we have will change to reflect our button-pressing, so it's just a plain int.
This time, we've got INPUTs (button) and OUTPUTs (LED) in the setup section.
In our loop, the first thing we do is check pin 2 to see whether it's HIGH or LOW, using digitalRead. Then, depending on the result, we use an if/else statement to trigger the right action. If it's HIGH (button pressed), set the LED HIGH as well. Else (otherwise), set the LED LOW.
FYI, you can have more than two conditions – in which case, you tell it "if the button is on, then turn the LED on; else if the button is not pressed, then turn the LED off; else (say the button has ceased to exist or Schrödinger is visiting) shrug your shoulders and do nothing."
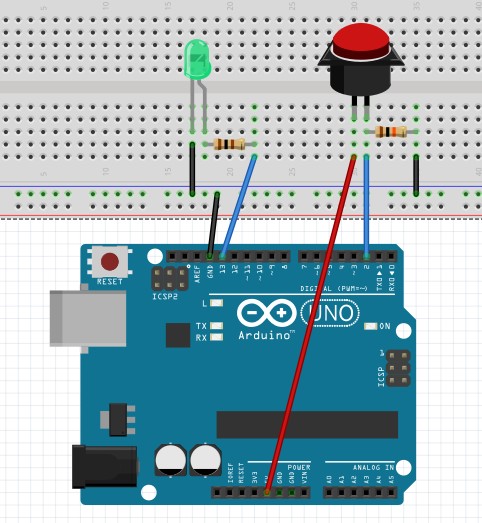
Alternate circuitThere's a slightly simpler way to hook up this circuit, using the Arduino's built-in pullup resistors. As you might suspect, these are the opposite of pulldown resistors: they let a small amount of power flow between the voltage source and the pin, without you making any physical connections, so that the pin is normally held HIGH unless you've connected it to ground. Super convenient!
All you'll need to do is change the button's type to INPUT_PULLUP, and then connect the button directly to pins d2 and GND – no external resistor needed.
As you might suspect, this swaps the Arduino's behavior. Since the pin is normally HIGH now, the LED will stay on until you press the button. So, you can switch around your conditions:
if (buttonState == LOW) {
digitalWrite(ledPin, HIGH);
} else {
digitalWrite(ledPin, LOW);
}
So, in this case we used a button, but that's just one kind of digital input! What else can you use?
- Switch – Add physical control to toggle different sections of code.
- Reed switch – Sense whether a door is open or closed, using these two-part magnetic switches.
- Wires – You don't even need a "real" button... tape two wires or pieces of metal to different surfaces and detect when they come into contact. I once built a horrible instrument this way, using weighted tinfoil balls to connect two wires as a primitive switch.
Also, see the code below for a LATCHING / TOGGLE version – a button that stays "pressed" until you hit it again.
Next stepsGet real-time text feedback from your button using the Serial Monitor!
See the whole series of Hackster 101 tutorials on Hackster and YouTube


_3u05Tpwasz.png?auto=compress%2Cformat&w=40&h=40&fit=fillmax&bg=fff&dpr=2)
Comments