


Hardware components | ||||||
 |
| × | 1 | |||
 |
| × | 1 | |||
| × | 1 | ||||
| × | 1 | ||||
| × | 1 | ||||
| × | 60 | ||||
| × | 2 | ||||
| × | 2 | ||||
 |
| × | 1 | |||
Hand tools and fabrication machines | ||||||
 |
| |||||
 |
| |||||
For background on this project, as well as introductary text to more technical concepts, see the previous iteration of this project: https://www.hackster.io/387263/monitoring-stress-in-plants-f72339
New device, new goalsThis chamber would learn from the mistakes and successes of the previous iteration, and aim for new goals:
- Chlorophyll Fluorescence imaging
- NDVI imaging
- Thermal imaging
- Enhanced temperature control
The new features necessitated changes to the design of the housing.
More space was allocated above the growth-area for LED plate cooling and cameras. A new section was added to the back solely for electrical devices and wiring. A touchscreen was added to the front in order to control the device. A limit-switch (mechanical touch-sensor) was also added to the door, so as to turn off any dangerous lights before the door is opened too far.
The bed for the plants also rested now on four vertical bolts, allowing the height to be finely tuned (albeit over a smaller range).
This time an Arduino Leonardo was used, as it had more input/output pins to control the additional circuitry.
Chlorophyll Fluorescence ImagingChlorophyll Fluorescence Imaging (CFI) is a powerful method of analysing the chemical reactions happening in a leaf. Plants take in light energy and either use it for photosynthesis or if they cannot use it, must release it as heat or re-emit it as light. This last option is known as fluorescence. By blasting plants with bright light and recording the fluorescence with light meters or cameras, one can measure the presence of chlorophyll non-invasively. When illuminated with visible light, plants typically fluoresce from red to near-infrared wavelengths (roughly 630-740nm):
https://omlc.org/spectra/PhotochemCAD/html/125.html
https://omlc.org/spectra/PhotochemCAD/html/125.html
The data above show not only where to expect fluorescence, but also how best to cause it, as plants must first absorb light energy. Chlorophyll (Chl) A has large absorption peaks at 450nm (blue) and 665nm (red), and Chl B at 430nm (UV) and 645nm (red), so these are the wavelengths to target in order to give the plants as much energy as possible. The difficulty is making sure the fluoresced light does not get lost in the much brighter stimulating light. As such, we cannot provide light in the red spectrum, and instead must use blue (UV is also possible but more dangerous). Many high powered 450nm LEDs were used to target the Chl B absorption peak, and a near-IR camera was used to look for flourescence. This camera was also fitted with a 715nm long-pass filter (blocks all light below 715nm) to block any other light that might interfere.
Most fluorescence metrics require the use of a saturating pulse (SP) which is where the plant receives so much light that it cannot use all of it, and is forced to fluoresce much of it back. This required upwards of 4000umol/m^2/s in a single blue blast. This was the hardest part of the project, as very few suppliers provide numbers in umol/m^2/s. The best method to ensure sufficient output was to purchase samples, and test them in the chamber itself with a light sensor that reads umol/m^2/s, before purchasing the number that is required to meet 4000.
NDVI InmagingNormalised-Difference-Vegitative Index is a metric for a plant, comparing its reflectivity of red light with its reflectivity of near infra-red (NIR) light. Plants absorb red, but reflect IR, so are highlighted from background objects when compared in both of these lights. This technique is commonly used by satellites to estimate biomass of forests from space.
Using a Raspberry Pi NoIR camera, these images can both be taken and compared to estimate leaf sizes. Most cameras already can detect NIR, but interpret is a red, so to stop pictures looking overly red manufacturers install NIR filters to block anything human eyes can't see as well. the NoIR camera identical to a Raspberry Pi camera, but has this filter removed so it can detect NIR light.
Thermal imagingThermal imaging is also included in this version of the CEA, but using the purethermal 2 board for the Lepton 3.5 to save much hassle and wiring issues. The Purethermal 2 board connects with a USB cable, so appears as a regular webcam to a computer.
To expand on the feeble temperature control of the last chamber, this would feature active cooling/heating in the bed itself. This would be done by heating a large aluminium plate with two Peltier heat pumps (see previous hackster for more details), with temperature sensors to monitor the bed temperature.
These Peltiers would be individually controlled with custom H-bridge circuits as before.
ReviewChamber construction
The chamber was constructed from 6mm PVC sheets as before, and included all the new features designed. This also meant the chamber weighted a fair bit more.
A 5mm aluminium plate was machined to mount all 66 LEDs (60 blue, 2 red, 2 IR, 2 white) and 4 peltier modules were used to cool it. It was also screened from the operator through an acrylic screen (and silicone gasket for air-tight seal) with mid-IR window for thermal camera. Welding safety glasses were also purchased for the user to wear when opening the chamber, to reduce the risk of dangerous light exposure.
To power everything, there was a large 48V power supply for the LEDs, a 12V power supply for fans, and a 5V power supply for all the Peltier modules. The raspberry Pi was powered by a USB socket in the main power hub.
Even with the much larger electrical cabinet space at the back, wiring was still very messy and a tight squeeze. In future designs even more space and time should be commited to tidy wiring and neat layouts.
Chlorophyll Fluorescence Imaging
Despite the difficulty sourcing and powering enough high powered LEDs, the chamber was able to produce over 2000umol/m^2/s (upper limit of the light sensor) and is estimated to produce between 3000-4000umol/m^2/s at full power.
Each of these LEDs was driven by a premade LED driver, as it was unfeasible to produce 15+ custom LED drivers by hand, and getting them made by a circuit-board manufacturer drastically increased the cost (due to SMD assembly costs). The NIR camera still needs tuning to operate as required, and work needs to be done to identify and finish programming the CFI regime that the chamber will run.
However all the hardware is present and functioning for this to proceed.
NDVI Imaging
Though no data analysis was carried out with the device, some preliminary tests seemed promising. The NoIR camera was certainly able to image both red and NIR with suitable resolution, and the difference in plant reflectances was clear. More testing and image analysis will be required to validate this method.
Thermal imaging
The thermal camera was easy to attach to the Raspberry Pi, and produced images straight away. However, it is unclear if the parameters can be easily modified, as there is no immediately provided interface for raspberry pi. Furthermore, research needs to be carried out into providing qualitiative temperature readings, beyond quantitative images.
Enhanced Temperature Control
The Peltiers were installed and were able to effectively cool and heat the bed of the chamber. The maximum upper and lower limits of this system is yet to be tested. LMT86LP chips were used as reliable and simple temperature sensors, with 5 mounted on the bed in different locations.
The fans below the bed were sealed from the above chamber when the door is closed, to avoid air-currents disturbing the plants.
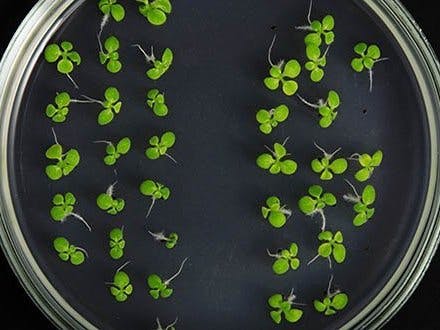
In action
Outstanding work
There is much still to do to get the chamber to operate as a fully functioning scientific instrument, but all of the features are in place and working separately.
- Thermal camera interfacing and telemetry
- Camera position adjustments
- Bed adjustement adjustments
- Touch-screen programming
- Safety switch reset features for safer usage of the device
- NIR camera programming to take videos for CFI monitoring
- Identifying and programming desired CFI procedures
- Testing with real samples and data analysis validation
- IR window installation
- Peltier temperature control validation and extremes testing
Many thanks to Mayke Santos, Alexandre Kabla, Stefan Savage and Mark Huntsman for their advice and contributions to this project.


Comments