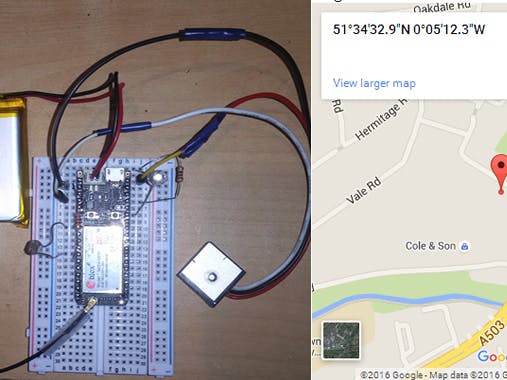
Electron GPS
UPDATE FEB/2017
Now with GPS LOCK LED
Background
As this devise is best suited to projects that can be mobile the first thing I decided that would be needed was to know its location. I thus set about adding a GPS Receiver.
GPS Receiver
Many of these devices exist for various IoT platforms so I decided to select one that is Arduino compatible thus ensuring program and connectivity compatibility.
These units vary in price greatly and are generally anywhere between £30 to £60.
I found one that was only £15 and from the specification looked to be a pretty good unit which actually exceeded specifications of some more expensive alternatives.
GP-20U7 GPS Receiver
This is a high sensitivity -163dBm, 56 channel search and 22 channel tracking.
Additionally it only requires 3.3V power @ 30mA which the Electron can supply adequately.
I got mine from SparkFun and they even gave me a free packet of sweets :)
The Data Sheet is here https://cdn.sparkfun.com/datasheets/GPS/GP-20U7.pdf
Project Overview
The only hardware parts of the project are the Particle Electron, GPS Unit, 220 Ohm Resistor and LED.
The Electron runs a program that reads the required line of GPS data via the Serial port.
If the Data is valid i.e the GPS Unit is LOCKED then an LED is turned on. This enables debugging and gives visual indication of GPS LOCK.
The Data contains the Latitude and Longitude and some other data which is made available as a web accessible variable.
The variable or data is then grabbed and decoded by the code embedded into a web page.
In order to achieve this you will need to be able to publish a webpage in some webspace somewhere.
I wrote my code in PHP but I guess you would be able to use ASP and or JavaScript.
The last bit of code required on the webpage is the Google Map Embed Function which places a Map Marker at the location of the device.
Circuit
The Electron comes with it own bread board so connecting up is easy.
Simply connect the positive of the GPS unit to +3.3V on the Electron and GND to GND and the TX from the GPS Receive to the RX of Serial Port on the Electron.
For the LOCK LED connect the 220Ohm Resistor from D1 to the Anode of the LED and the Cathode of the LED to GND.
Electron Code
Is below
Website Code
Is below
Operation
Simply use any web browser to access the page from the internet and the GPS Location of your device will be visible on a map.
My Electron Location Map: http://www.brianmoreau.com/apps/particle/particle-map.php
Lastly
Sorry almost forgot to mention but to use Google MAP API which is what my project is based on you will need to sign up for an API access key.
I do understand there are alternative mapping options.
Improvements
Exploring the Google Mapping options should allow for a continuous route plotting and the access webpage could be modified to automatically refresh so location plotting is continuous.
Added GPS LOCK LED to aid debugging and a visual lock is nice :)
<br/>


Comments