


After seeing some beautiful photos of the milky way, I wanted to step up my astrophotography game a little bit. In astrophotography, you are limited to shutter speed = 500 / (focal length) before your stars get blurry from the earth's rotation. To get better photos of the night sky, you can use what is called a tracker which allows you to take much longer exposures.
They are also quite expensive, and not particularly complicated. So I decided to try making one myself. The goal was to make it simple, and cheap. In the end, the total was less than $50, and the results have been quite successful.
It was so simple to build in fact, you probably don't even need a guide once you understand the key concepts. Here is a video introduction on the theory, and how to operate the device:
Tracker BasicsThe fundamental problem you are solving is that the earth's rotation leads to star trails. So all we are doing is rotating our camera opposite to the earth's movement.
I personally imagine a camera at the north pole. To align with the earth's rotation, it just needs to point straight up. Then you place that camera in the center of a merry-go-round that spins once in 24 hrs and you've got a tracking covered.
With a barn door tracker it's the same concept, except you align the trackers rotation with the rotational axis. If you're in the northern hemisphere, this is as simple as pointing your tracker's hinge at the north star.
To drive your tracker, you will be rotating a threaded rod. As you have some flexibility in dimensions, I suggest doing some math at this stage to make things convenient for yourself if you're hand turning. I built mine such that I need to rotate the rod once per minute. With a 20 threads per inch rod, one rotation would open the tracker 0.05". A hypotenuse length of 11.47" then ensures that one rotation per minute matches the earth's rotation of 0.25° per minute.
- Attach the two pieces of wood by the hinge.
- Hammer the T-nut into the bottom of the wood. This is where a tripod will attach.
- Drill a hole through the board near the hinge (exact location doesn't matter), and run 3/4" bolt through to attach tripod head.
Drill hole 11.5" from the hinge through the board for the 1/4" carriage bolt to pass through. Use a larger drill size to add a shelf to embed nut on. Gorilla glue nut to the shelf. This part is the sketchiest in my build, so use whatever you think will work to hold this nut in place.
Thread carriage bolt up through the nut so the rounded end is in between the two sides of the hinge. Gorilla glue a nut to the end of this bolt, and glue some type of handle. I used a 3D printed handle, but literally anything you can turn would work here.
I added two finishing nails and an elastic to prevent vibration in the hinge while turning.
And you're done!
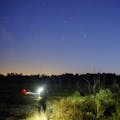
UsageTo use, attach your tripod to the T bolt. Adjust your tripod so the hinge of the tracker is pointing straight at Polaris and attach your camera to the mount on the tracker. Point your camera at whatever you want to photograph, set your shutter to bulb mode, and trigger the shutter. If your lens is 30mm or less, count out 15s and rotate the handle 1/4 turn. Repeat this for as long as you want to expose, and then release the shutter. Different lenses will require different count / rotation amounts, so you'll have to experiment.
Comments