

Hardware components | ||||||
_ztBMuBhMHo.jpg?auto=compress%2Cformat&w=48&h=48&fit=fill&bg=ffffff) |
| × | 1 | |||
| × | 1 | ||||
 |
| × | 1 | |||
| × | 1 | ||||
Software apps and online services | ||||||
 |
| |||||
In this project I will show you how you can create a proximity sensor using aluminium foil and a high value resistor (resistance from 10 MΩ to 40 MΩ). It works based on the Arduino capacitive sensing Library. Whenever you bring your hand (any conductive object) near to the sensor, the LED's brightness changes depending on the distance. At minimum distance, it shows maximum brightness.
The capacitive sensor library turns two or more Arduino pins into capacitive sensor, which can sense the electrical capacitance of the human body. All the sensor setup requires is a medium to high value resistor and a small (to large) piece of aluminium foil on the end. At its most sensitive, the sensor will start to sense a hand or body inches away from the sensor.
How do capacitive sensors work?Capacitive sensing is a proximity sensing technology. Capacitive sensors work by generating an electric field, and detecting near by objects by sensing whether this field has been disrupted. Capacitive sensors can detect anything that is conductive or that has a significantly different permittivity than air, like a human body or hand.Permittivity is the measure of how difficult it is to create an electric field around a material. It’s the ability of a substance to store electrical energy in an electric field.
MaterialsTo begin you will need:
- · Arduino Uno
- · USB cable
- · 10 MΩ resistor
- · LED
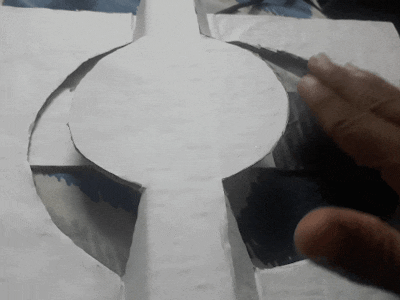
- · Aluminium foil (size 4 cmX4cm)
Small sensors (about the size of a finger print) work best as touch sensitive buttons, while larger sensors work better in proximity mode.
The size of the aluminium foil can impact the sensitivity of the sensor, so try a few different sizes if you want and see how this changes the way that the sensor reacts.
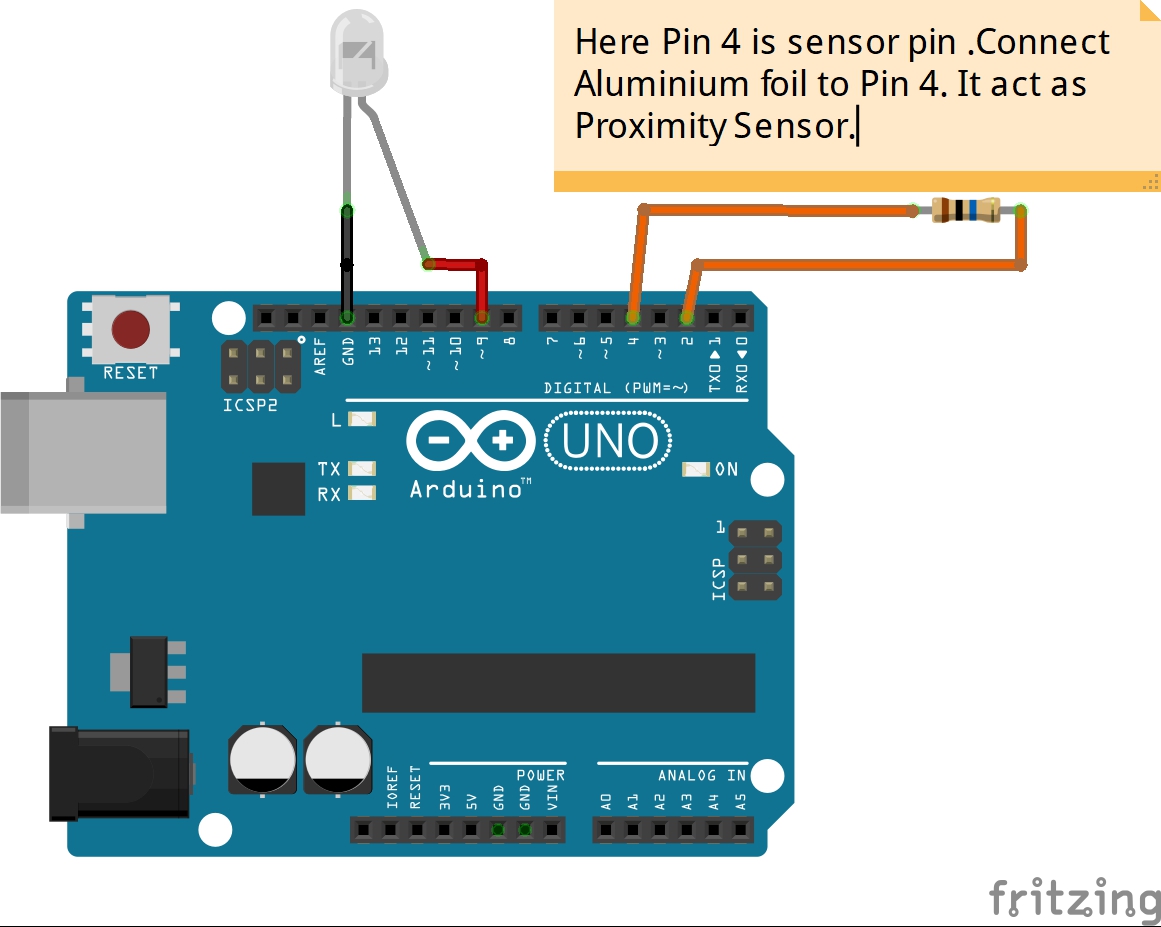
Circuit DiagramInsert a 10 M ohm resistor in between 2nd and 4th pin of Arduino. As per the program pin 4 is receive pin.Connect aluminium foil to the receive pin. Connect Led’s +ve terminal to 9th pin –ve terminal to GND of Arduino.
Code:#include <CapacitiveSensor.h>
CapacitiveSensor cs_2_4 = CapacitiveSensor(2,4); // 10M ohm resistor between pins 2 & 4, pin 4 is sensor pin, add a wire and or foil
int in = 2;
int out = 4;
void setup()
{
Serial.begin(9600); // // initialize serial communication at 9600 bits per second:
pinMode(4, INPUT);
pinMode(9, OUTPUT);
}
void loop()
{
long start = millis();
long total1 = cs_2_4.capacitiveSensor(30); //sensor resoultion. Default 30.
// increase for higher resolution, but slower performance.
Serial.print(millis() - start); // check on performance in milliseconds
Serial.print("\t"); //tab character for debug window spacing
Serial.println(total1); // print sensor output 1
delay(10); // arbitrary delay to limit data to serial port
if(total1>=140) // change this based on serial Monitor's output
{
analogWrite(9, total1);
}
else
{
digitalWrite(9,LOW);
}
}
Great! Now all of the physical work is done and we’re off to the code. Make sure that you’ve installed capacitive sensing library.
Now we are ready to test your sensor! Make sure that your computer is plugged into the wall, or the Arduino is connected to ground as this improves the stability of the sensor. To check the output of the sensor, open the Serial monitor in the Arduino programming environment (make sure the monitor is set to 9600 baud as that is what is specified in the code).
If it is working correctly, moving your hand closer and farther from the foil should change the brightness of led.
The sensor plate and your body forms a capacitor. We know that a capacitor stores charge. The more its capacitance, the more charge it can store.
The capacitance of this capacitive touch sensor depends on how close your hand is to the plate.
What does the Arduino do?Basically the Arduino measures how much time the capacitor (i.e. the touch sensor) takes to charge, giving it an estimate of the capacitance. The capacitance may be very small, nevertheless the Arduino measures it with accuracy.


Comments