

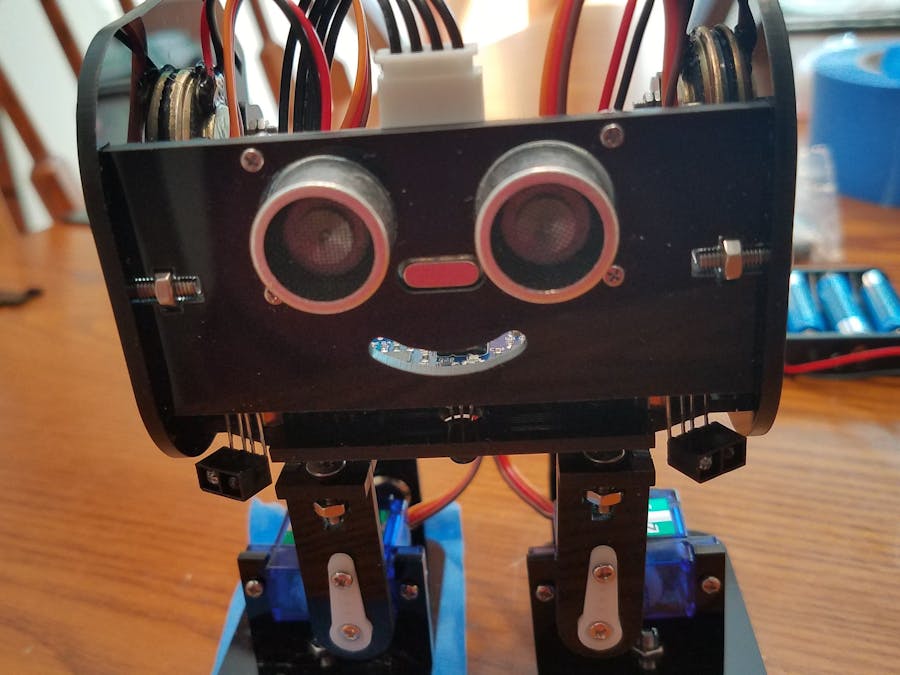
Hardware components | ||||||
| × | 1 | ||||
| × | 1 | ||||
| × | 1 | ||||
| × | 1 | ||||
| × | 4 | ||||
| × | 1 | ||||
Software apps and online services | ||||||
 |
| |||||
| ||||||
| ||||||
What do I build next?... A short diversion from my latest humanoid robot assemblies/projects... a review of a "free" robot kit by Elegoo.
1st thoughts...very similiar to the "OTTO DIY" kit I previously reviewed (not from Kickstarter pledge): https://www.hackster.io/alien-energy-3/what-do-i-build-next-finally-my-otto-diy-kit-6f5bf9)
(Elegoo PenguinBot $39.99 free shipping-Amazon... OTTO Plus $49 plus shipping... Acrobotics - I can't promote/advocate this vendor due to Kickstarter fulfillment issues)... Can I list prices or say this about Acrobotics?
What is a PenguinBot? I didn't know at 1st but still I said yes a few months ago to a marketing email. Last week, another email, "Are you still interested?...Sept. 10th.. If so what color? Red or Black?" I chose "Black." Shipping Notification: That was Thursday, Sept. 13th and a follow-up email said I would have it Saturday, Sept. 15th. Amazon did the shipment... and as expected...I arrived on Saturday as scheduled. 4 hour assembly time...
When I was told of its shipment due date, I did some investigations into what a "PenguinBot was". I found this/these assembly video's...(http://labpacks.blogspot.com/search/label/Elegoo%20Penguin-Bot)
They were helpful in general.
Next I went to Elegoo's website and downloaded all current info: (https://www.elegoo.com/download/)
That was helpful as well...an User Manual with assembly drawings, Arduino base code, etc. I learned that the "Brain of this Robot was based upon the Arduino nano, p328".
With that tidbit, and the example "core code" I could 1st see if it compiled.... nothing is more frustrating than OEM Vendor's example code that is poorly written. (This example code "v4.3.4" compiled ok).
Now for my kit.
1. Lay out all the hardware to ensure everything is there
2. Let's begin assembly: remove protective film...
***Just an Assembly Note- I needed a different pair of pliers to hold the small nuts, I used "Blue "Painters tape to keep servos from sliding on table during testing, and I needed "Gorilla Glue" to repair a broken bracket...I'll explain later...
I will deliver assembly notes with a title, a picture of the required hardware and then the finished assembly step...
3. Assemble the Robot Legs and Feet
4. Assembling the servos-feet
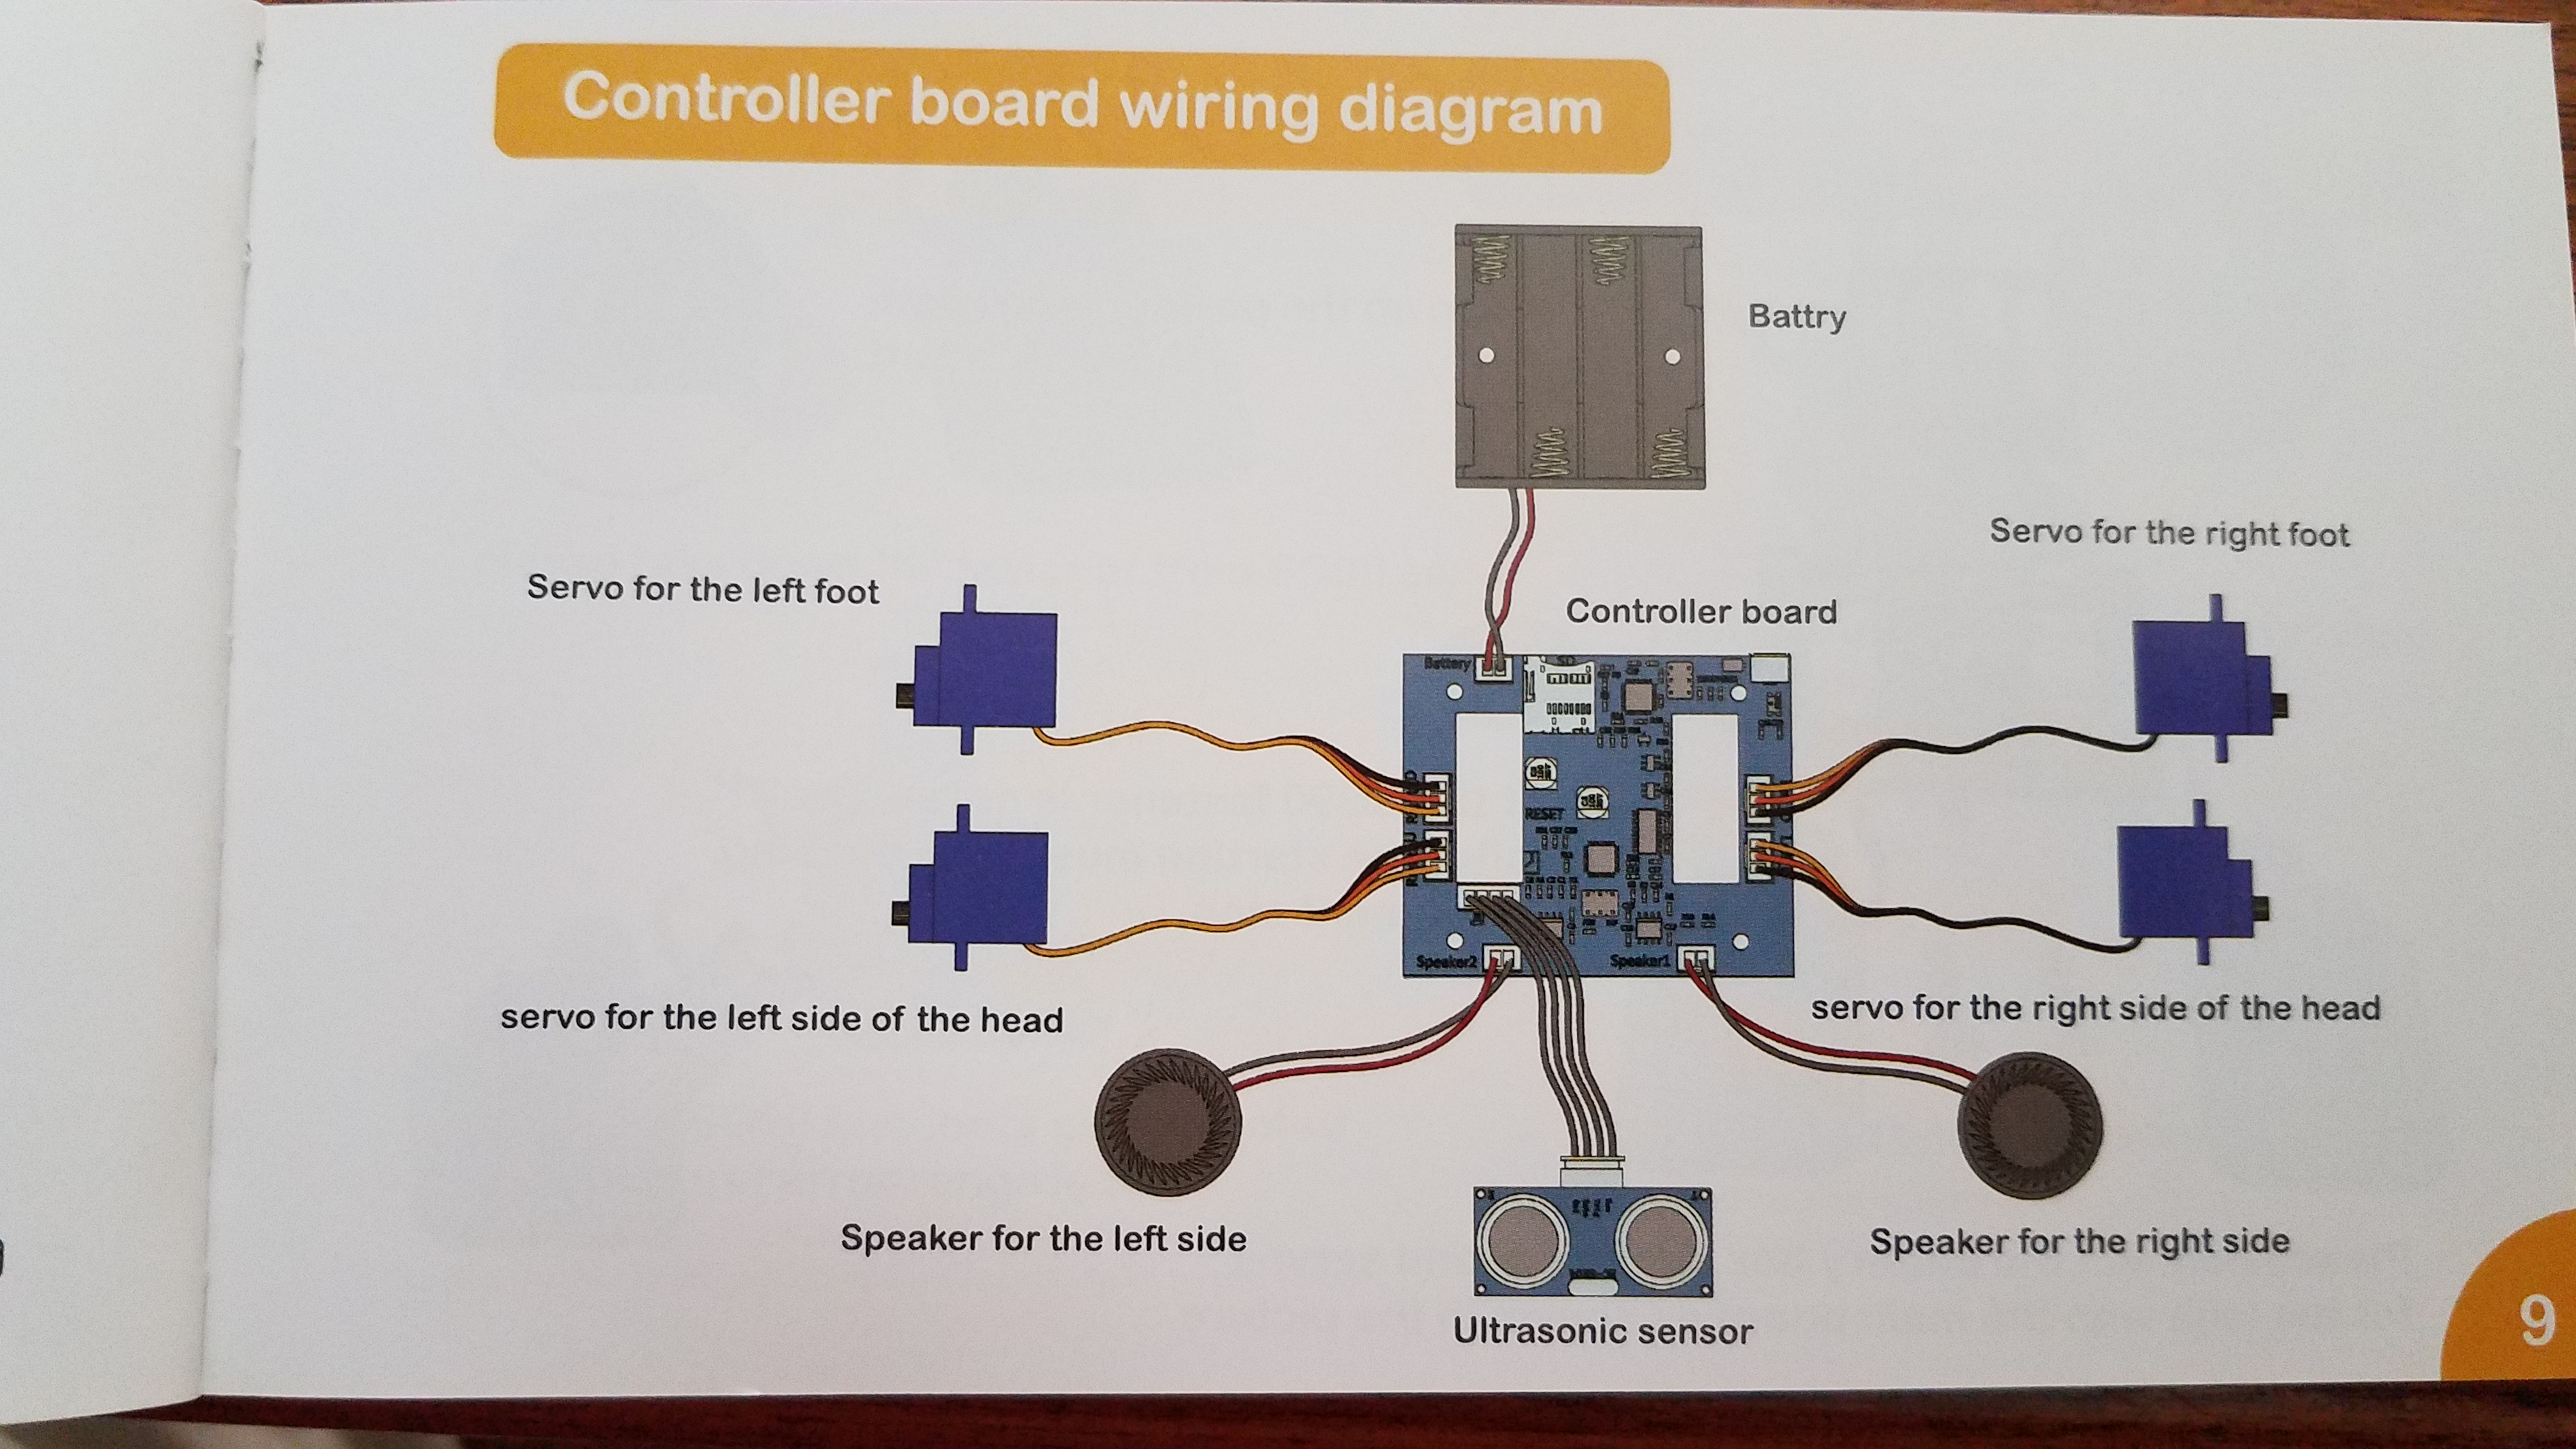
5. Controller board wiring
6. Correcting the Servo position-feet
7. Assemble the legs
8. Assemble the head
9. Install the servos-legs
10. Correcting the Servo position-legs
11. Install the circuit plate
12. Assemble and install the Speakers
13. Install the two flanks of the head
14. Install the Ultrasonic Sensor
15. Install the battery box
16. Install the top plate of the head
17. Install each foot's Sticky Pads
Wake-Up Video
Going through the motions video
18. Optional: Making Head Covers
Review included tutorials for learning
There are 6 Control Modes via IR-Remote:
1. Standby Mode- PenguinBot will STOP all moves
2. IR Remote Control Mode- pressing one of the four direction buttons, will cause PenguinBot to move in that direction
3. Obstacle Avoidance Mode- when you press the Mode button the PenguinBot will maintain 20cm path from obstacles while moving forwards and turning
4. Auto-follow Mode- when your hand is placed within 7cm of either Infrared sensor on the left or right side, the PenguinBot will move accordingly and if hand is within 20cm in front of PenguinBot, it will continue to move forward
5. Music-player Mode- in this Mode, the PenguinBot will play the 1st song, by pressing the LAST or NEXT button will allow for music selection stored on the SD card.
6. Dancing Mode- in this MODE, the PenguinBot will start playing the 1st song on the SD card and will dance along with it
7. Volume Control Mode- in this MODE you can control the Music's volume
Review Comments:
1. 13 minutes to remove protective film and ~ 4 hours to build and document via pictures the process.
2. One Foot Servo acrylic mount broke when attaching servo horn-Correcting servo position
3. Many M2 nuts had bad thread... zinc plating build-up?
4. Apparent Bad/Dead servo--- (actually, later I discovered I had a new "DEAD" AAA battery)
5. M1.6 nuts x 2, for Ultrasonic Sensor were bad.. zinc plating in thread?
6. 256mb SD card included(yes very small) had NO data "Music files" on it....no instructions about required formatting "FAT" and then required "music files copied onto it".
7. Initial PenguinBot "WAKE-UP" routine was not described... no videos as to what to expect... "only wait until music stops and robot stops moving"....I could see IR LED flicker when IR-remote buttons were pushed but no servo/robot actions due to only 4.4vdc via 3 AAA batteries...4th was DEAD.
8. My PenguinBot would "WAKE-UP" with USB cable attached... this was good news because : I had a power issue.....My battery pack outputted 4.4v DC. I now know what actions/dance motions took place, music was supposed to play once the SD card was formatted and music files copied onto, and finally... a was able to determine that my NEW battery 4-pack of AAAs had one DEAD battery....never had this before.


Comments