A few years back, I created a new home automation course at Santiago Canyon College in Orange, Calif. where I taught Computer Science and Robotics. I wanted to introduce my programming students to microcontrollers so they could have some fun controlling things around their home. The students never built anything like that so I came up with a couple introductory level lab projects for them to try out. I decided to make a simple "weather station" project so they could learn how to build a circuit on a breadboard, learn to program an Arduino, and how to write some code that could read multiple sensors and display the readings on a small LCD display.
The activity was the first time the class ever used electronic components. Once more, they had no idea of how to make them do something cool. It turned out to be great fun. I thought some of you might also enjoy building this. So, if this sounds like something you would like to explore for yourself, you are invited to come along with us on this adventure!
A WORD ABOUT ARDUINO LIBRARIES
You will discover that you must have the correct Arduino libraries installed for your particular sensor. This is especially true when working with LCD displays. The one we use in this project is version 1.2 so be sure to download both the LCD and the DHT-11 temperature libraries from my website here. Unzip them on your desktop and copy each folder to your Documents | Arduino | Library folder. Be sure to delete any existing libraries with the same name.
BUILDING THE PROJECT
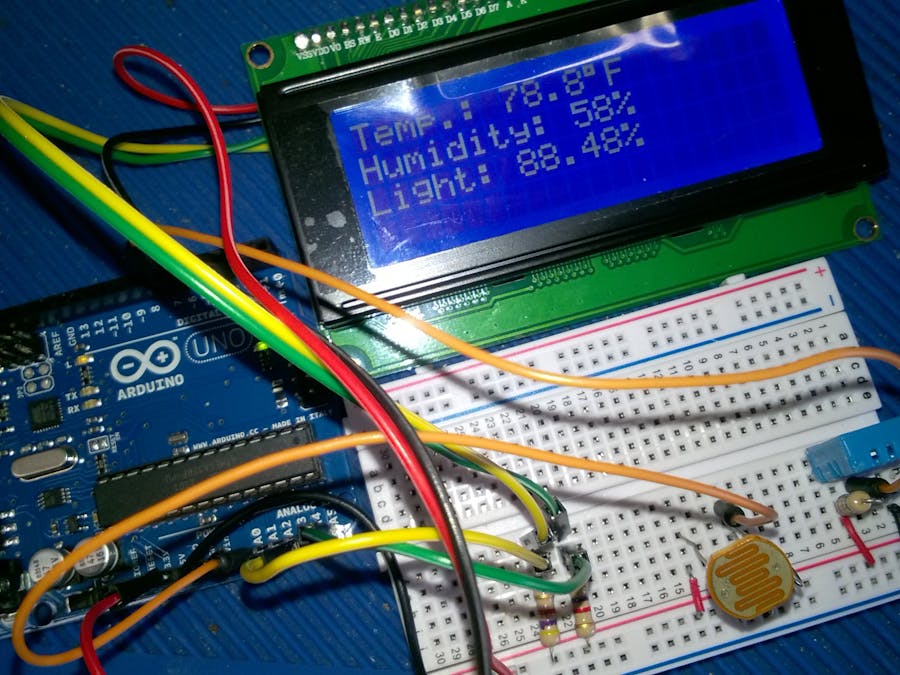
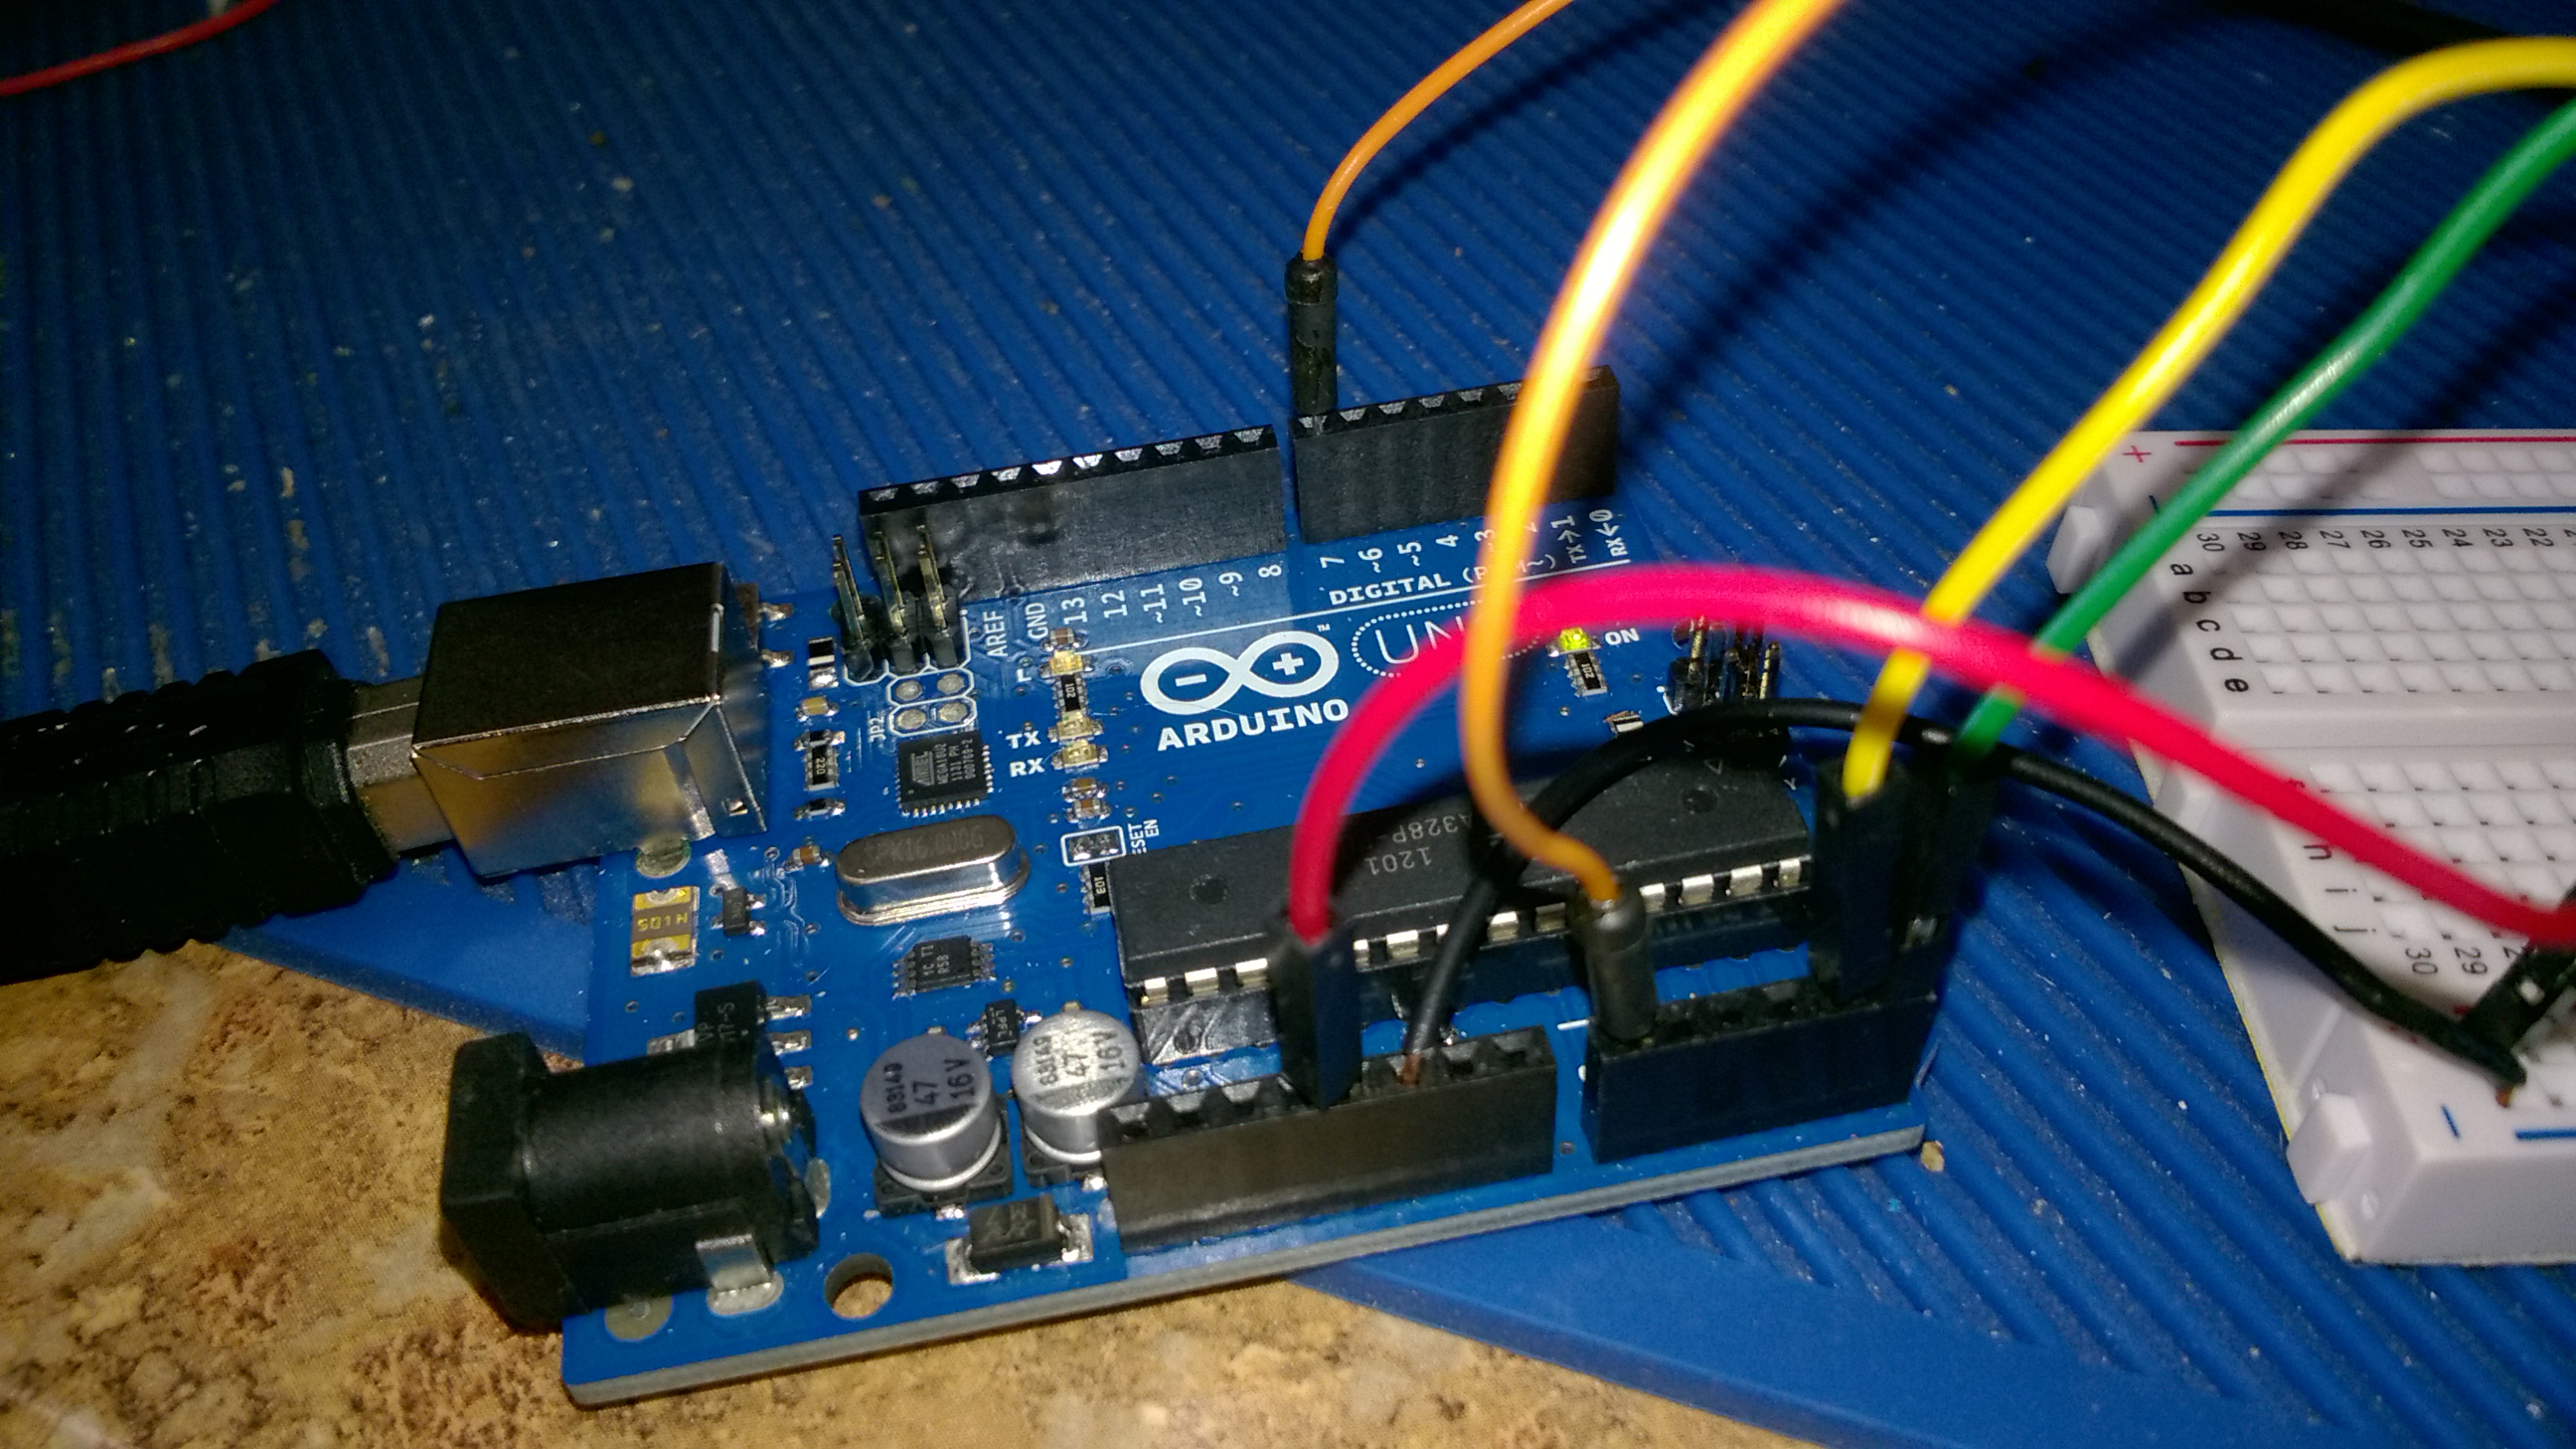
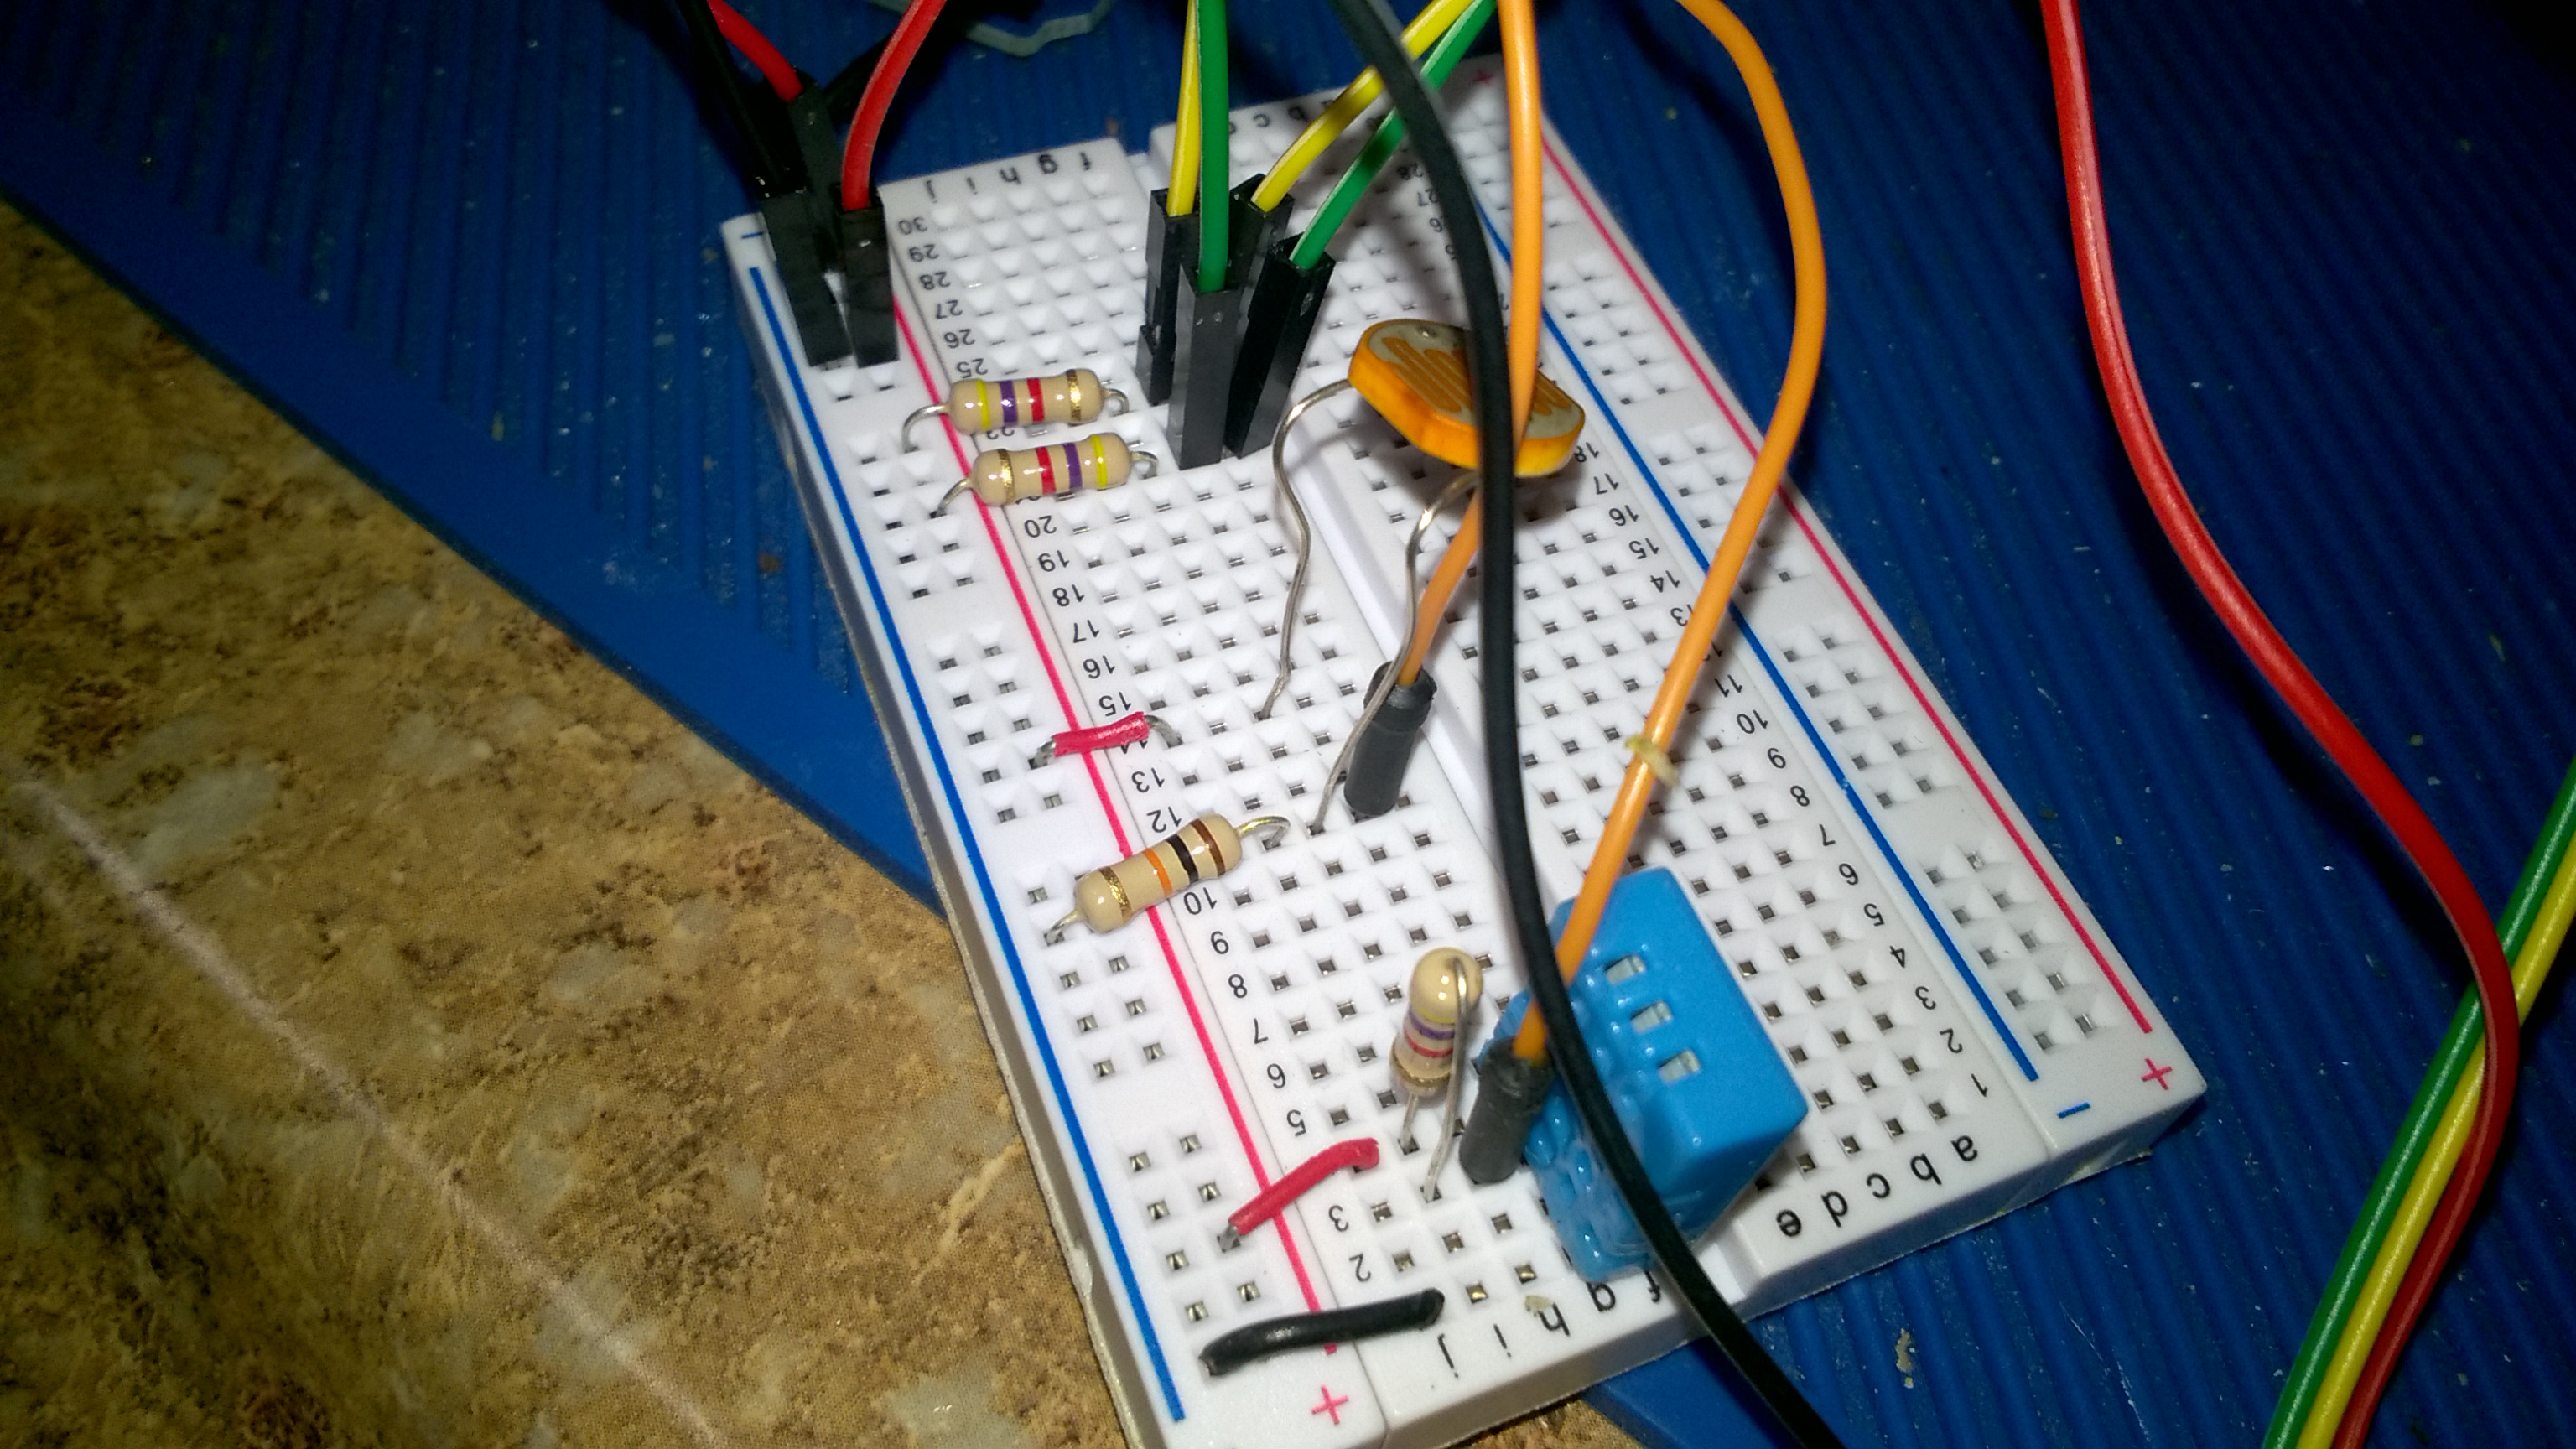
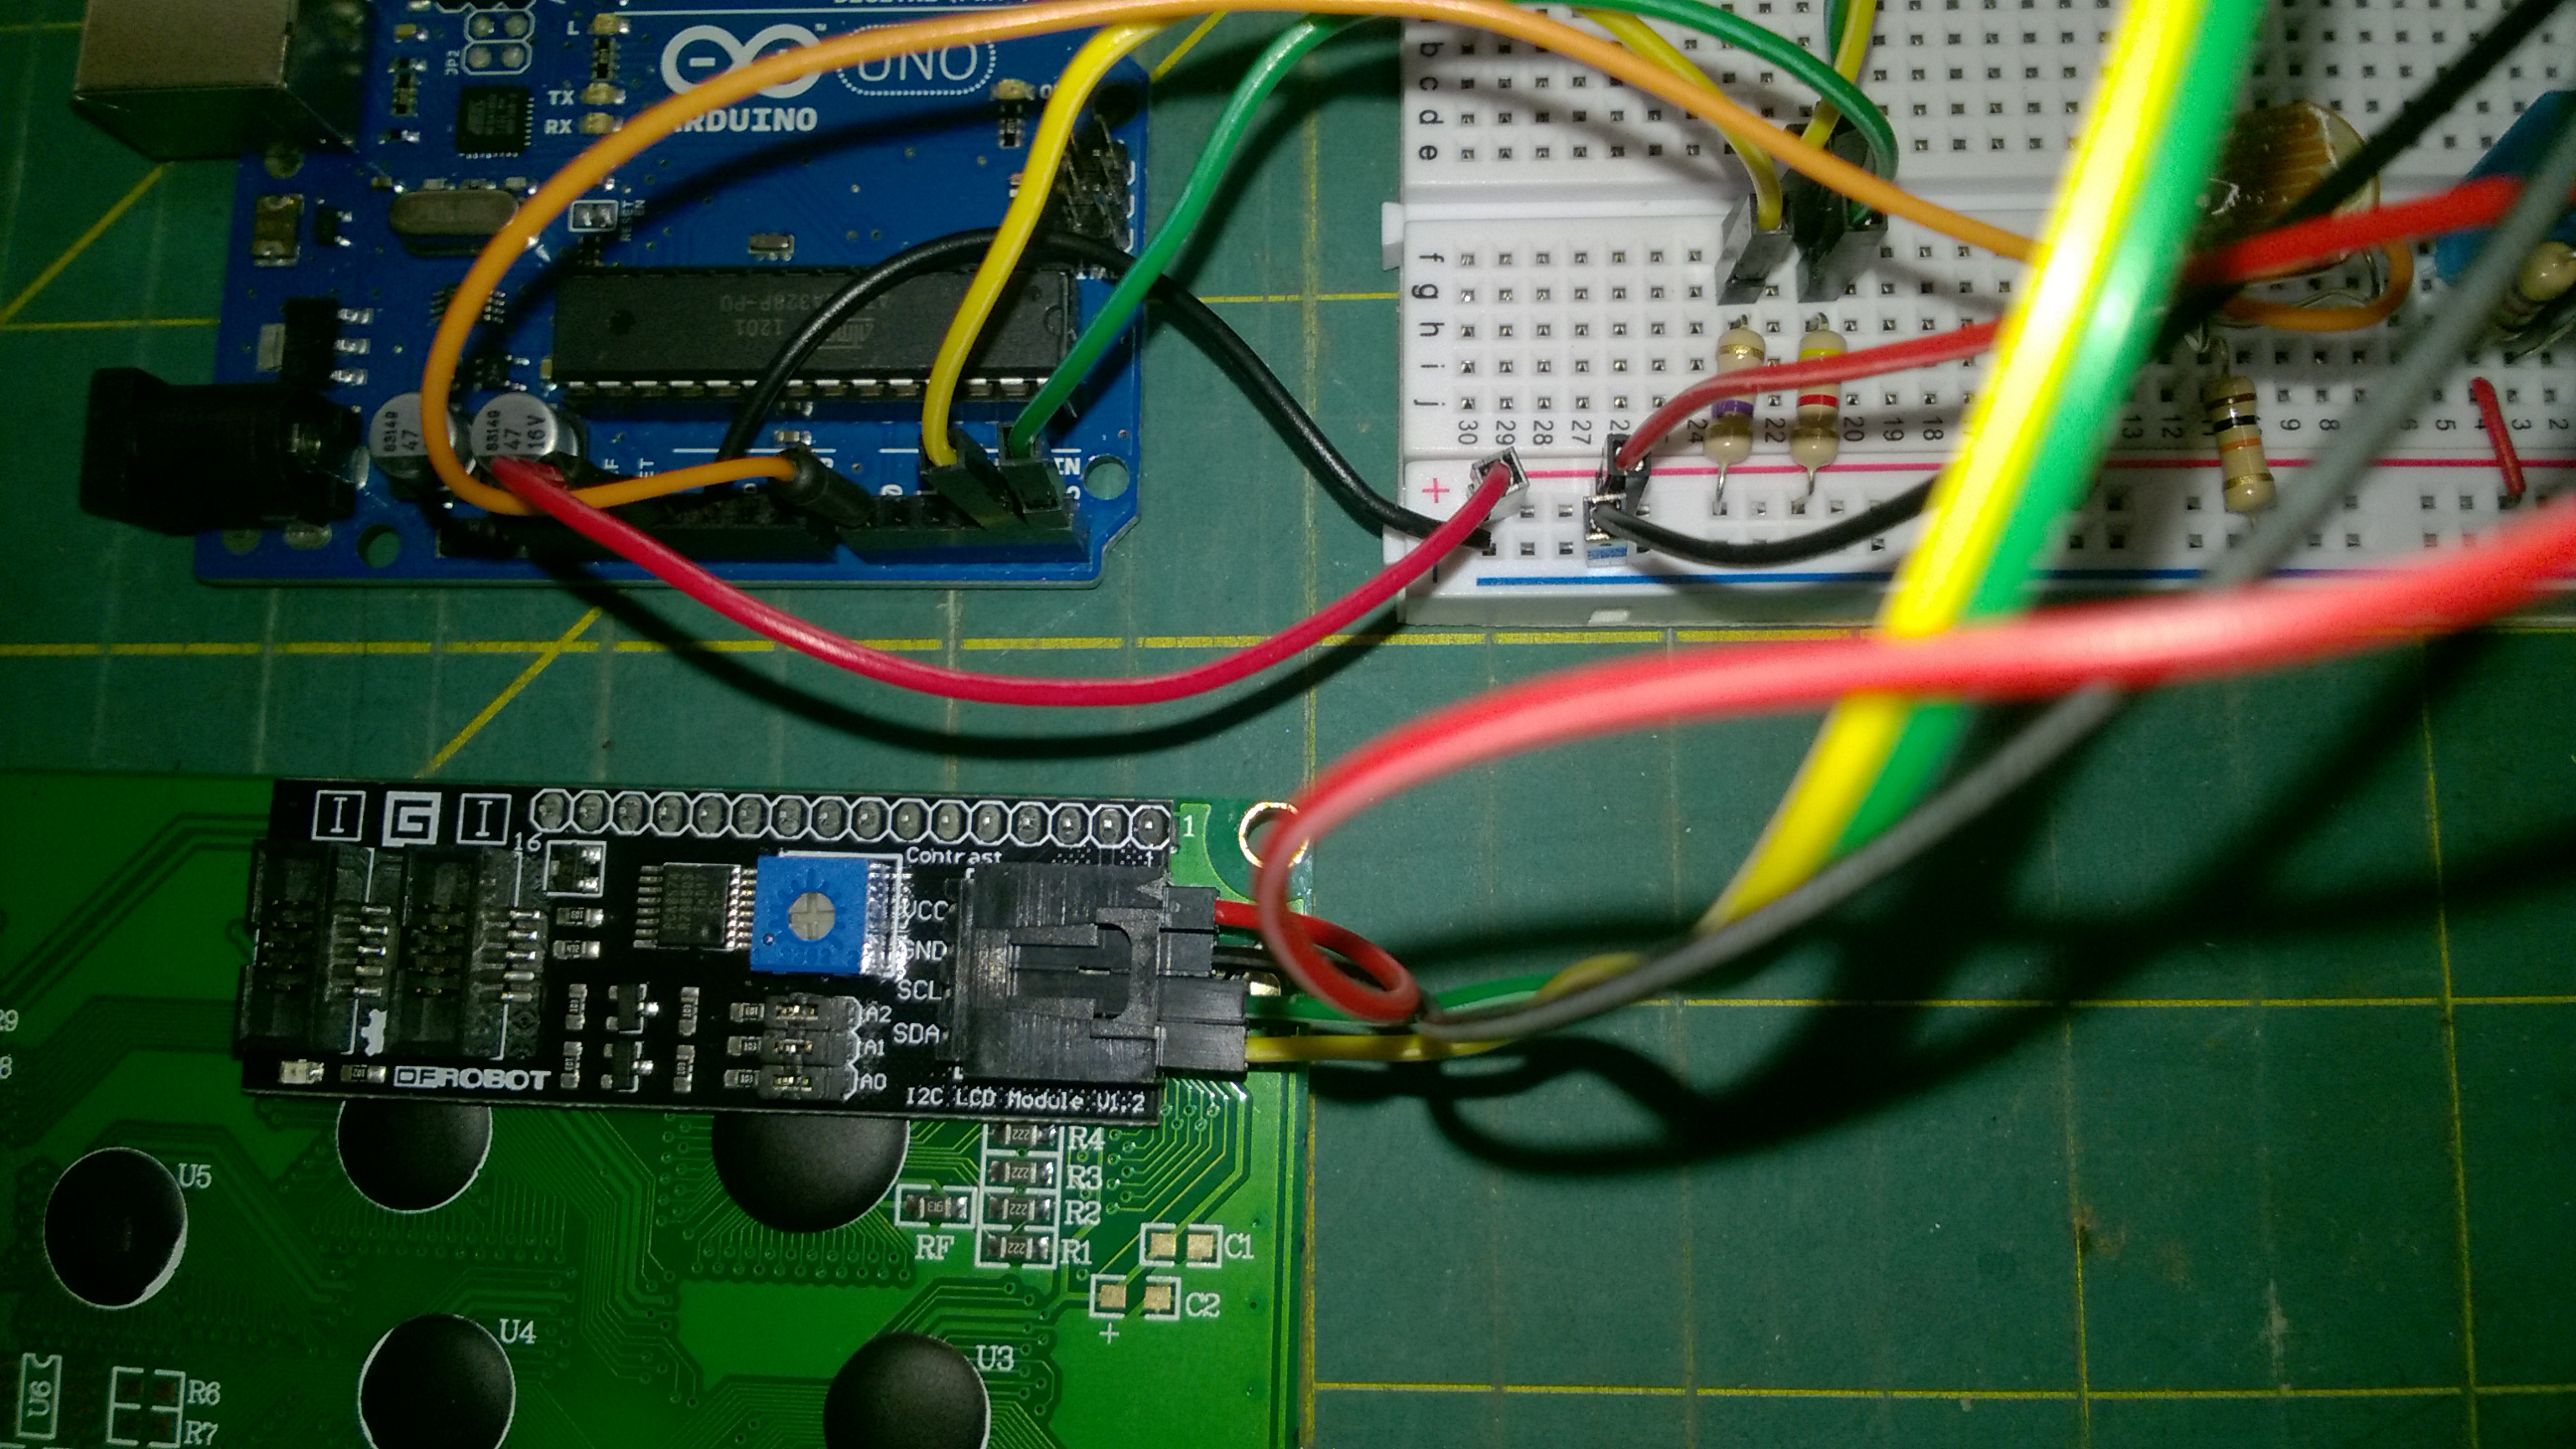
I added some photos of the finished project so you can see how it is wired up. Please take your time and make sure all the connections are secure. I use a small set of needle nose pliers to help me insert resistors and wires into the breadboard. Sometimes, a new breadboards connections are very tight.
Always choose wire colors that make sense to you. Use red for power, black for ground, and another color for the output of your sensors. Be very careful when you wire up the LCD. On the connector, you must connect wires to the right place. For some reason, LCD's even from the same manufacturer have the connector pins in different positions. Look at my comments under the LCD section below to see how I wired it. I also added a closeup photo of my connections.
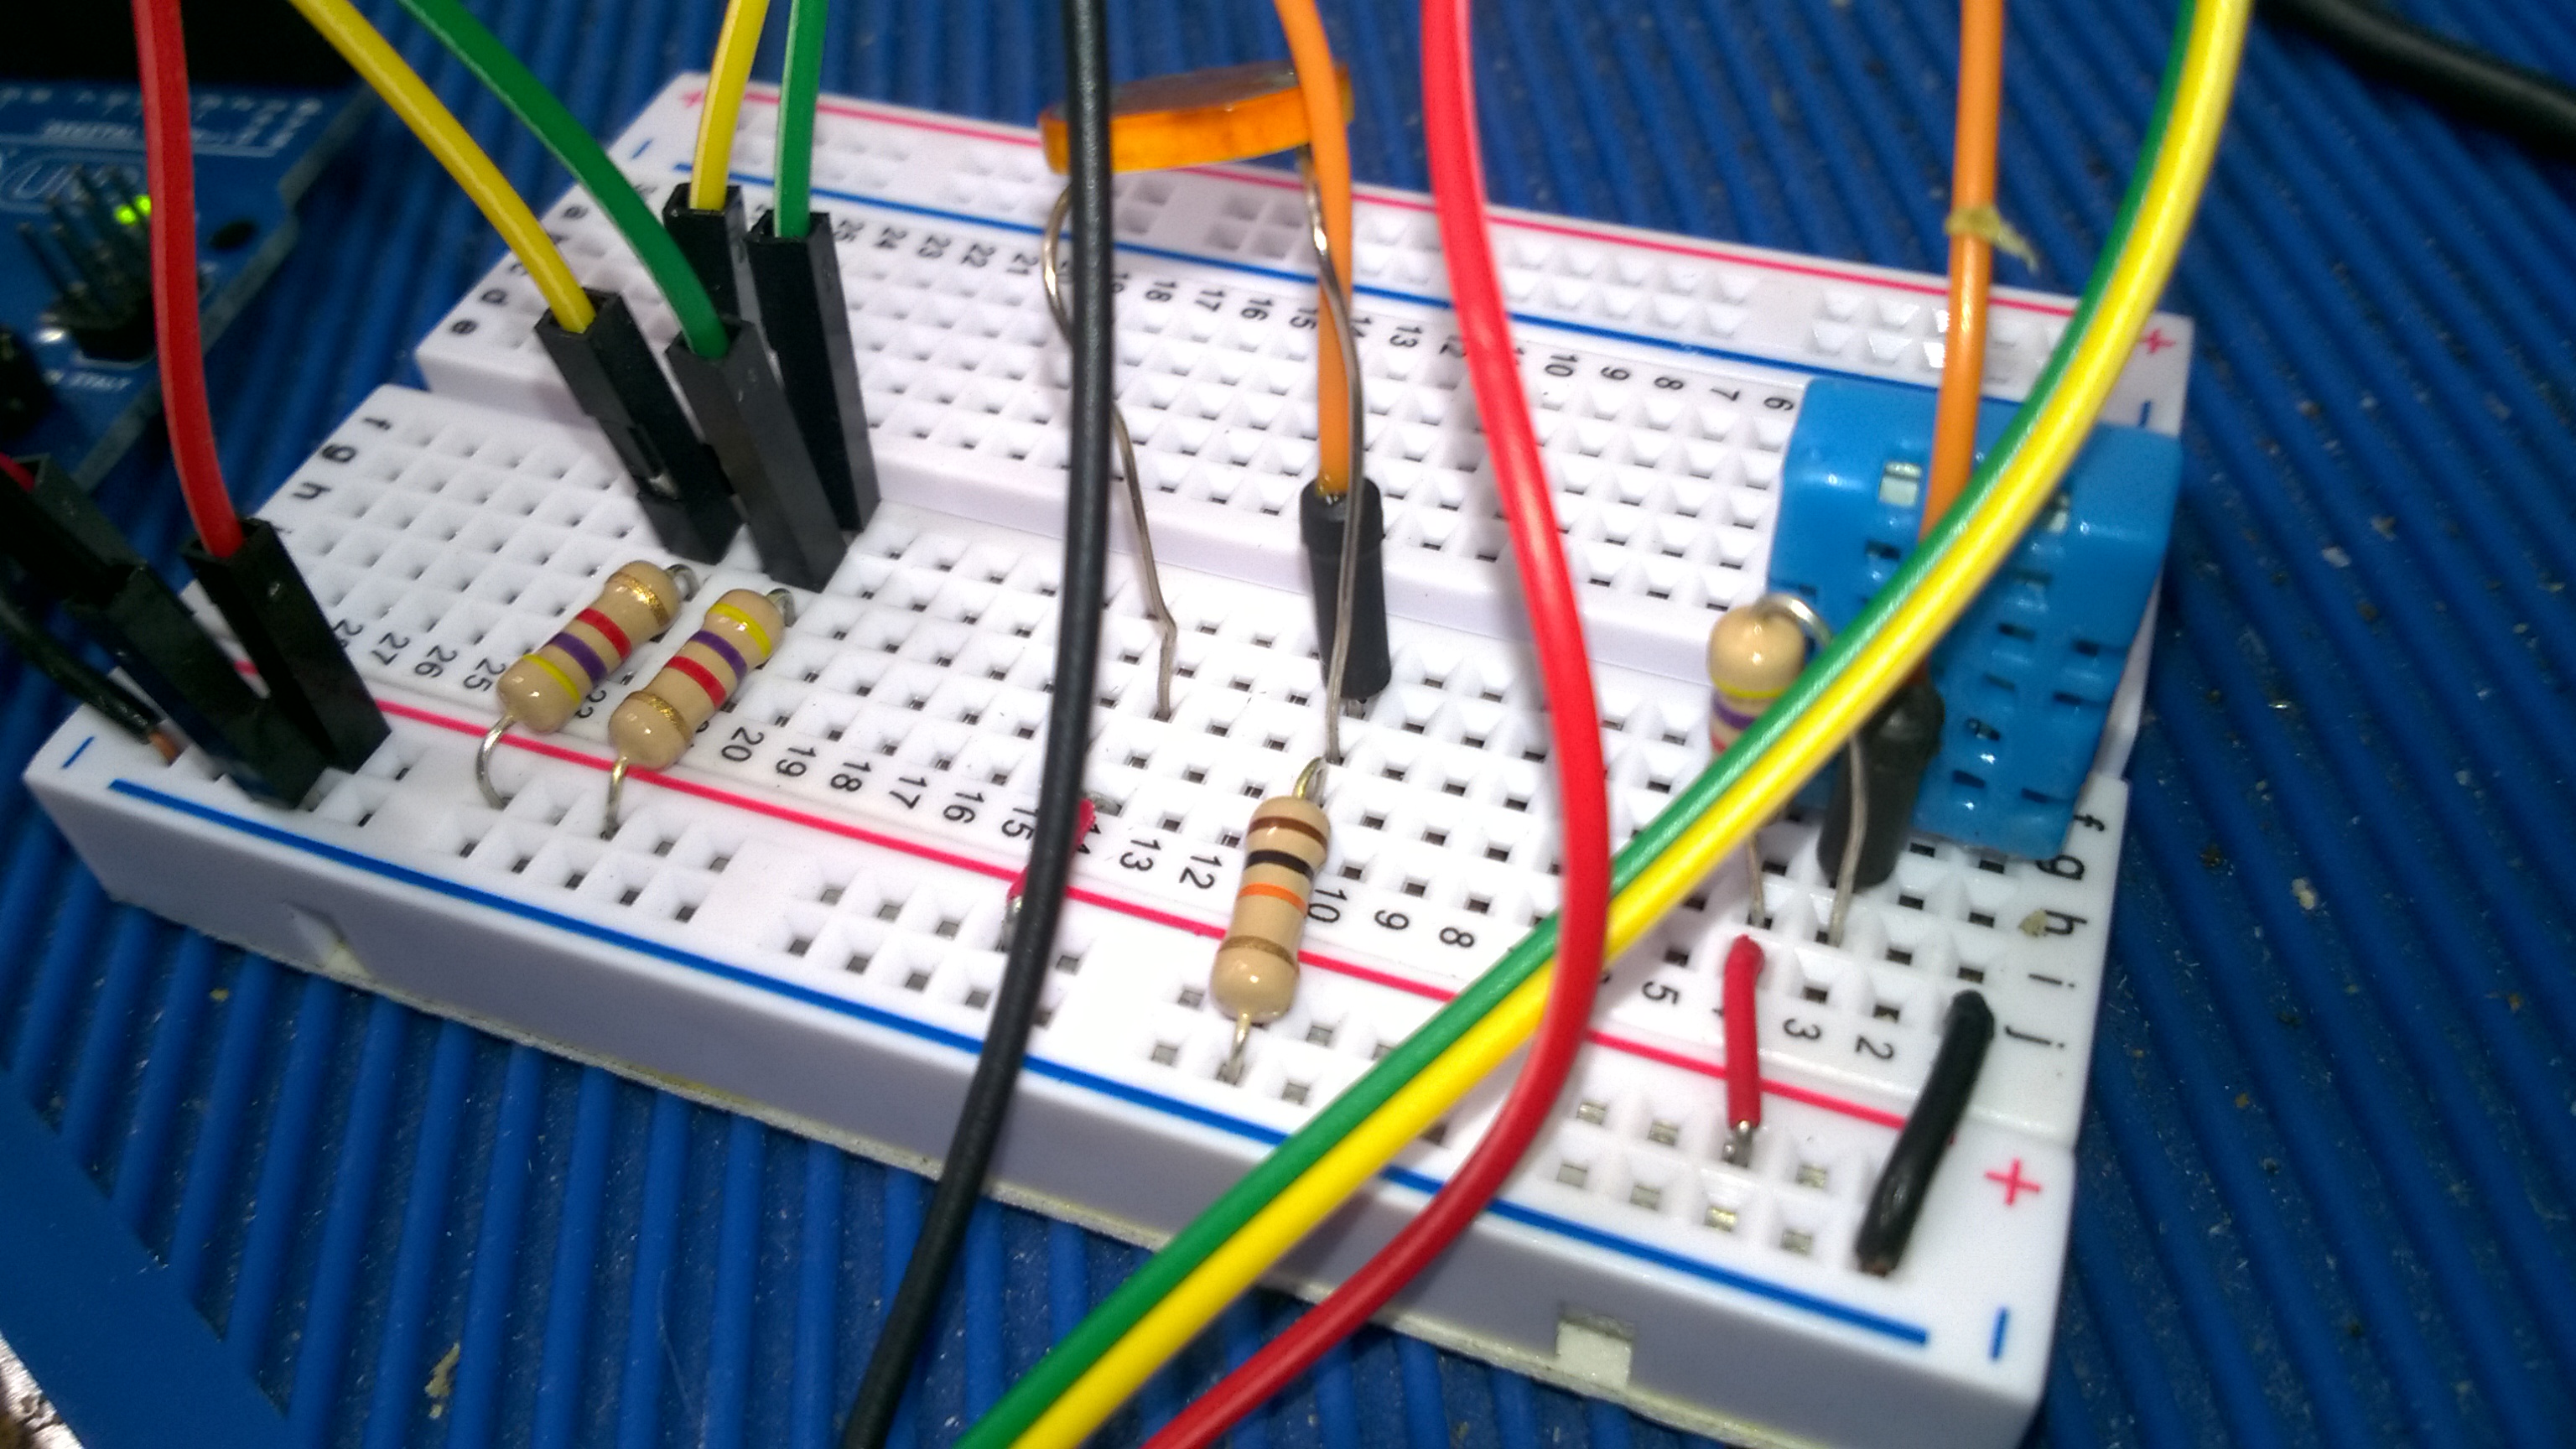
Notice how I added the resistors to the breadboard and how the green and yellow wires go from the LCD connector to those resistors and THEN connect to the Arduino. The SCL & SDA pins on the LCD each need a pull--up resistor or it won't display properly! The resistors provide a small amount of current to the LCD so the Arduino signals are interpreted correctly.
If you understand the schematic and use the photos, I feel confident you can build this. Make sure to use the libraries from my website by using the link in the previous section. Please let me know if you need some help. I will be happy to assist you. Have fun!


_ztBMuBhMHo.jpg?auto=compress%2Cformat&w=48&h=48&fit=fill&bg=ffffff)


Comments