


Hardware components | ||||||
_ztBMuBhMHo.jpg?auto=compress%2Cformat&w=48&h=48&fit=fill&bg=ffffff) |
| × | 1 | |||
| × | 1 | ||||
| × | 1 | ||||
| × | 20 | ||||
| × | 1 | ||||
| × | 1 | ||||
| × | 1 | ||||
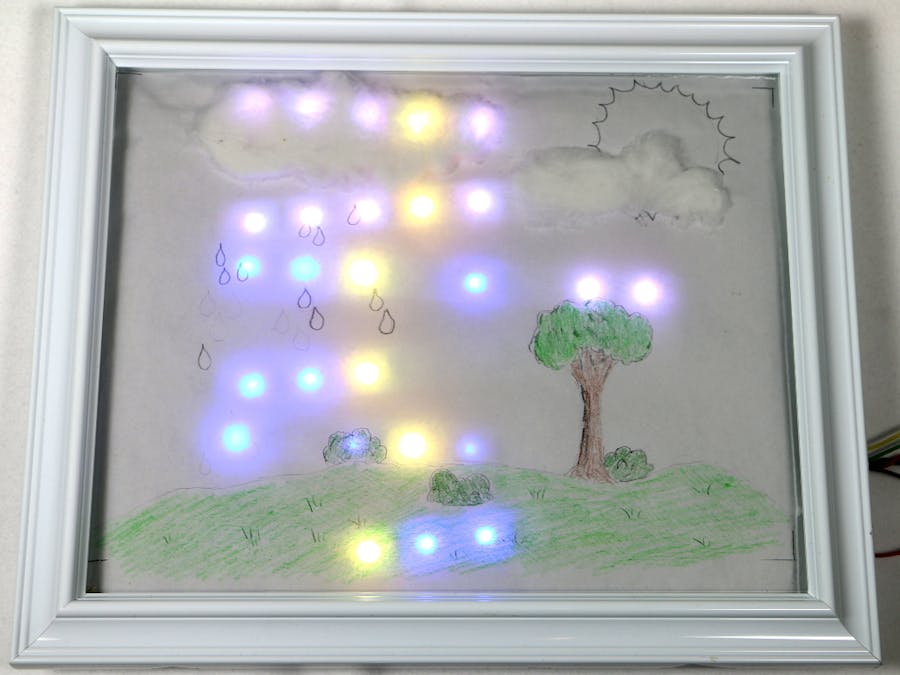
In this sample, we will connect an RGB LED strip to an Arduino and control it to indicate the weather forecast behind a picture.
Components
You will need the following components :
an Arduino UNO or compatible
a Digital RGB LED Weatherproof Strip - LPD8806 32 LED - (1m))
a SparkFun Bluetooth Modem - BlueSMiRF Silver](https://www.sparkfun.com/products/12577)
solder and a soldering iron
20 red/black/green/yellow wires at 6 inches length each (5 sets of 4 colors).
a picture frame
a 8x11” paper drawing from an artistic family member, friend or yourself
Connect to your Device
Follow the instructions at this Arduino repository to set up your Arduino.
Follow the instructions at this Universal repository to set up your Windows Phone.
Modify the RGB strip
The RGB LED strips come with 48 LEDs in a strip.
- Carefully split apart the RGB strips at the seams so that you have 6 strips of 8 lights.
- Keeping the power connector (and other original wires) at the bottom right of the 6 strips,
- … solder wires between the splits so that the ends are reconnected through the wires.
Upload to your device
In the Arduino IDE (set up from Connect to your Device : Arduino), choose the menu item File->Examples->VirtualShield->PictureTheWeather
Upload to your Arduino.
See it run
- The phone will show “Web Weather Indicator,” your coordinates and your weather forecast.
- You can say “tomorrow,” “in 3 days,” “in 5 days” to see different forecasts for your location.
- (There’s also a not-so-secret debugging mode), try saying “show thunderstorms”. Then, say “strike”.
Here’s what’s happening…
The Arduino sketch is:
-
Getting your GPS coordinates.
- Using that to get the National Weather Service forecast and location using your coordinates.
- Presenting that information to you on screen as well as ...
- Setting the animation on the RGB LED strip .
Windows IoT


Comments