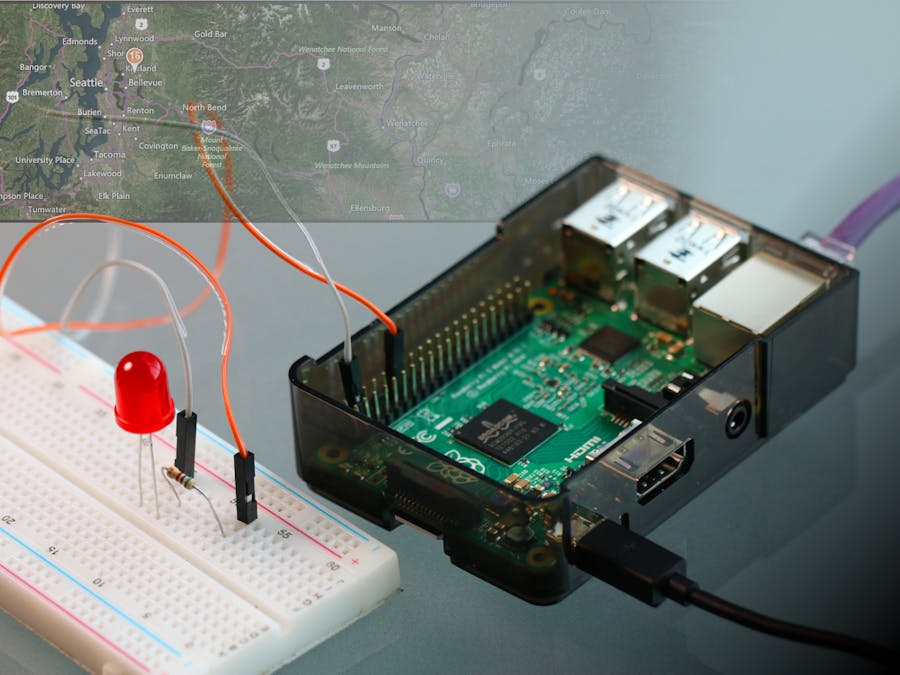
In this project you will use the Adafruit Starter Pack for Windows 10 IoT Core on Raspberry Pi 2 components to create a project that blinks a LED based on the response from a Web API call.
Hardware setup
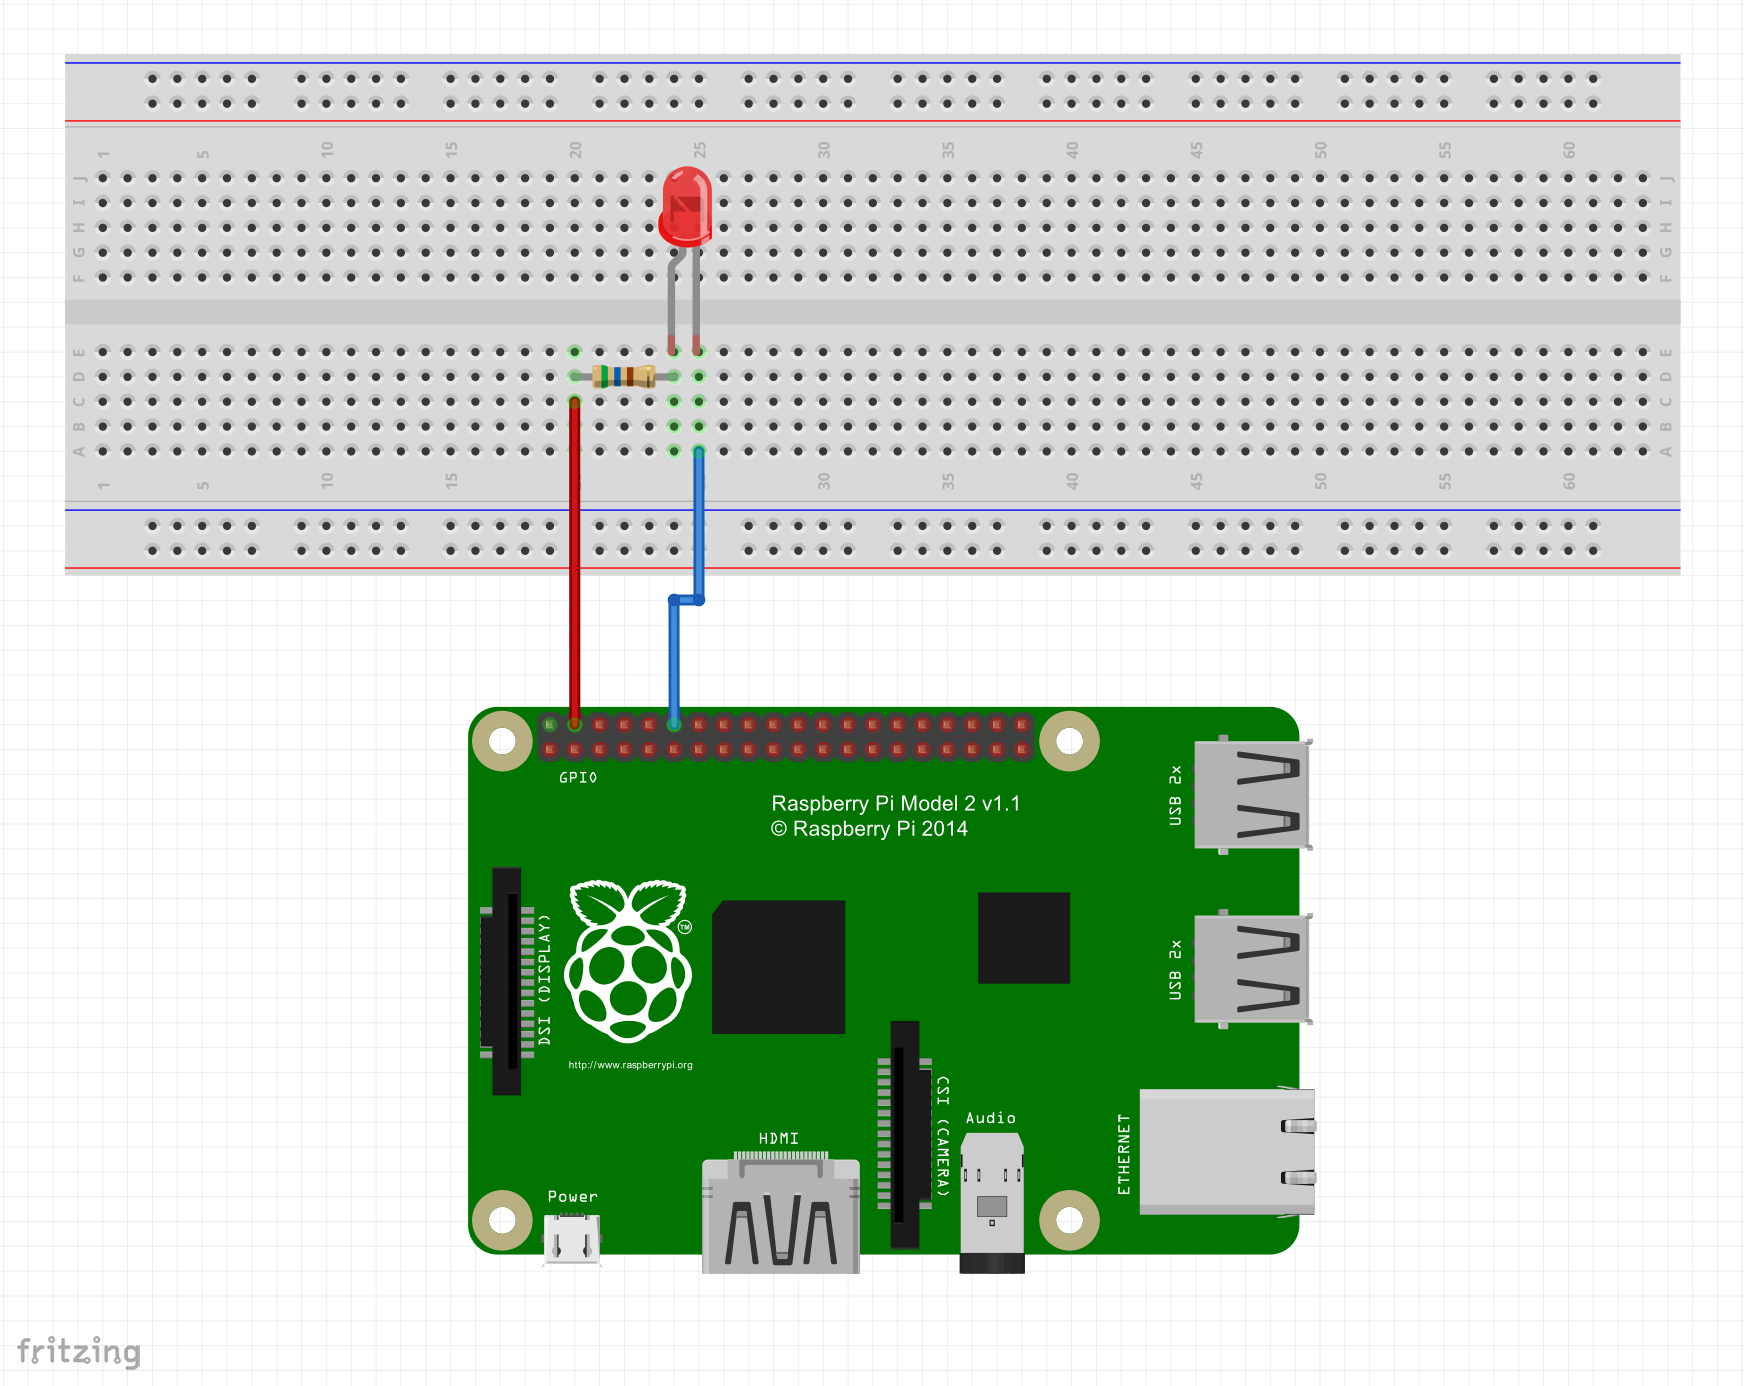
Connect the Raspberry Pi2 to the breadboard and the other components as per the Fritzing diagram at the bottom of the page.
Note: The LED pin has changed from the previous Blinky example from GPIO 5 to GPIO 18.
Code
MainPage.cs
You can download the code starting project from https://github.com/ms-iot/adafruitsample and we will lead you through the addition of the code needed to talk to the web service and get your pin on the map. What map?
Open up "Lesson_201\StartSolution\Lesson_201.sln" and open the MainPage.xaml.cs file.
We have filled in a few methods as a starting point for you in this solution. If you want to jump ahead you can find a solution with all the code completed at: "Lesson_201\FullSolution\Lesson_201.sln"
Add the following lines at the top of the MainPage class. These define what pin on the Pi2 you will use to control the LED and a reference to the InternetLed class which you will be adding shortly.
 public sealed partial class MainPage : Page
    {
        // which GPIO pin do we want to use to control the LED light
        const int GPIOToUse = 18;

        // The class which wraps our LED.
        InternetLed internetLed;

        public MainPage()
Now add code in the OnNavigatedTo method which will:
-
Create a new InternetLed object
-
Make a web API call to put our pin on the maker map
-
Initialize the object
-
Call the webapi to get our delay value.
-
Loop 100 times with the returned delay, blinking the led each pass.
If you do not want to add a pin onto the map, remove MakePinWebAPICall();
// This method will be called by the application framework when the page is first loaded.
protected override async void OnNavigatedTo(NavigationEventArgs navArgs)
{
    Debug.WriteLine("MainPage::OnNavigatedTo");

    MakePinWebAPICall();

    try
    {
        // Create a new InternetLed object
        internetLed = new InternetLed(GPIOToUse);

        // Initialize it for use
        internetLed.InitalizeLed();

        // Now have it make the web API call and get the led blink delay
        int blinkDelay = await internetLed.GetBlinkDelayFromWeb();

        for (int i = 0; i < 100; i++)
        {
            internetLed.Blink();
            await Task.Delay(blinkDelay);
        }

    }
    catch (Exception e)
    {
        Debug.WriteLine(e.Message);
    }
}
InternetLed.cs
Now you will add a new class file in which most of the work will actually be performed.
From the main menu select Project -> Add Class...
The Add New Item dialog will open and default to Visual C# Class.
Enter InternetLed.cs for the file name and click Add
The class file will be created and opened for you.
Update using's
You will need replace the using's section at the top of the file so the code can reference the GPIO device, web interfaces and the system diagnostics.
using System;
using System.Diagnostics;
using System.Net.Http;
using System.Threading.Tasks;
using Windows.Devices.Gpio;

namespace Lesson_201
{
Class members
Inside the class brackets add the following lines which will be referenced by the code a little later.
 class InternetLed
    {
        // GPIO controller code
        private GpioController gpio;
        private GpioPin LedControlGPIOPin;
        private int LedControlPin;

        // only used if we don't get a response from the webapi call.
        private const int DefaultBlinkDelay = 1000;

        // An enumeration to store the state of the led
        public enum eLedState { Off, On };
        private eLedState _LedState;
Class constructor
Now, add the class constructor code which will store the value of the pin used to control the LED.
 public InternetLed(int ledControlPin)
    {
        Debug.WriteLine("InternetLed::New InternetLed");

        // Store the selected GPIO control pin id for use when we initialize the GPIO
        LedControlPin = ledControlPin;
    }
Initializer member
Add initialization code, this is responsible for setting up communication with the Pi2 General Purpose Input Output (GPIO) controller.
public void InitalizeLed()
{
    Debug.WriteLine("InternetLed::InitalizeLed");

    // Now setup the LedControlPin
    gpio = GpioController.GetDefault();

    LedControlGPIOPin = gpio.OpenPin(LedControlPin);
    LedControlGPIOPin.SetDriveMode(GpioPinDriveMode.Output);

    // Get the current pin value
    GpioPinValue startingValue = LedControlGPIOPin.Read();
    _LedState = (startingValue == GpioPinValue.Low) ? eLedState.On : eLedState.Off;
}
LedState property
This wraps interaction with the state of the led (on vs off) into a central location.
// A public property for interacting with the LED from code.
public eLedState LedState
{
    get { return _LedState; }
    set
    {
        Debug.WriteLine("InternetLed::LedState::set " + value.ToString());
        if (LedControlGPIOPin != null)
        {
            GpioPinValue newValue = (value == eLedState.On ? GpioPinValue.High : GpioPinValue.Low);
            LedControlGPIOPin.Write(newValue);
            _LedState = value;
        }
    }
}
Blink method
Add a method that handles changing the led state.
 // Change the state of the led from on to off or off to on
        public void Blink()
        {
            if (LedState == eLedState.On)
            {
                LedState = eLedState.Off;
            }
            else
            {
                LedState = eLedState.On;
            }
        }
GetBlinkDelayFromWeb method
This is where the main work of the class gets done.
Start out by setting up a HttpClient call and then execute it. Then output the returned string to the debug channel so you can see it.
Next, we determine what the value of the delay is and return it.
 // This will call an exposed web API at the indicated URL
        // the API will return a string value to use as the blink delay.
        const string WebAPIURL = "http://adafruitsample.azurewebsites.net/TimeApi";
        public async Task<int> GetBlinkDelayFromWeb()
        {
            Debug.WriteLine("InternetLed::MakeWebApiCall");

            string responseString = "No response";

            try
            {
                using (HttpClient client = new HttpClient())
                {
                    // Make the call
                    responseString = await client.GetStringAsync(WebAPIURL);

                    // Let us know what the returned string was
                    Debug.WriteLine(String.Format("Response string: [{0}]", responseString));
                }
            }
            catch (Exception e)
            {
                Debug.WriteLine(e.Message);
            }

            int delay;

            if (!int.TryParse(responseString, out delay))
            {
                delay = DefaultBlinkDelay;
            }

            // return the blink delay
            return delay;
        }
    }
}
Try it out
Once all the code is entered you can build the solution and run the code on your Pi2. If needed you can review the instructions on how to connect and run code on PI, revisit Lesson 1 - Blinky.
Open the Output tab of visual studio. If needed on the main menu use Debug -> Window -> Output
Now you can watch for the output of the Debug.WriteLine commands.
Look for the messages which start with "Response string:", they will then be followed with the response from the web API surrounded in "[]" brackets.
MainPage::OnNavigatedTo
InternetLed::New InternetLed
InternetLed::InitalizeLed
InternetLed::MakeWebApiCall
Response string: [100]
InternetLed::LedState::set Off
Blinking LED
At this point your LED should be blinking on and off about once a second based on the value of the time string being returned from the web API.


Comments