


Hardware components | ||||||
 |
| × | 1 | |||
| × | 1 | ||||
 |
| × | 1 | |||
| × | 1 | ||||
 |
| × | 1 | |||
 |
| × | 1 | |||
 |
| × | 1 | |||
Software apps and online services | ||||||
 |
| |||||
 |
| |||||
| ||||||
| ||||||
 |
| |||||
Description of the problem:
Illegal dumping and water pollution have plagued humankind for ages. Utilizing AI at the edge, we have a vision system that is capable of identifying people who are in the process of dumping environmental hazards such as garbage, construction waste, and water pollution. I've witness and also notice from the news that people are dumping their construction waste in residential neighborhoods. My attempt at building this PoC (Proof of Concept) is to utilize AI and off the shelf hardware to save the environment and to save people's health.
The system block diagram below attempts to capture the major components of this PoC.
System block diagram:
This PoC has four distinct modes of operation:
1. Pan and record
2. Sentiment analysis
3. Confirm and transmit
4. Prevent and protect
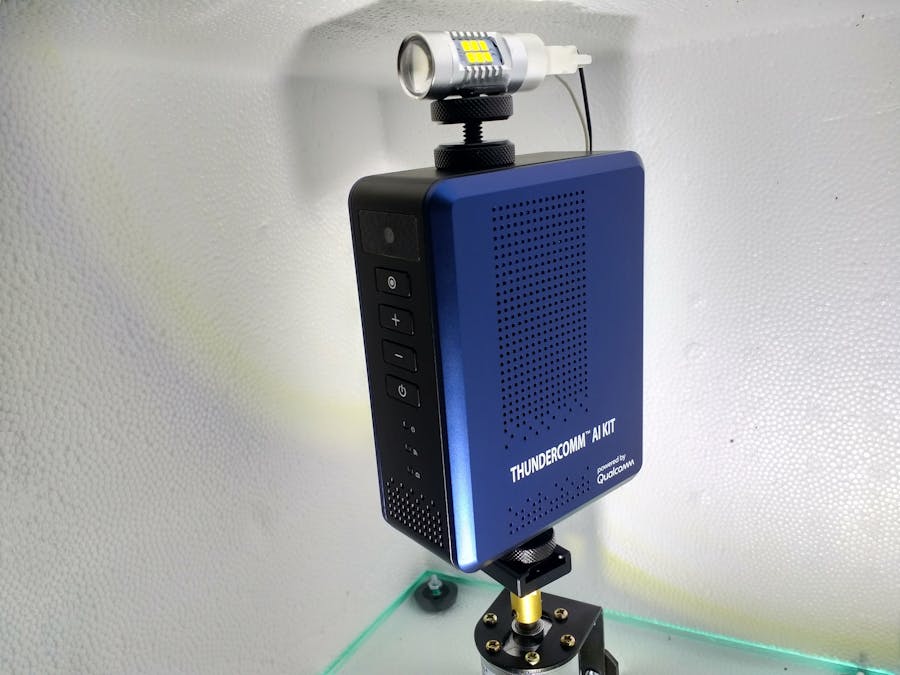
Pan and record:
The PoC is able to pan left and right. This is to enable 180 degree FoV (Field of View). A standard camera mount adapter was utilized to accomplish the physical turning of the camera. The Thundercomm hardware controls the 12V DC geared motor via the L298 motor driver and an Arduino Nano. The Arduino Nano's interface to the Thundercomm kit is through the USB emulating a tty UART connection. This is similar in may aspects to the way the ROS (Robot Operating System) connects with the main processor. From there, the an image frame is captured at each angle. The Arduino Nano only increments the angle at the request of the Thundercomm. Some of the key actions that the panning function are as follows:
a. Pan right
- Check shaft location, hall effect sensor
- Take snapshot with time-stamp
- File naming sequence
- Record one frame
- Increment by one
- Resolve to 180 degree in “right” direction
b. Pan left
- Check shaft location, hall effect sensor
- Take snapshot with time-stamp
- File naming sequence
- Record one frame
- Increment by one
- Resolve to 180 degree in “left” direction
c. Complete the record log for the right and left pan
Sentiment analysis:
The very first step was to understand how to use the Thundersoft's AI Toolkit.
http://www.45smart.com/download/aikit/Thunder_AI_Application_Development_Guidev0.2_en.pdf
There is some great information on AI in general at Qualcomm's website.
https://developer.qualcomm.com/get-started/artificial-intelligence
Android Studio was key to this project. You can find more information at this link:
https://developer.android.com/
Confirm and transmit:
A requirement in this PoC is to transfer both image and sentiment analysis data back to a centralized server. A high speed embedded cellular connection is required. Here we use the AT&T IoT Cellular kit. Connection from the Thundercomm AI hardware and the Cellular kit is through USB.
https://marketplace.att.com/products/att-iot-starter-kit-2nd-gen
Prevent and protect:
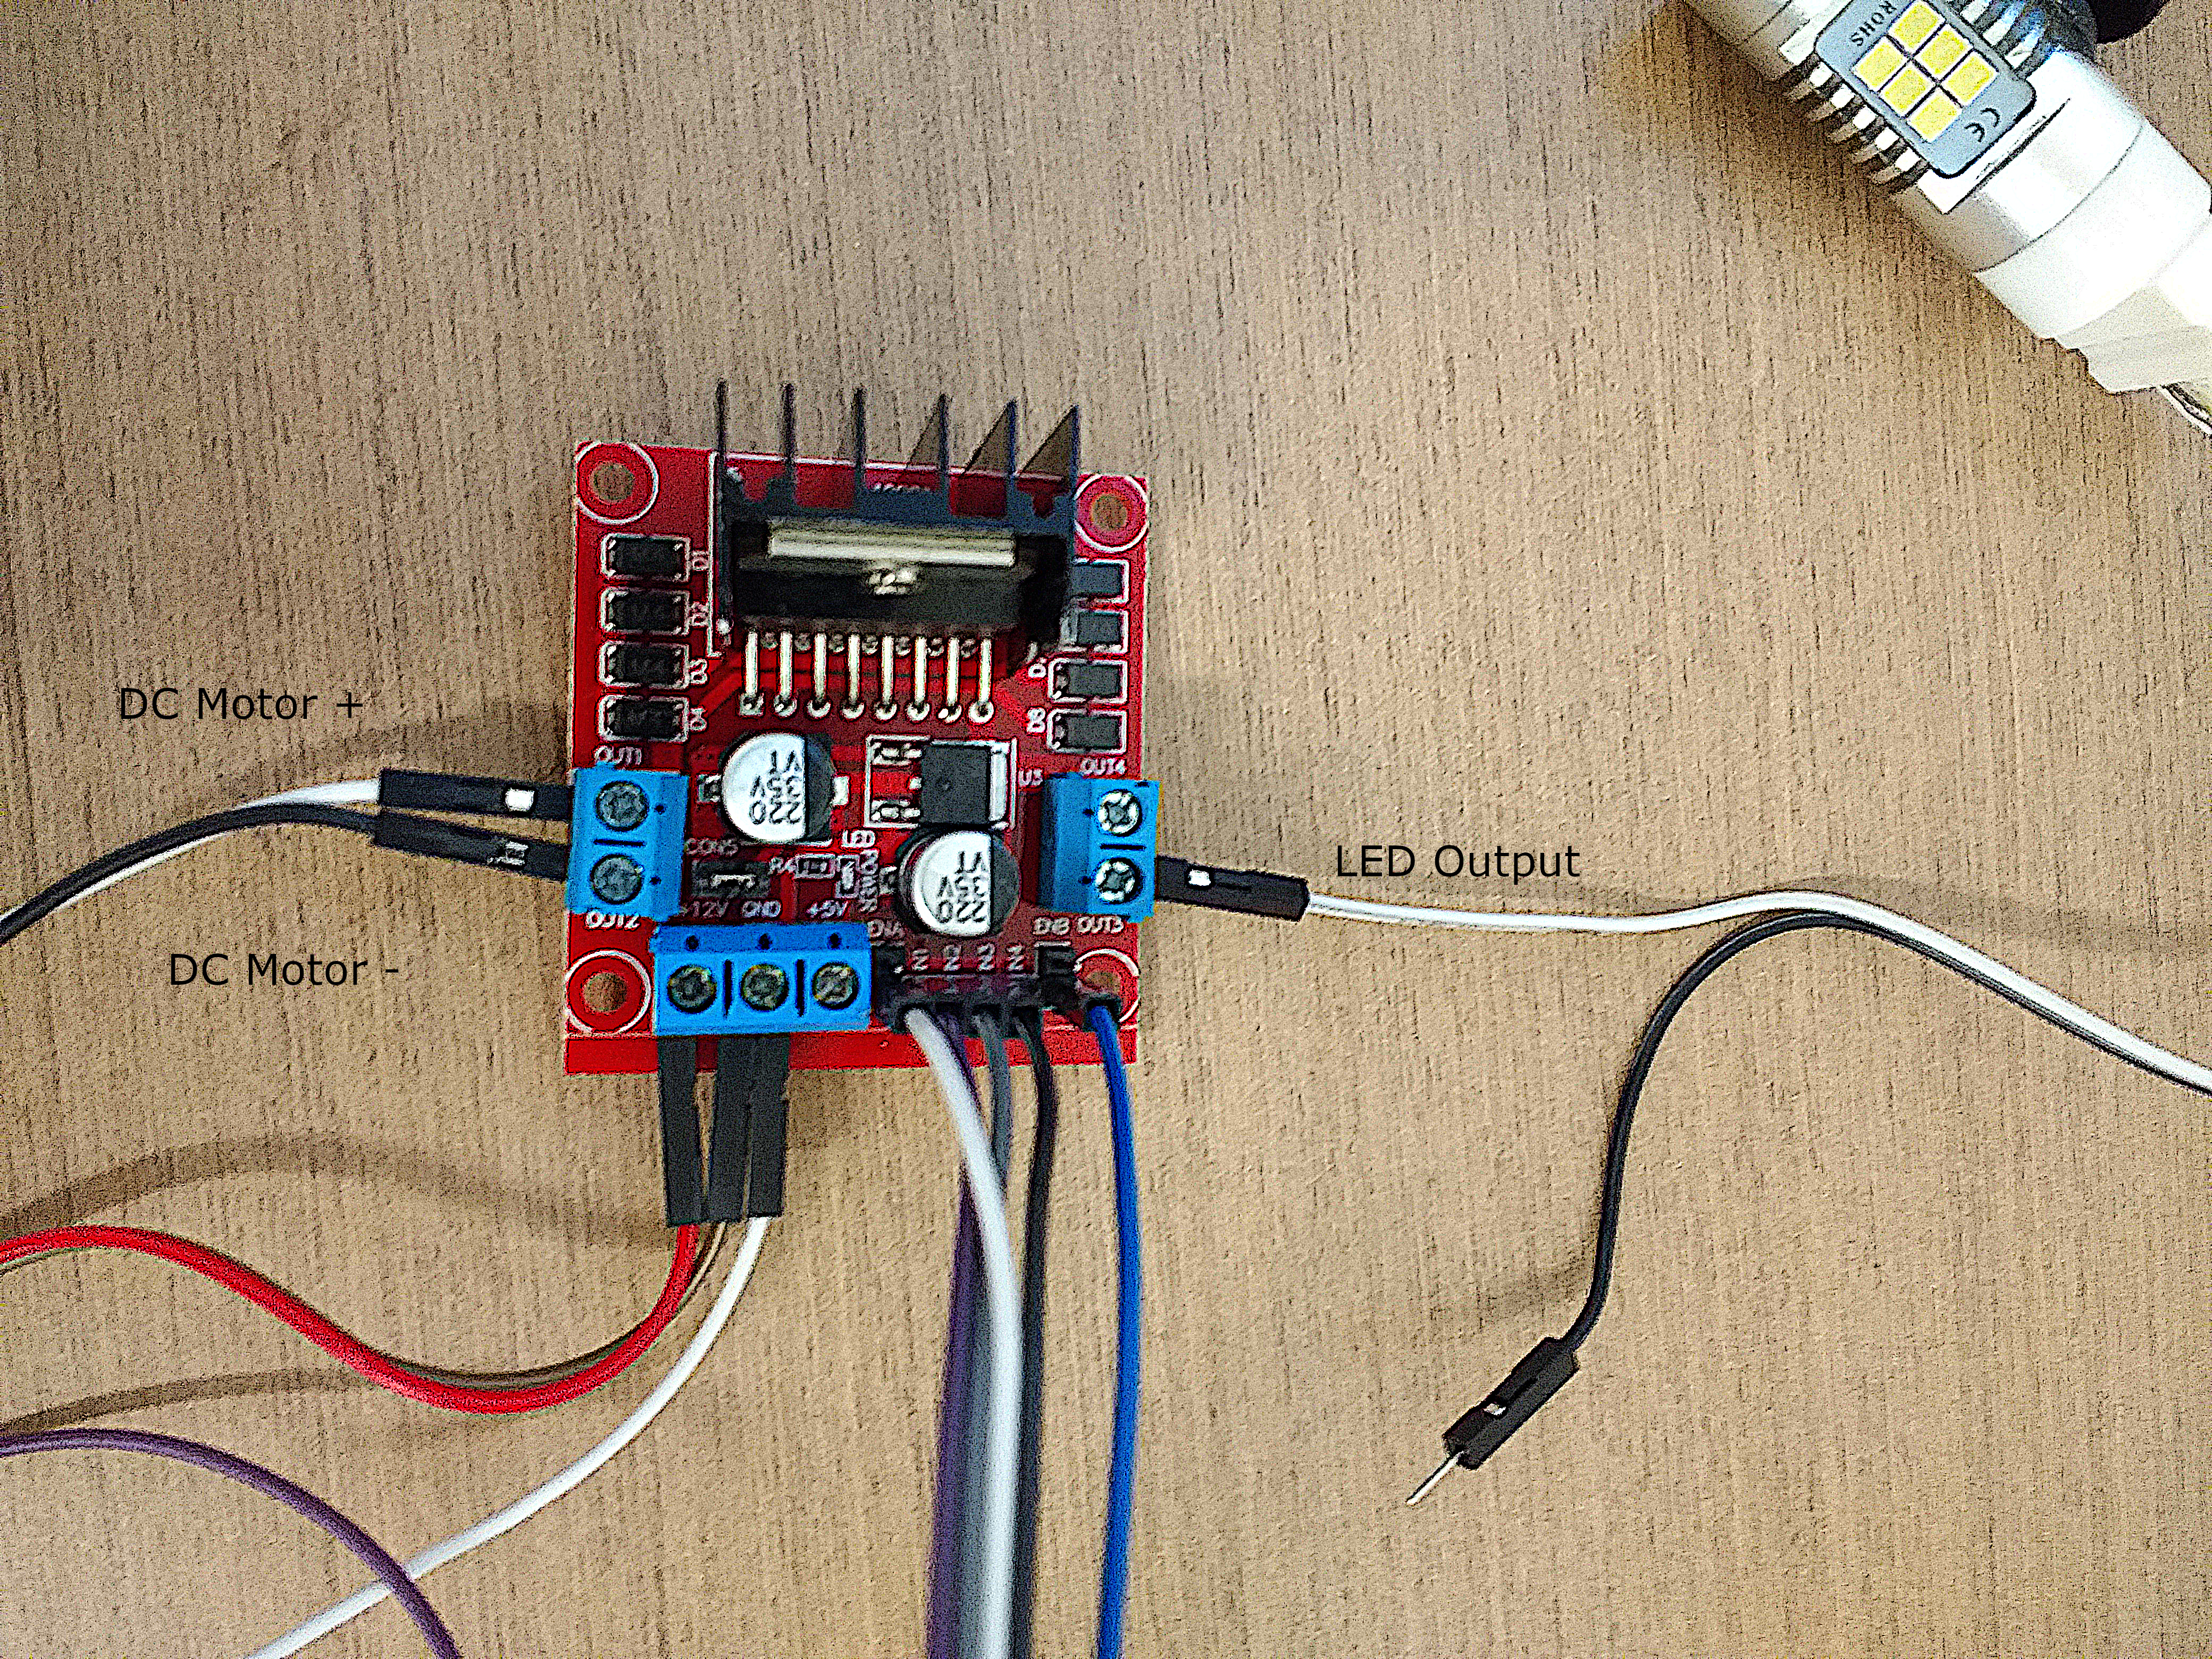
This last mode of operation that this PoC provides is to prevent and protect. While it is awesome that this PoC transmits images and data to a centralized server for reporting, another highly valuable function is to prevent the dumping of the waste all together in the first place. To accomplish this task; a high power torch is utilized. In a production product a more powerful LED torch can be used. Ideally; a > 100W LED spotlight would be a better solution. For this PoC, a LED backup light bought from Amazon was implemented. Some of the key actions for the prevent and protect function are as follows:
- Communicate via USB to the Arduino Nano via the second half of the H-bridge on the L298
- Get current ambient light value from a ambient light sensor (not shown)
- Turn the torch on with value = 2 for torch implementation
- Increment torch by +=1 to understand if there is enough light in the picture
- If not enough light, then increment by += 1
- If light value = 255, then torch is not enough, something is wrong, not enough light
- Send back diagnostic value 0x4e for error in external torch light if picture is still "dark"
A potential future add-on would be to provide audio through a Class-D amplifier to alert the suspect(s) that the authorities are on their way and images of them have been recorded and sent.
Future Work:
At heart of this PoC is the mechanism of people, vehicles, and debris detection. Currently, I'm able to detect faces fairly easily with the help of the Thundercomm AI Toolkit. However, additional work will be needed to train up a network to recognize vehicles, debris, and license plates. I will continue this project way beyond this submission date and appreciate Thundersoft for providing the software and the Thundercomm AI toolkit.

Comments