If the PIR motion sensor detects any motion it sends a notification to your mobile phone. ESP8266 ESP-01 WiFi module, PIR motion sensor and 3.3V voltage regulator were used in this project.
You can also see in this project how to build a 3.3V power station, how to upload code to the ESP-01 using the FTDI, how to programming the ESP-01 using the Arduino IDE, and create free WiFi scenarios with IFTTT.
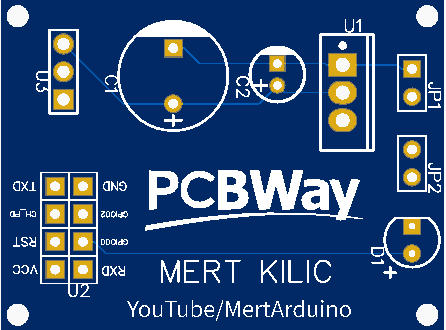
Download Gerber File & Order PCB
PCB
In this project, I have choosen PCBWay. PCBWay is the only way to make this project happen a very low cost and high quality.
You can use it to program NodeMCU DEVKIT or your own ESP8266 board. Just click flash and you can burn firmware to ESP8266. Before you doing it, GPIO0 MUST LOW.
For this project we’re going to use a free service called IFTTT that stands for If This Than That. This service is used to automate a wide variety of tasks online. If the PIR motion sensor detects any motion it sends a notification to your mobile phone.
Type in your browser https://ifttt.comand click the “Get started” button in the middle of the page. Complete the form with your details and create your account.In the wesite, Open the “My Applets” tab, press the create “New Applet” button. Click the “This” word and search for the “Webhooks” service.
Source Code:
Here’s the code that you need to upload to your ESP board. You need to change a few variables: SSID, password, API Key and Event Name.In this project, we use Wifi-Manager library. WiFiManager allows you to connect your ESP8266 to different Access Points (AP) without having to hard-code and upload new code to your board. Additionally, you can also add custom parameters and manage multiple SSID connections with the WiFiManager library.
Here’s the code that you need to upload to your ESP board. You need to change a few variables: SSID, password, API Key and Event Name. In this project, we use Wifi-Manager library. WiFiManager allows you to connect your ESP8266 to different Access Points (AP) without having to hard-code and upload new code to your board. Additionally, you can also add custom parameters and manage multiple SSID connections with the WiFiManager library.
#include <ESP8266WiFi.h>#include <DNSServer.h>#include <ESP8266WebServer.h>#include <WiFiManager.h>#define SENSORPIN 2#define LEDPIN 0// Set web server port number to 80WiFiServer server1(80);// Variable to store the HTTP request
String header;// Replace with your unique IFTTT URL resource
const char* resource="/trigger/YOUR_EVENT_NAME/with/key/YOUR_KEY";// Maker Webhooks IFTTT
const char* server="maker.ifttt.com";volatile bool sensorActivatedFlag= false;void setup(){ Serial.begin(115200); pinMode(SENSORPIN, INPUT); pinMode(LEDPIN, OUTPUT); attachInterrupt(SENSORPIN, sensorActivated, RISING); // WiFiManager
// Local intialization. Once its business is done, there is no need to keep it around
WiFiManager wifiManager; // fetches ssid and pass from eeprom and tries to connect
// if it does not connect it starts an access point with the specified name
// here "AutoConnectAP" // and goes into a blocking loop awaiting configuration
wifiManager.autoConnect(); // or use this for auto generated name ESP + ChipID
//wifiManager.autoConnect(); // if you get here you have connected to the WiFi
Serial.println("Connected."); server1.begin(); initWifi();}// Establish a Wi-Fi connection with your router
void initWifi(){ WiFiClient client= server1.available(); // Listen for incoming clients
if(client){ // If a new client connects,
Serial.println("New Client."); // print a message out in the serial port
String currentLine=""; // make a String to hold incoming data from the client
while(client.connected()){ // loop while the client's connected if (client.available()) { // if there's bytes to read from the client,
char c= client.read(); // read a byte, then Serial.write(c); // print it out the serial monitor
header+= c;if(c=='\n'){ // if the byte is a newline character
// if the current line is blank, you got two newline characters in a row.
// that's the end of the client HTTP request, so send a response: if (currentLine.length() == 0) { // HTTP headers always start with a response code (e.g. HTTP/1.1 200 OK) // and a content-type so the client knows what's coming, then a blank line:
client.println("HTTP/1.1 200 OK"); client.println("Content-type:text/html"); client.println("Connection: close"); client.println(); // Web Page Heading
client.println("<body><h1>ESP8266 Web Server</h1>"); // The HTTP response ends with another blank line
client.println(); // Break out of the while loop
break;}else{ // if you got a newline, then clear currentLine
currentLine="";}}elseif(c !='\r'){ // if you got anything else but a carriage return character,
currentLine+= c; // add it to the end of the currentLine
}}} // Clear the header variable
header=""; // Close the connection
client.stop(); Serial.println("Client disconnected."); Serial.println("");}}void sensorActivated(){ Serial.println("sensorActivated"); int pirSensor= digitalRead(SENSORPIN);if(pirSensor== HIGH){sensorActivatedFlag= true;}return;}// Make an HTTP request to the IFTTT web service
void makeIFTTTRequest(){ Serial.print("Connecting to "); Serial.print(server);sensorActivatedFlag= false; WiFiClient client; int retries=5;while(!!!client.connect(server, 80)&&(retries-- > 0)){ Serial.print(".");} Serial.println();if(!!!client.connected()){ Serial.println("Failed to connect, going back to sleep");} Serial.print("Request resource: "); Serial.println(resource); client.print(String("GET ") + resource +
" HTTP/1.1\r\n" +
"Host: " + server + "\r\n" +
"Connection: close\r\n\r\n"); int timeout=5 * 10; // 5 seconds
while(!!!client.available()&&(timeout-- > 0)){ delay(100);}if(!!!client.available()){ Serial.println("No response, going back to sleep");}while(client.available()){ Serial.write(client.read());} Serial.println("\nclosing connection"); client.stop();}void ledblink(){ digitalWrite(LEDPIN, HIGH); delay(500); digitalWrite(LEDPIN, LOW); delay(500); digitalWrite(LEDPIN, HIGH); delay(500); digitalWrite(LEDPIN, LOW); delay(500); digitalWrite(LEDPIN, HIGH); delay(500); digitalWrite(LEDPIN, LOW);}void loop(){if(sensorActivatedFlag){ makeIFTTTRequest(); ledblink();}}


Comments