


Hardware components | ||||||
 |
| × | 1 | |||
 |
| × | 1 | |||
| × | 1 | ||||
Software apps and online services | ||||||
| ||||||
| ||||||
| ||||||
Hand tools and fabrication machines | ||||||
| ||||||
This project requires a Launchpad S if your going to make it, not just a Launchpad, or a Lauchpad MK2, a Launchpad S! The developer api isn't the same for a Lauchpad(MK2) as it is for a Launchpad S.
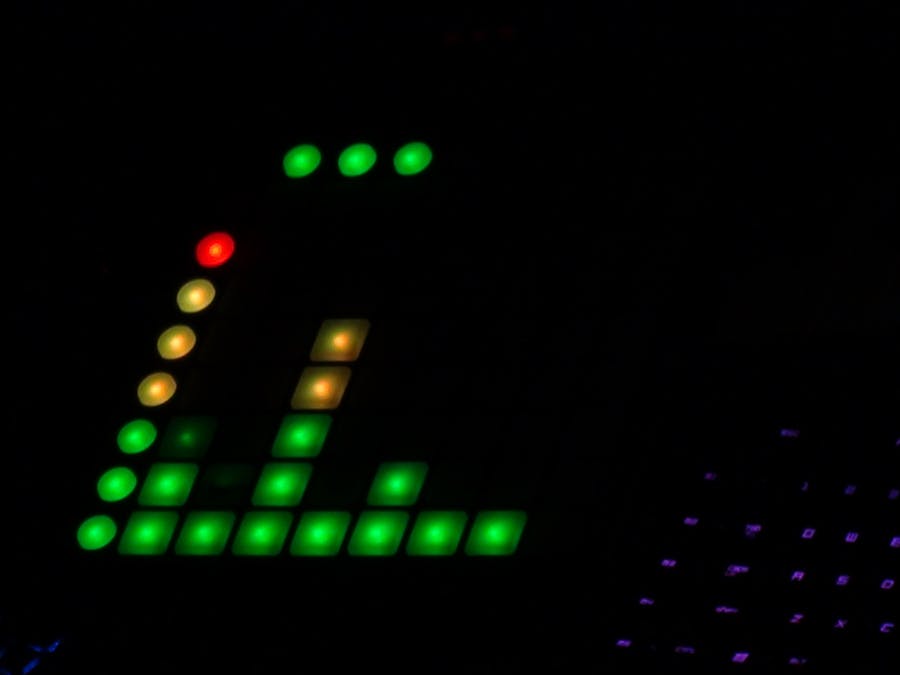
I've seen quiet a few projects around that are making Audio visualizers with an LED matrix and Arduinos, so when I was trying to thing of some fun way to re-purpose my Launchpad S that I don't use much, and as I hadn't seen anyone do anything like this with the Launchpad before, I got the idea to create an audio visualizer.
What is the LaunchpadThe Launchpad S is a 2 way MIDI controller, meaning that it sends MIDI data to the computer to control music making applications, and it also receives a special type of MIDI data called SysEx to tell it what to color the pads.
By sending the Launchpad S the SysEx commands defined in the programmers guide we can swap between 2 display buffers, set the colors for each button (Green, Yellow and Red), set colors for whole rows, create sliders, display text, and more!
Technology UsedI decided first of all to use the Intel Edison as the device to control the Launchpad S through a Node server, that way I could communicate to it from any device. After a bit of consideration, I decided to go with Processing for writing the app that sends the Edison the data to display on the Launchpad. I chose Processing for 2 reasons, one being that it would be fun to try something new, and that I've seen that it's great for making apps that interact with graphics and audio.
I specifically used Processing 2.2, as none of the examples I could find for running spectrum analysis on audio worked in Processing 3, and I didn't want to spend a ton of time figuring out why it didn't work.
amidi and SysExOnce I knew what I was going to use, I started to figure out how to send SysEx commands to the Launchpad S which is connected to the Edison using the SparkFun base block and a USB OTG cable.
I did a bunch of searching for how to send SysEx commands on Linux, but most of them where GUI solutions that wouldn't work (or run) on the Edison. Then I came across this man page for the amidi command from alsa-utils, perfect!
The amidi command is for sending SysEx/hex midi commands out to MIDI devices. This allows me to copy a commands from the Launchpad S Programmers Guide and send it out the the connect Launchpad.
Installing amidiTo install amidi, follow the guide from here to add AlexT's well-known Edison opkg repositories to your package, list, and then run
opkg install alsa-utils
First I checked that the Edison could find my Launchpad S by running "lsusb" which lists all the attached USB devices.
root@LilEddy:~# lsusb
Bus 002 Device 001: ID 1d6b:0003 Linux Foundation 3.0 root hub
Bus 001 Device 002: ID 1235:0020 Novation EMS
Bus 001 Device 001: ID 1d6b:0002 Linux Foundation 2.0 root hub
You can see that a deice for Novation is showing up, perfect! Now I ran the amidi command to list available MIDI devices.
root@LilEddy:~# amidi -l
Dir Device    Name
IO  hw:2,0,0  Launchpad S MIDI 1
From this we can see that the Launchpad is correctly connected, that it's MIDI device 2, and the the MIDI communication direction is Input and Output.
Now I went and copied the demo SysEx message for displaying the scrolling text "Hello World!". One thing to be aware of with amidd and sending SysEx/Hex commands is that the Launchpad Programmers Guide has an h after each hexadecimal to show that it's a hexadecimal, but amidi doesn't accept/use the h, so you need to remove the h from each hexadecimal in the commands you want to send.
I went ahead and executed the command, and everything worked perfectly as expected! No... not really, it wouldn't be worth writing this if I didn't run into issues.
root@LilEddy:~# amidi -S F0 00 20 29 09 7C 05 48 65 6C 6C 6F 20 02 77 6f 72 6c 64 21 F7
ALSA lib /data/jenkins_worker/workspace/edison-weekly/out/linux64/build/tmp/work/core2-32-poky-linux/alsa-lib/1.0.28-r0/alsa-lib-1.0.28/src/rawmidi/rawmidi_hw.c:233:(snd_rawmidi_hw_open) open /dev/snd/midiC0D0 failed: No such file or directory
cannot open port "default": No such file or directory
Uh oh, amidi is having trouble finding our MIDI device! Assuming that it's looking for a node at "/dev/snd/midiC0D0" from what it says in the error, I checked what nodes where available there.
root@LilEddy:~# ls /dev/snd
by-id      controlC0  controlC2  pcmC0D0c   pcmC0D1c   pcmC1D0c   seq
by-path    controlC1  midiC2D0   pcmC0D0p   pcmC0D1p   pcmC1D0p   timer
From there we can see that there is a node called "midiC2D0" but none for "midiC0D0". I'm guessing that something isn't being assigned correctly when I'm plugging in my Launchpad S, so I tried creating a symlink from "midiC0D0" to "midiC2D0".
root@LilEddy:~# ln -s /dev/snd/midiC2D0 /dev/snd/midiC0D0
Then upon running the amidi command again, we can see that it works!
root@LilEddy:~# amidi -S F0 00 20 29 09 7C 05 48 65 6C 6C 6F 20 02 77 6f 72 6c 64 21 F7
root@LilEddy:~#
Now it's not throwing any errors, and the text "Hello World!" is scrolling across the Launchpad like it's suppose to.
A note on using multiple MIDI devices: using the -p argument you can specify which MIDI port to use eg. "amidi -p hw:2 -S ..."
Setting up the Node serverI SSHed into my Edison, and created a new folder in my home folder "mkdir ~/launchpad_viz" to hold a couple shell scrips to make it easy to re-do the symlink after restarts, and a couple demo scripts that run different effects on the launchpad for testing.
Within that project folder, I created a new folder for the Node.JS script to reside in with "mkdir node", and then created a new Node project using "npm start".
I went and installed express with hosting the server, and the body-parser addon for express that's made for processing POST requests.
var express = require('express');
var app = express();
var bodyParser = require('body-parser')
Next I'm going to declare a few variables that contain JSON objects to help with speeding some of the stuff up. The first JSON object is going to hold what hexadecimals correspond with a certain color
var colors = {"off":"0C", "dim_green":"3E", "med_green":"3D", "full_green":"3C", "dim_red":"0D", "full_red":"0F", "full_orange":"2F", "full_amber":"3F", "full_yellow":"3E"}
I've also got a couple variable holding the MIDI responce code for Novation and the Launchpad S, which I may use later to verify that the port the script is using is really set to a Launchpad S.
var novation_id = "00 20 29"
var launchpad_id = "20 00"
After that I have another JSON object that holds some basic commands, most of them aren't actually used yet in the script, but will be in the future.
var commands = {"reset":"B0 00 00", "all_on": "B0 00 7F", "button_layout_1": "B0 00 01", "button_layout_2": "B0 00 02", "device_inquiry": "F0 7E 7F 06 01 F7", "empty_scroll": "F0 00 20 29 00 F7", "switch_buffers": "B0 10 "}
Next is an object holding all the buffer swapping codes, again only 2 of these are used in the script currently, but I plan to expand it in the future.
var buffer_bits = {"s":"20",    // display and write one buffer
                   "b0":"24",   // display 0 write 1
                   "b1":"21",   // display 1 write 0
                   "b0c":"34",  // display 0 copy to 1
                   "b1c":"31",  // display 1 copy to 0
                   "flash":"28" // write 0 swap every 280 ms
Now we have an array, this array holds the color hex for every square on the main Launchpad grid stringing in the upper left, going to the right, and then down to the next row. This is passed to the Launchpad S later on.
var displayGrid = ["0C","0C","0C","0C","0C","0C","0C","0C",
                   "0C","0C","0C","0C","0C","0C","0C","0C",
                   "0C","0C","0C","0C","0C","0C","0C","0C",
                   "0C","0C","0C","0C","0C","0C","0C","0C",
                   "0C","0C","0C","0C","0C","0C","0C","0C",
                   "0C","0C","0C","0C","0C","0C","0C","0C",
                   "0C","0C","0C","0C","0C","0C","0C","0C",
                   "0C","0C","0C","0C","0C","0C","0C","0C"]
Next we're going to tell Express to use the "text" mode of the body-parser plugin, but will make is so our requests come through in plain text. Then we setup a post listener that passes all the posted data to another function to be handled.
app.use( bodyParser.text());
app.post('/', function(req, res) {
    process_data(req.body);
});
Then we're going to start the server. After the server is started, we're printing out all the connected MIDI devices for debugging, resetting the Launchpad S, and then printing out that the server has started.
app.listen(3000, function () {
    run_cmd("amidi", ["-l"], function(text) { console.log (text) })
    reset_pad ()
    console.log('Example app listening on port 3000!');
})
Now to process the data, from processing we receive a string of 0s, 1s, 2s, and 3s where 0 is off, 1 is green, 2 is yellow, and 3 is red. We need to loop through that string and based off of it, generate the command to send to the launchpad.
Before we do that though, we call a command to swap the display buffers. The Launchpad S has 2 display buffers, one is always displayed while the other one is hidden and being written to. By swapping the buffers before we write new data, we remove the need to call the command to clear the Lanuchpad S, which would result in the pads flickering every time they updated.
function process_data (data){
    switch_buffers();
    var splitData = data.split(" ");
    var arrayLength = splitData.length;
    for (var i = 0; i < arrayLength; i++) {
        if(parseInt(splitData[i]) == 0)
            displayGrid[i] = colors["off"]
        if(parseInt(splitData[i]) == 1)
            displayGrid[i] = colors["full_green"]
        if(parseInt(splitData[i]) == 2)
            displayGrid[i] = colors["full_yellow"]
        if(parseInt(splitData[i]) == 3)
            displayGrid[i] = colors["full_red"]
    }
     push_grid ();
}
Now for the function that swaps the buffers, we simply store the currently displayed buffer as a 1 or 0 in an integer, and then when the function is called we swap to the opposite buffer.
One thing you might notice with the port argument I'm passing, is that there is no space between the argument (p) and the variable (hw:2), this is because I discovered that if you do put in a space for some reason it doesn't work.
var buffer = 0
function switch_buffers(){
    if(buffer = 0)
        buffer = 1
    else if (buffer = 1)
        buffer = 0
    run_cmd("amidi", ["-phw:2", "-S "+commands["switch_buffers"]+buffer_bits["b"+buffer]])
}
Next is the reset function that is called when the server starts. This simply resets the Launchpad's buffers so now LEDs are lit, and it resets the mode arrangement to the default (important if your using the Launchpad in some DAWs)
function reset_pad (){
    run_cmd("amidi", ["-phw:2", "-S "+commands["reset"]])
}
After the reset function, is the function that actually turns the processed colors into the command which we pass to the Launchpad S. All we need to do is to generate a string from the grid array with a space in-between each colors, and add 92 at the beginning which is basically a command that can set the whole Launchpad S to the given colors in one command.
function push_grid (){
    var gridCommand = "92 ";
    var arrayLength = displayGrid.length;
    for (var i = 0; i < arrayLength; i++) {
        gridCommand = gridCommand + displayGrid[i] + " ";
    }
    run_cmd("amidi", ["-S " + gridCommand])
    if(logging)
       console.log("amidi -S " + gridCommand);
}
Finally we have the most important function, the function that executes all our commands. I'm not going to go into details about how this works, as it should be pretty self-explanatory, but if you want to learn more about it, read the Node.JS documentation on it.
function run_cmd(cmd, args, callBack) {
    var spawn = require('child_process').spawn;
    var child = spawn(cmd, args);
    var resp = "";
     child.stdout.on('data', function (buffer) { resp += buffer.toString() });
     child.stderr.on('data', function (buffer) { resp += buffer.toString() });
     if(typeof callBack !== 'undefined')
         child.stdout.on('end', function() { callBack (resp) });
     if(logging){
        child.on('close', function (code){
          console.log('child process exited with code ' + code);
        });
        child.on('error', function (error){
          console.log('child process errored ' + error);
        });
    }
}
Now that the Node.JS app for the Edison is ready, we can start writing the code that will take the audio data from the computer and send it to the server on the Edison.
Start up Processing 2.2.1, and create a new sketch.
First of all, our Java imports. We're using Minim to get the audio input, and to run the spectrum analytics on the audio input. We will also be using OpenGL to draw a window that will visualize what is being set to the Launchpad S.
import ddf.minim.*;
import ddf.minim.analysis.*;
import processing.opengl.*;
import processing.net.*;
Now to declare our global variables, the most important one that you'll need to change here is the url. This should be the IP Address of your Edison on your internet network. This allows Processing to connect to the Node server running on the Edison.
If you change the showGraphics variable to false, then it won't draw the window visualizing the audio data.
The pads variable holds the pad colors data that is sent to the Edison, it's like the display_grid variable in the Edison code, except this one is a jagged array.
AudioInput stream;
FFT fft;

String url = "192.168.0.107:3000";
Client myClient;

boolean showGraphics = true;

int windowSize = 200;
int GridSize = 8;
int blockSize = windowSize / GridSize;

color red = color(255, 0, 0);
color green = color(0, 255, 0);
color yellow = color(255, 255, 0);

int[][] pads = {{ 0, 0, 0, 0, 0, 0, 0, 0 },
                { 0, 0, 0, 0, 0, 0, 0, 0 },
                { 0, 0, 0, 0, 0, 0, 0, 0 },
                { 0, 0, 0, 0, 0, 0, 0, 0 },
                { 0, 0, 0, 0, 0, 0, 0, 0 },
                { 0, 0, 0, 0, 0, 0, 0, 0 },
                { 0, 0, 0, 0, 0, 0, 0, 0 },
                { 0, 0, 0, 0, 0, 0, 0, 0 }};
In our setup function we create the OpenGL window, initizalize Minim and tell it to start monitoring the line in, and lastly we connect to the Node server.
void setup(){
  if(showGraphics){
    size(windowSize,windowSize);
    colorMode(HSB, width, 100, width);
    noStroke();
    background(100,100,100);
  }
  Minim minim  = new Minim(this);
  stream = minim.getLineIn(Minim.STEREO);
  fft = new FFT(stream.bufferSize(), stream.sampleRate());
  println("Avaliable Spectrum Size: " + fft.specSize());
  myClient = new Client(this, "192.168.0.107", 3000);
}
Now in the draw function, firstly we reset the array that holds our pad colors so it's blank, and then we tell Minim to get the latest fft spectrum band info for that frame, then we populate the pads with that data, and draw some squares in the OpenGL window to visualize the data on the computer. The for loops and the rest of the function should be pretty self-explanatory.
Also note the 50 millisecond delay, you can run the program without a delay, but the lights flash way to fast to look pleasing, and if we send data too fast to the Edison, it can get backed up and fall out of sun with the audio.
void draw(){
   pads = new int[][] {{ 0, 0, 0, 0, 0, 0, 0, 0 },
            { 0, 0, 0, 0, 0, 0, 0, 0 },
            { 0, 0, 0, 0, 0, 0, 0, 0 },
            { 0, 0, 0, 0, 0, 0, 0, 0 },
            { 0, 0, 0, 0, 0, 0, 0, 0 },
            { 0, 0, 0, 0, 0, 0, 0, 0 },
            { 0, 0, 0, 0, 0, 0, 0, 0 },
            { 0, 0, 0, 0, 0, 0, 0, 0 }};
 if(showGraphics){
   background(100, 100, 100);
  }
  fft.forward(stream.mix);
  pushMatrix();
  for(int i = 0; i < GridSize; i=i+1)
  {
    int barHeight = Math.round(fft.getBand(i*10)*4)/8;
    if(barHeight > GridSize){
      barHeight = GridSize;
    }
    for(int i2 = 0; i2 < barHeight; i2=i2+1)
    {
      int barX = i * blockSize;
      //println(barHeight);
      if(i2 > 5){
        fill(red);
        pads[i][i2] = 3;
      }else if(i2 > 2){
        fill(yellow);
        pads[i][i2] = 2;
      }else{
        fill(green);
        pads[i][i2] = 1;
      }
      rect(barX, (height-(blockSize*i2))-blockSize, blockSize, blockSize);
    }
  }
  popMatrix();
  sendServerData();
  delay(80);
}
Now we'll do the stop function, this is ran when your Processing app is stopped. For this we'll simply close the audio stream reader, disconnect the client from the server, and shut down the app.
 void stop(){
  stream.close();
  myClient.stop();
  super.stop();
}
The next function just gets all the color data from the array and makes the space separated string that is sent to the server.
void sendServerData (){
  String padData = "";
  for(int[] ia :  pads){
    for(int i :  ia){
      padData = padData + Integer.toString(i) + " ";
    }
  }
  sendToServer(padData);
}
The last function is the most important, it's the one that actually sends the data to the server.
I probably spent the most time on this one, wondering why my data wasn't being correctly sent to the server. After awhile I realized that it needed the content-length header to correctly send all the data.
void sendToServer(String s){
  myClient.write("POST / HTTP/1.1\n");
  myClient.write("Host: 192.168.0.107:3000\n");
  myClient.write("Cache-Control: no-cache\n");
  myClient.write("Content-Type: text/plain\n");
  myClient.write("content-length: " + s.length() + "\n");
  myClient.write("\n");
  myClient.write(s);
  myClient.write("\n\n");
}
Now to run the visualizer all the need to do is to first start the Node server but running "node ." in the same folder as the index.js file, and then press the play button in Processing.
Now by default Minim can only get audio from a microphone/recording device. So by default the visualizer will only show audio from your microphone, but what fun is that? we wanna pump some music through it!
Audio RoutingTo get music and audio playing from our computer, we have to use an internal audio cable/router. What this basically does is it creates a "fake" microphone and speaker device that we can then use as an input into Minim/Processing.
My personal favorite virtual audio cable app is Voice Meeter, It's very user friendly, and is pretty easy to use.
After installing Voice Meeter, you'll need to restart your computer. "Why?" you'll say, "I thought this was 2016! Why would I need to restart my computer??", we'll it's because for Windows to properly setup the virtual audio devices like any other device driver you've installed, it needs a restart.
After you've restarted, you'll need to right click on the little speaker icon in your taskbar, and click on "Playback Devices". Select "VoiceMeeter Output" and hit "Set Default at the bottom", and then at the top of the window click on the "Recording" tab and do the same with "VoiceMeeter Input".
Now open up Voice Meeter, and in the upper right click on the "A1" next to "HARDWARE OUT", and select your speakers or headphones you normally use.
Now if you start the Processing app, it will set VoiceMeeter Input as the device it's listening to, and all your sound will be directed it to, as well as your speakers or headphones like normal.
AfterthoughtsIs this the best way to do this? Definitely not. If there is over 20-30 milliseconds of latency between the Edison and the main computer playing the audio, then you'll notice a delay, and the packets from Processing will slowly start to pile up on the Edison.
This was the quickest way I could figure out to do this, as I was only able to find easy info on how to send SysEx messages from Linux. I plan on redoing everything in the near-future using either Serial data to send the colors, or maybe even having an audio-in jack attached to the Edison.
ErrorsRarely Node throws errors like this one:
Error: spawn EMFILE
    at errnoException (child_process.js:1011:11)
    at ChildProcess.spawn (child_process.js:958:11)
    at exports.spawn (child_process.js:746:9)
    at run_cmd (/home/root/launchpad_viz/node/index.js:117:17)
    at switch_buffers (/home/root/launchpad_viz/node/index.js:96:7)
    at process_data (/home/root/launchpad_viz/node/index.js:72:5)
    at arrayLength (/home/root/launchpad_viz/node/index.js:61:5)
    at Layer.handle [as handle_request] (/home/root/launchpad_viz/node/node_modules/express/lib/router/layer.js:95:5)
    at next (/home/root/launchpad_viz/node/node_modules/express/lib/router/route.js:131:13)
    at Route.dispatch (/home/root/launchpad_viz/node/node_modules/express/lib/router/route.js:112:3)
    at Layer.handle [as handle_request] (/home/root/launchpad_viz/node/node_modules/express/lib/router/layer.js:95:5)
I haven't been able to figure out where they come from, I'm guessing they might be from how Node executes the amidi shell commands. After it throws these errors it seems that the script starts to slow down, causing a very noticeable latency.
To get it running again, just hit Ctrl+C to stop to server, and then run "node ." to start it. After doing that you need to stop and start the Processing app again.
Thanks for reading! I'll be surprised if anyone actually reads this far :)

_3u05Tpwasz.png?auto=compress%2Cformat&w=40&h=40&fit=fillmax&bg=fff&dpr=2)
Comments