


Hardware components | ||||||
_ztBMuBhMHo.jpg?auto=compress%2Cformat&w=48&h=48&fit=fill&bg=ffffff) |
| × | 1 | |||
 |
| × | 1 | |||
 |
| × | 1 | |||
 |
| × | 1 | |||
| × | 1 | ||||
Software apps and online services | ||||||
 |
| |||||
Hand tools and fabrication machines | ||||||
| ||||||
| ||||||
Looking for a fun addition to your Christmas decor this year? Try making these easy mason jar lights that can be controlled with the push of a button.
The Mason JarWhat you will need:
- Mason Jar with lid
- Micro LED string lights
- Wired Wide (1.5 inch) Ribbon
- Non-wired ribbon
Instructions:
- Test your LED lights to make sure they work.
- Cut the wired ribbon 10-12 inches longer than your LED string (I cut mine about 60 inches long).
- Wrap one end of your wired ribbon to the end of your LED string.
- Loosely wrap your ribbon around the string until you reach the last LED light.
- Wrap the LED string in a large coil and place in the mason jar, leaving the end of the string and battery pack outside of the jar. Place the lid on the jar making sure the battery pack is in the back.
- Cut the non-wired ribbon 24 inches long. Wrap it around the neck of the jar and tie a bow.
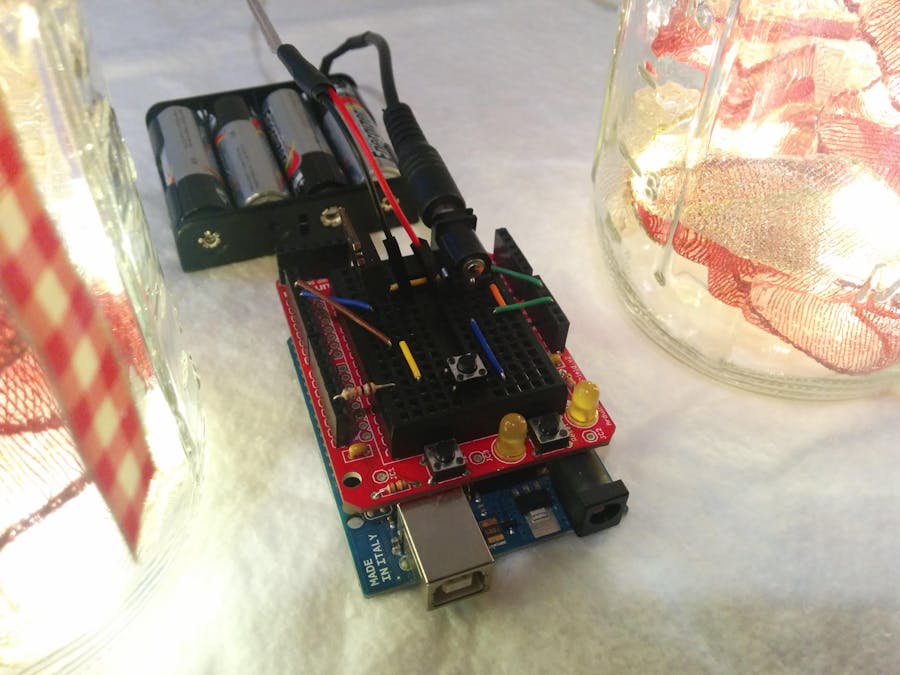
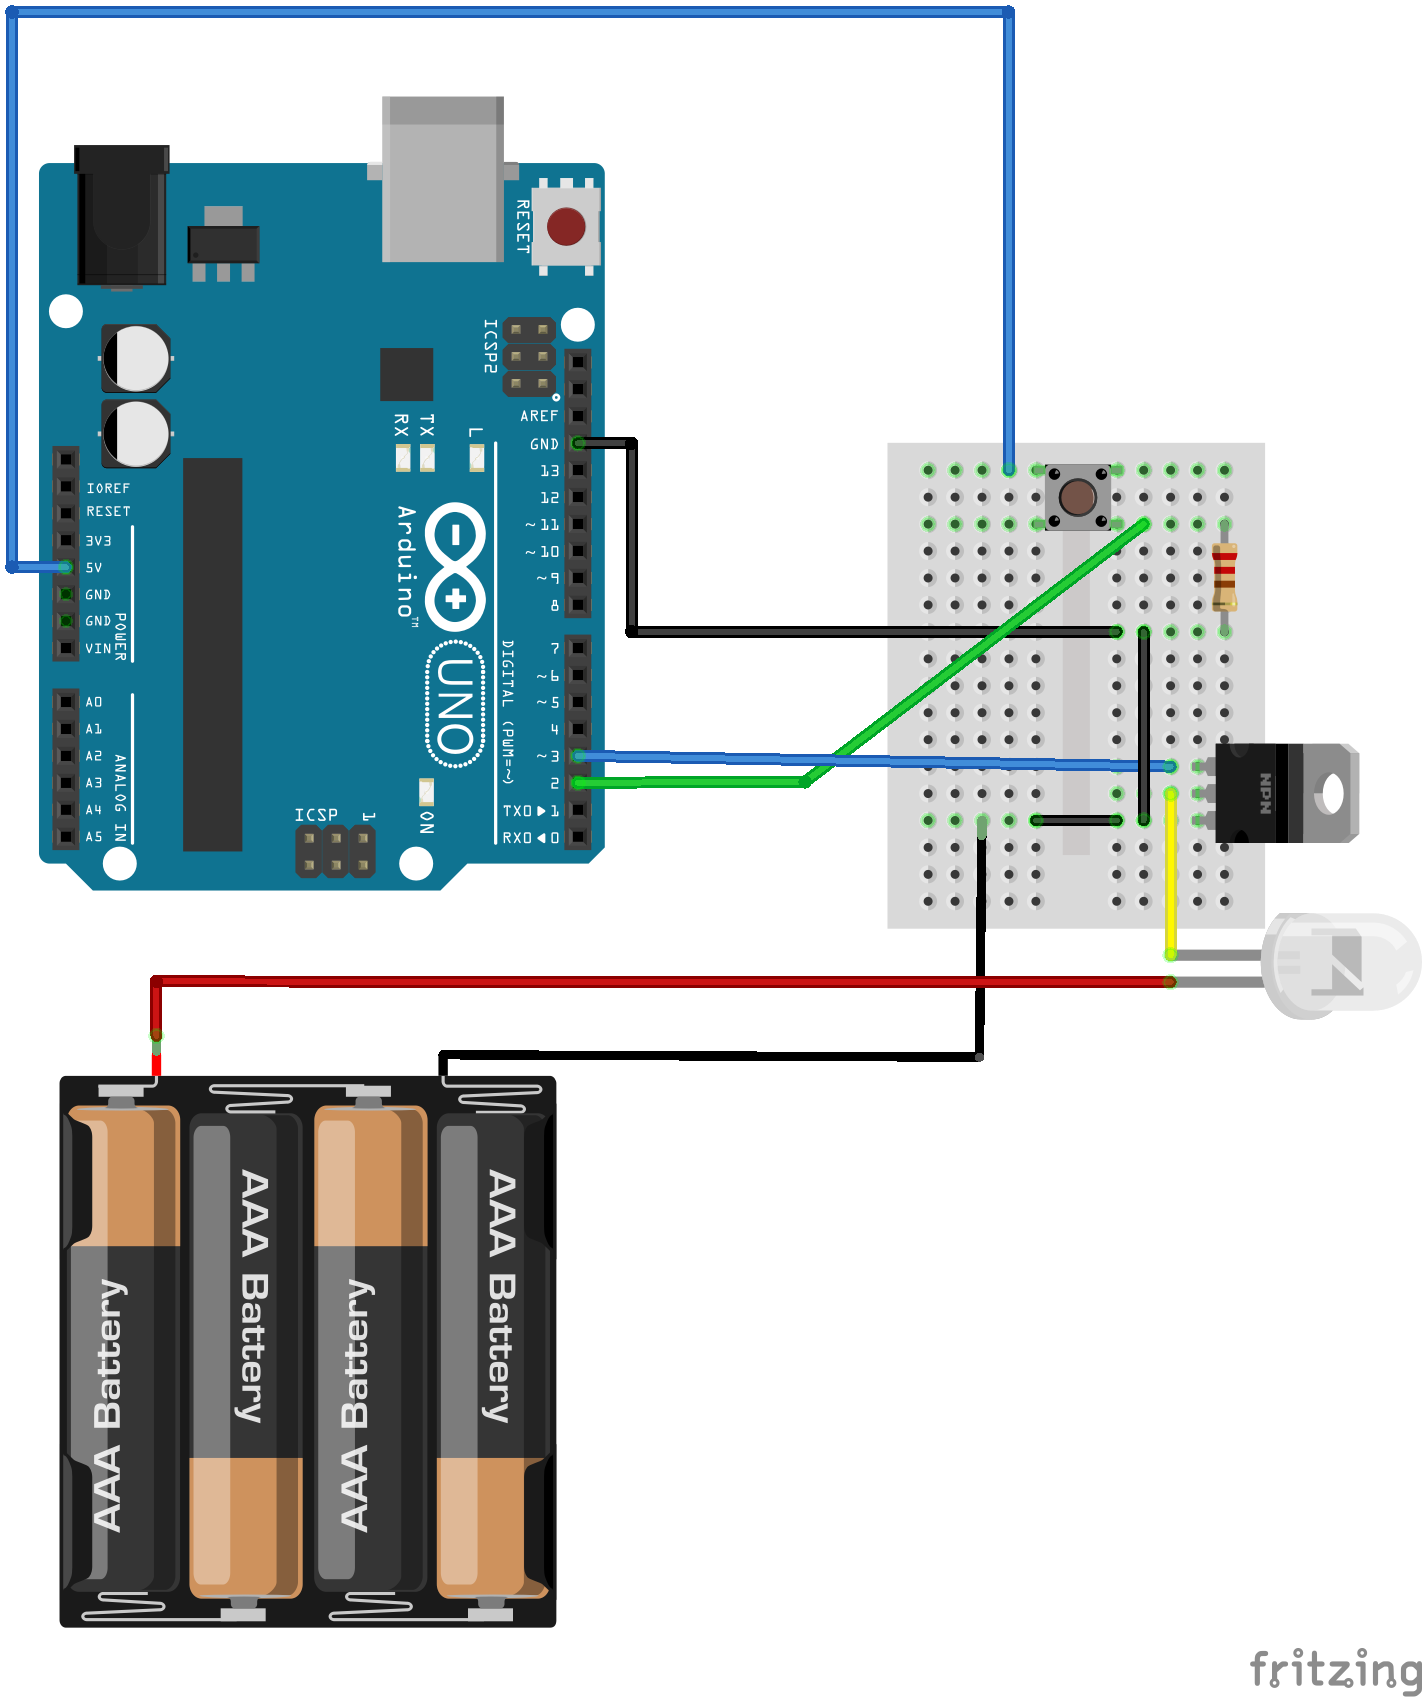
The Arduino's digital I/O pins are not powerful enough to power the LED string, so I used a MOSFET, as shown below, to power the string.
I wanted five light modes for this project (off, low, medium, high, and flicker) and I wanted to change modes by pressing a button. I used the analogWrite() function to control the LED brightness and pinMode() and digitalRead() to detect button presses.
I start by reading the button presses. If the button is pressed, I increment the count by one. Once the count reaches 5 I reset the count to zero. I use an if...else statement to set the light intensity based on the count value. When count is 1 the light is set to low, when count is 2 the light is set to medium, and so on.
For the flicker I use high and medium intensity light with a small delay (40 ms) between each intensity.
I ran into an issue when running my original code because the code ran so fast that it would read several button presses each time I hit the button. Even though I pressed the button quickly, I was still too slow and the code read the button value several times before the button was released.
I added a half second delay at the end of the loop, which helped, but caused another problem. Now, if I pressed the button during the delay, the button press wouldn't work. I had to press the button multiple times, or hold the button until the delay was over.
To fix the problem I got rid of the delay and added an AND Boolean operator to increment the count only when the previous button state was 0 AND the current button state was 1. Check out the fully working source code below.
Source Codeint buttonPin = 2;
int led = 3;
int buttonState = 0;
int count = 0;
int preButtonState = 0;
int flickerDelay = 40;
void setup() {
pinMode(led, OUTPUT);
pinMode(buttonPin, INPUT);
analogWrite(led, 0);
}
void loop() {
preButtonState = buttonState;
buttonState = digitalRead(buttonPin);
if (preButtonState == 0 && buttonState == 1)
{
count = count+1;
if (count == 5)
{
count = 0;
}
}
if (count == 0)
{
analogWrite(led, 0);
}
else if (count == 1)
{
analogWrite(led, 77);
}
else if (count == 2)
{
analogWrite(led, 153);
}
else if (count == 3)
{
analogWrite(led, 255);
}
else if (count == 4)
{
analogWrite(led, 153);
delay(flickerDelay);
analogWrite(led, 255);
delay(flickerDelay);
}
}


_3u05Tpwasz.png?auto=compress%2Cformat&w=40&h=40&fit=fillmax&bg=fff&dpr=2)
Comments