


First I made a mount by gluing pallet boards together but you can use any kind of timber or sheet material such as plywood, you could even cut old tabletops to shape and use those.
The most important thing is to make sure the surface you want to put the image on is perfectly flat. Before gluing my boards I used a belt sander with 120 grit paper on them to get rid of all the old weathered top layer of wood. After they were glued and had dried I used a palm sander with 180 grit paper before progressively hand sanding up to 600 grit. I also used the belt sander to round off the corners and sharp edges though you could use a router table for this if you have access to one. What was most important is all the sanding and shaping is done before you start the transfer.
Once you are happy with your wood mount you need to make an image. Any photo will do in black or white (I find black and white most effective for a rustic sepia feel) to which you need to open in an photo editing program, I use GIMP because it is powerful and free. When you apply the image to the wood it will be a mirror image so you need to mirror the original image in your software, you can also apply a soft border and noise like I did in the video though this is not necessary, it depends on the look you are going for.
When you print out your picture it needs to be with a laser printer. Make sure your picture is scaled correctly to cover the whole surface of your mount.
Next you need to give your wood a good coating of Mod Podge which you will find in any craft store. You want an even coat covering the entire wood surface, you want it thick enough for the paper you printed the image on to stick firmly but not too thick that it oozes out of the sides. Use your judgement but also work fast as it dries quite quickly.
Then line up your image face down on the mount and stick it down and smooth out all the bubbles and air pockets, it needs to be perfectly flat. Also you must have your alignment exact here as you will not be able to change it once you stick down. You might want to line up the image first and hold it in place with a piece of masking tape before applying the Mod Podge.
The Mod Podge needs a good 8 hours to go off so go away and do something else, maybe pick it up tomorrow.
Once the Mod Podge is dry you need to remove the paper with water and your fingers. Alternate between a gentle circular rubbing motion and a rolling motion and the paper will start to come away. Take your time, keep reapplying water and whatever you do don't rush. If you go too quickly you will start losing chunks of the transferred ink. Once you stop seeing bits of white coming away when you rub you are finished.
Next add another layer of Mod Podge on top of the image to protect it. Allow to dry before adding picture wire or a stand to the back.
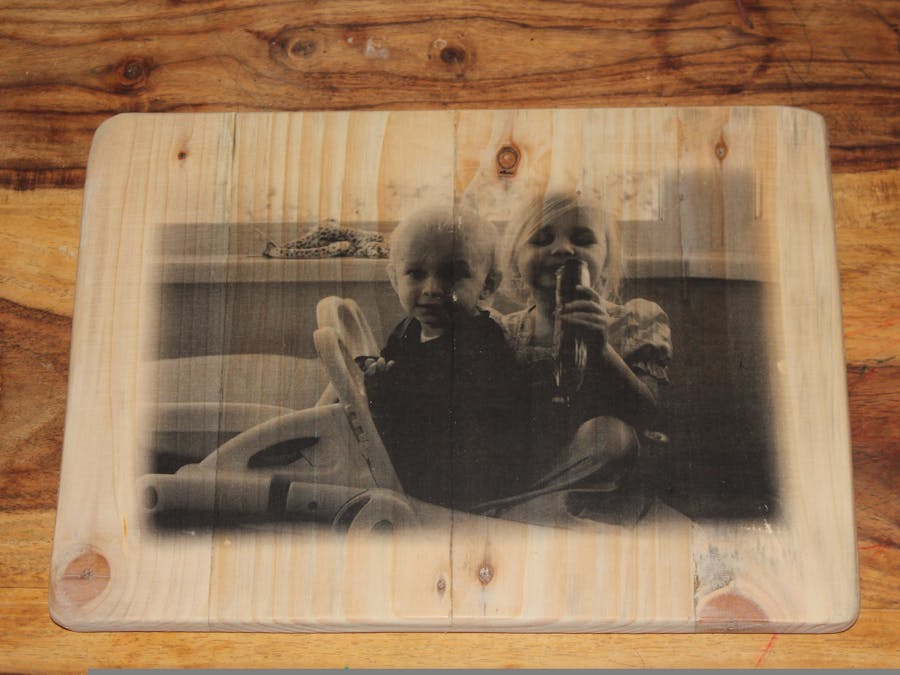
Congratulations, you are finished! If you would like to see the process in a bit more detail then please have a look at the video link above in which I demonstrate this build step by step. Alternately if you don't feel up to the challenge perhaps I could make one for you?
Finally please consider supporting me on Patreon. Even when you build from salvaged materials there are always parts you need to buy to complete projects like this, not to mention tools, heat, light, power etc. By sponsoring me you will help me continue to create content like this, so if you enjoyed reading this project and watching the video I would really appreciate your patronage.
https://www.patreon.com/jpsworkshop
Thanks for reading

Comments