


Hardware components | ||||||
 |
| × | 1 | |||
| × | 1 | ||||
 |
| × | 1 | |||
Software apps and online services | ||||||
| ||||||
This project was done for my MEGR-3171 Instrumentation class at UNC Charlotte. I decided to make a heartbeat monitor that shows when a heartbeat is present. The sensor uses an infrared LED and a phototransistor to detect the pulse at the finger. The phototransistor is affected by pressure so constant pressure was required. Maintaining a constant pressure was one of the difficult parts because if the pressure is changing then the output values will change giving an unstable graph. To counter this I simply just froze my other finger against the back end of the phototransitor and avoided moving my fingers.
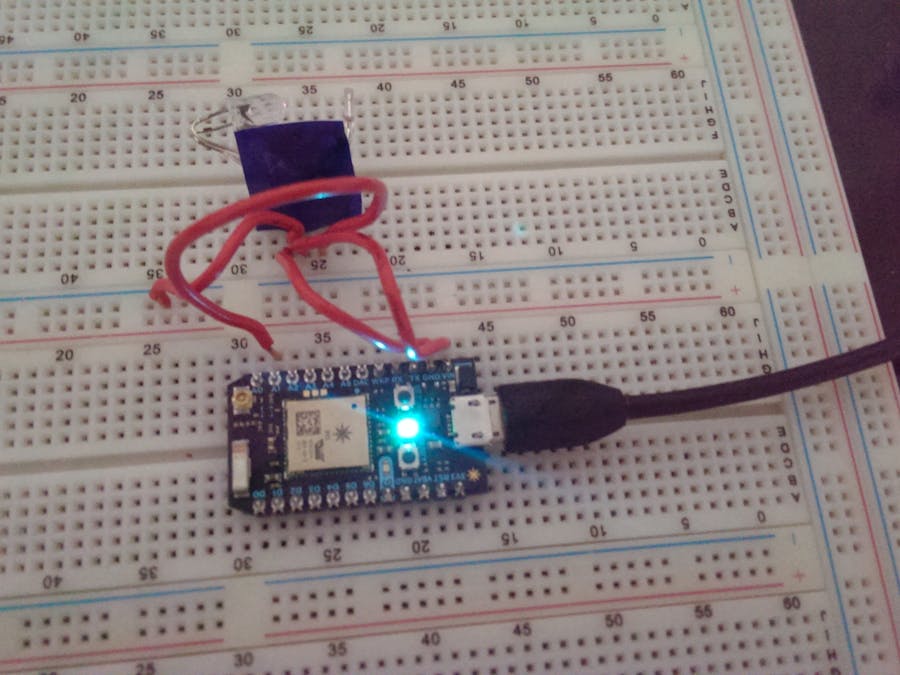
Due to the use of an infrared LED I had to make sure it was actually working since its invisible to the eye. To see the light I simply looked at the LED through my camera as shown below in figure 1.
As you can seen in figure 1 there is light present on my finger meaning that it's turned on as it should be. In addition to making sure it turns on, I had to position the infrared LED so that most of the light hits the photransistor. Using the same method as mentioned previously, I adjusted the light while looking at it through the camera on my phone.
Once everything was setup properly and the code was functional, next was to get the data to be sent over the internet to a graph on my phone. For this project I used the blynk app which took me a bit to figure out. In the particle build, there is a code in the library that allows you to connect a project in the blynk app to your photon. Once this was done I created a graph and set it up to get data from pin A0 of the photon. After everything was done the graphs shown below were created.
As can be seen in Figure 2 and 3 the heartbeat monitor works (more or less) by giving a flat line when there is no finger present and then a peak at each heartbeat that occurs. I also tested to make sure that I was getting a proper heartbeat by checking my pulse and it seemed to be pretty accurate.
I was slightly dissatisfied with this sensor due to its inaccuracy and the amount of noise that occurs. For a future project I definitely plan on getting a better sensor and setting up an op-amp configuration to clean up the noise. Additionally, it proved rather difficult for me to get a bpm from this sensor due to my lack of programming knowledge.
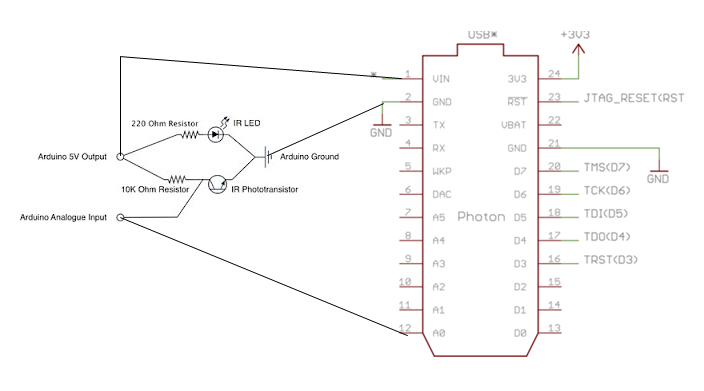
Heartbeat Circuit Diagram


Comments