


Hardware components | ||||||
 |
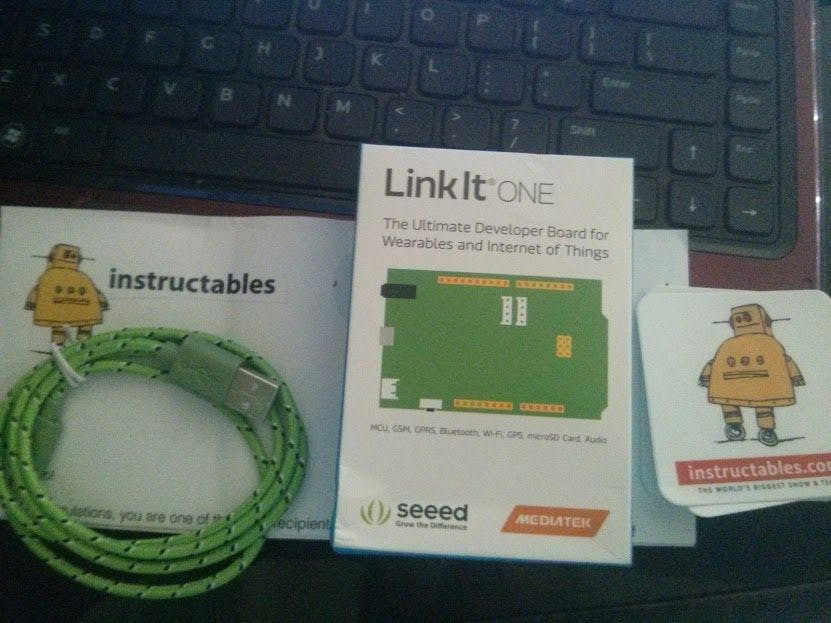
| × | 1 | |||
 |
| × | 1 | |||
Linkit one is an arduino compatible board made from seeed studio and based on mediatek ARM chip. The goal of this board is to make wearable and IoT project easier to the makers. Thingspeak is an IoT platform that has been widely use by Arduino user to make their IoT project sent to the cloud. This tutorial will explain on how to connect these two things to make any other IoT project easily connected to the Cloud.
Step 1: Get Your KitsMaterials needed for this tutorial is:
- Linkit One Board
- Micro USB Cable
- Breadboard
- Few Jumpers Cable
- 1k Resistor
- LDR sensor
In this tutorial an LDR sensor will be used to read Analog Data but any sensor with analog data will do just fine. LDR was chose because it is the cheapest and simple sensor on the market right now.
LDR is a Light Dependent Resistor, this sensor could read the amount of light that the sensor receive and later the data could translated into digital data via Linkit One board.
There's an unboxing video attached but it's in Indonesian (sorry).
Step 2: Getting Started with SoftwareLinkit One
In order to code with the Linkit One, Arduino IDE need to be installed first then Linkit One Library needs to be added.
Here are the full instruction on how to install the software.
https://labs.mediatek.com/site/global/developer_tools/mediatek_linkit/get-started/index.gsp
Or this is instructables made by Light Bug has more clear instruction on installing the device software.
http://www.instructables.com/id/Getting-Started-with-LinkIt-One-LEDs/
Thingspeak
Open:
Then create a new ID, after new ID is complete. Click "channel" and then make new channel. Just enter the name Box with "LDR sensor" then save it.
when still in the channel page, click API keys. And then save the Write API Keys to notepad. It will be used later for the next step.
Step 3: Setting the HardwareThe linkit one board comes with 3 antenna. This tutorial will use wifi connectivity to send the data so the wifi data need to be attach to middle antenna port.
take 3 Jumper Wires and set the LDR and 1k Resistor just like in the picture. The Analog Pin A0 will be used to read the sensor data.
Step 4: The CodeThe code is made by combining the LWIFI example and the sample code from thingspeak.
On the WriteApiKey Variable write the API that has been made/save from the notepad at step 2.
Verify the code and upload it.
/*  WiFi Web Server A simple web server that a repeated counter Change the macro WIFI_AP, WIFI_PASSWORD and WIFI_AUTH accordingly. created 13 July 2010
by dlf (Metodo2 srl)
modified 31 May 2012
by Tom Igoe
modified 20 Aug 2014
by MediaTek Inc.Thingspeak codeCreated: October 17, 2011 by Hans Scharler (http://www.nothans.com)
*/
#include <LTask.h>
#include <LWiFi.h>
#include <LWiFiServer.h>#include <LWiFiClient.h>#define WIFI_AP "YourWiFiName"
#define WIFI_PASSWORD "WiFi Password"
#define WIFI_AUTH LWIFI_WPA  // choose from LWIFI_OPEN, LWIFI_WPA, or LWIFI_WEP according to your WiFi AP configuration// ThingSpeak Settings
char thingSpeakAddress[] = "api.thingspeak.com";
String writeAPIKey = "Your API Key";
const int updateThingSpeakInterval = 16 * 1000;      // Time interval in milliseconds to update ThingSpeak (number of seconds * 1000 = interval)long lastConnectionTime = 0;
boolean lastConnected = false;
int failedCounter = 0;LWiFiClient client; void setup()
{
LWiFi.begin();
Serial.begin(115200);  // keep retrying until connected to AP
Serial.println("Connecting to AP");
while (0 == LWiFi.connect(WIFI_AP, LWiFiLoginInfo(WIFI_AUTH, WIFI_PASSWORD)))
{
  delay(1000);
}  startWifi();
}void loop()
{
// Read value from Analog Input Pin 0
String analogValue0 = String(analogRead(A0), DEC);
// Print Update Response to Serial Monitor
if (client.available())
{
  char c = client.read();
  Serial.print(c);
}  // Disconnect from ThingSpeak
if (!client.connected() && lastConnected)
{
  Serial.println("...disconnected");
  Serial.println();
  client.stop();
}
// Update ThingSpeak
if(!client.connected() && (millis() - lastConnectionTime > updateThingSpeakInterval))
{
  updateThingSpeak("field1="+analogValue0);
}
// Check if Arduino Ethernet needs to be restarted
if (failedCounter > 3 ) {startWifi();}
lastConnected = client.connected();
}void updateThingSpeak(String tsData)
{
if (client.connect(thingSpeakAddress, 80))
{
  client.print("POST /update HTTP/1.1\n");
  client.print("Host: api.thingspeak.com\n");
  client.print("Connection: close\n");
  client.print("X-THINGSPEAKAPIKEY: "+writeAPIKey+"\n");
  client.print("Content-Type: application/x-www-form-urlencoded\n");
  client.print("Content-Length: ");
  client.print(tsData.length());
  client.print("\n\n");    client.print(tsData);
  lastConnectionTime = millis();
  if (client.connected())
  {
    Serial.println("Connecting to ThingSpeak...");
    Serial.println();
    failedCounter = 0;
  }
  else
  {
    failedCounter++;
    Serial.println("Connection to ThingSpeak failed ("+String(failedCounter, DEC)+")");
    Serial.println();
  }
}
else
{
  failedCounter++;
  Serial.println("Connection to ThingSpeak Failed ("+String(failedCounter, DEC)+")");
  Serial.println();
  lastConnectionTime = millis();
}
}void startWifi()
{
client.stop();  Serial.println("Connecting Arduino to network...");
Serial.println();    delay(1000);
}
After the code has been uploaded open the serial monitor and set the baudrate at 115200. If the serial monitor print just like in the picture then data has been successfully sent to the cloud. Check the Thingspeak channel to check the graph data.


Comments