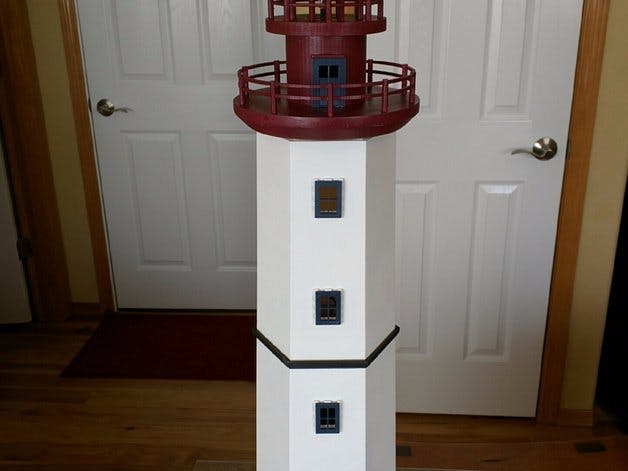
I had to test our our new 3D printer, and what a better way than by making something truly amazing! I printed this in an Fortus 250mc 3D printer, and it took about 14 hours or so to complete if I remember correctly. The files for printing can be found here and was created by user josemivaz. In my build, I decided to use an Arduino to power the lighthouse instead of a custom circuit. My build can be found here.
Instructions:Download the .stl files for the project from josemivaz's Thingiverse profile and 3D print the files using your 3D printer. Once the files are done, I sanded mine to smooth them out and to help my spray paint stick to the model. I used flat white, black, and dark red for mine.
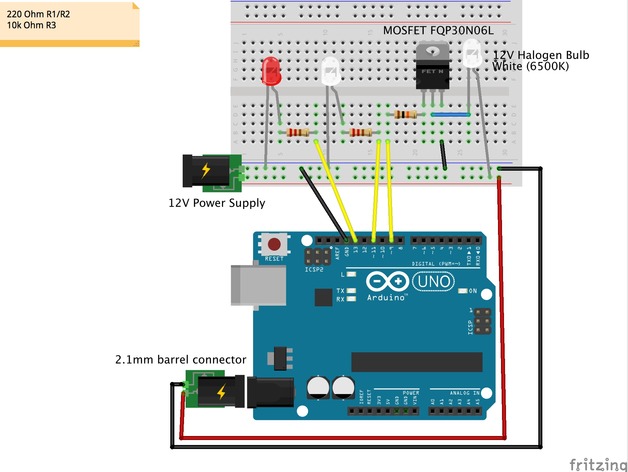
While the device is printing, you can build load the Arduino sketch in your Arduino Uno/Mega, and get build a test circuit on the breadboard. Once your components are in working order and you have painted your lighthouse, place a red led on the top, the halogen bulb under the dome, and a white LED inside the structure. I ran the wires directly to my breadboard and then stuffed it all into the bottom to hide it from general view. On the back/bottom of the base I placed an on/off switch and ran the power cord out to the outlet.
Photos:
Power switch and power cord on the back/base of the lighthouse
Arduino inside the lighthouse


_ztBMuBhMHo.jpg?auto=compress%2Cformat&w=48&h=48&fit=fill&bg=ffffff)


_3u05Tpwasz.png?auto=compress%2Cformat&w=40&h=40&fit=fillmax&bg=fff&dpr=2)
Comments