


Hardware components | ||||||
 |
| × | 1 | |||
 |
| × | 1 | |||
| × | 1 | ||||
Software apps and online services | ||||||
| ||||||
I'm working on a project with Samsung's new SAMI IoT control center. To that end, I needed to get familiar with controlling hardware on the RasPi 2... and, truth be told, I'd never so much as blinked an LED with it. Time to change that.
1. Software setup
I chased the RasPi 2 across London, ending up with a sweet kit from Maplin. It comes with a USB WiFi nubbin and an SD card already loaded with NOOBS, saving me a bunch of trouble.
From the boot screen, I kept the original "pi" and "raspberry" access credentials, then typed startx to fire up the GUI.
Mathematica + GPIO Control
Wolfram Mathematica is a language that now comes with NOOBS. You may know Wolfram Alpha as a muscular search engine for just about anything. This is made by the same people. And it can control the RasPi's GPIO pins! However, it needs superpowers (i.e., root access). I followed this guide to get started. Fire it up under sudo:
sudo wolfram
Next, you're gonna pick some pins and plug stuff in. I just set up pin 4 for now, but you can expand it from there:
pins = {4}
From there, it's a simple matter of telling Wolfram to toggle the pin on:
DeviceWrite[ "GPIO", First[pins] -> 1 ]
Or off:
DeviceWrite[ "GPIO", First[pins] -> 0 ]
You'll get explicit feedback either way: 4 -> 1 or 4 -> 0 .
In fact, if you're using only a single pin, this whole process takes even less effort. Here's what that looks like, with most of the feedback left in:
pi@raspberrypi ~ $ sudo wolfram
In[1]:= DeviceWrite[ "GPIO", 4 -> 1 ]
Out[1]:= 4 -> 1
In[2]:= DeviceWrite[ "GPIO", 4 -> 0 ]
Out[2]:= 4 -> 0
2. Hardware
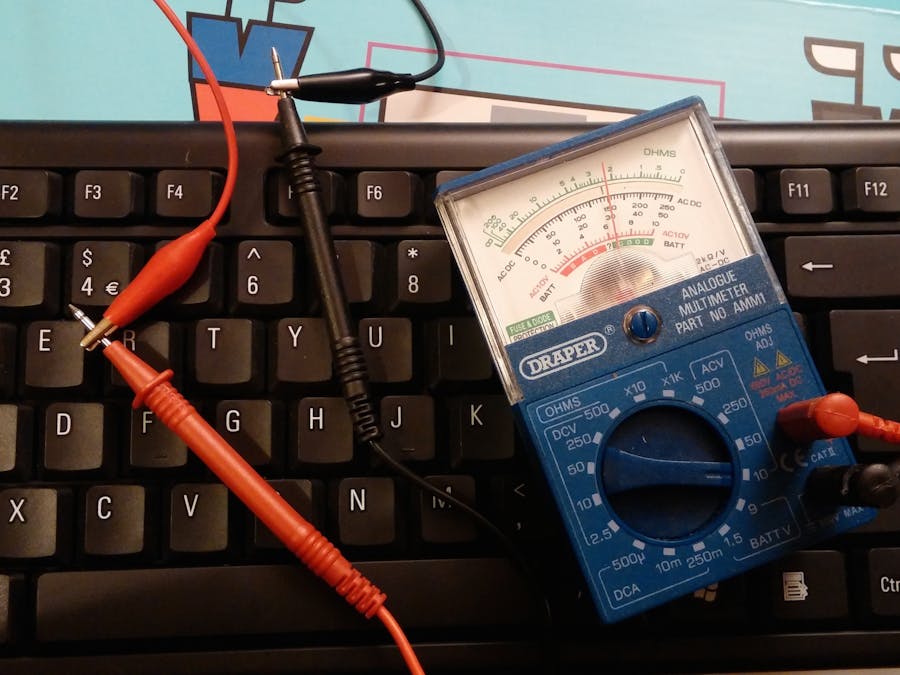
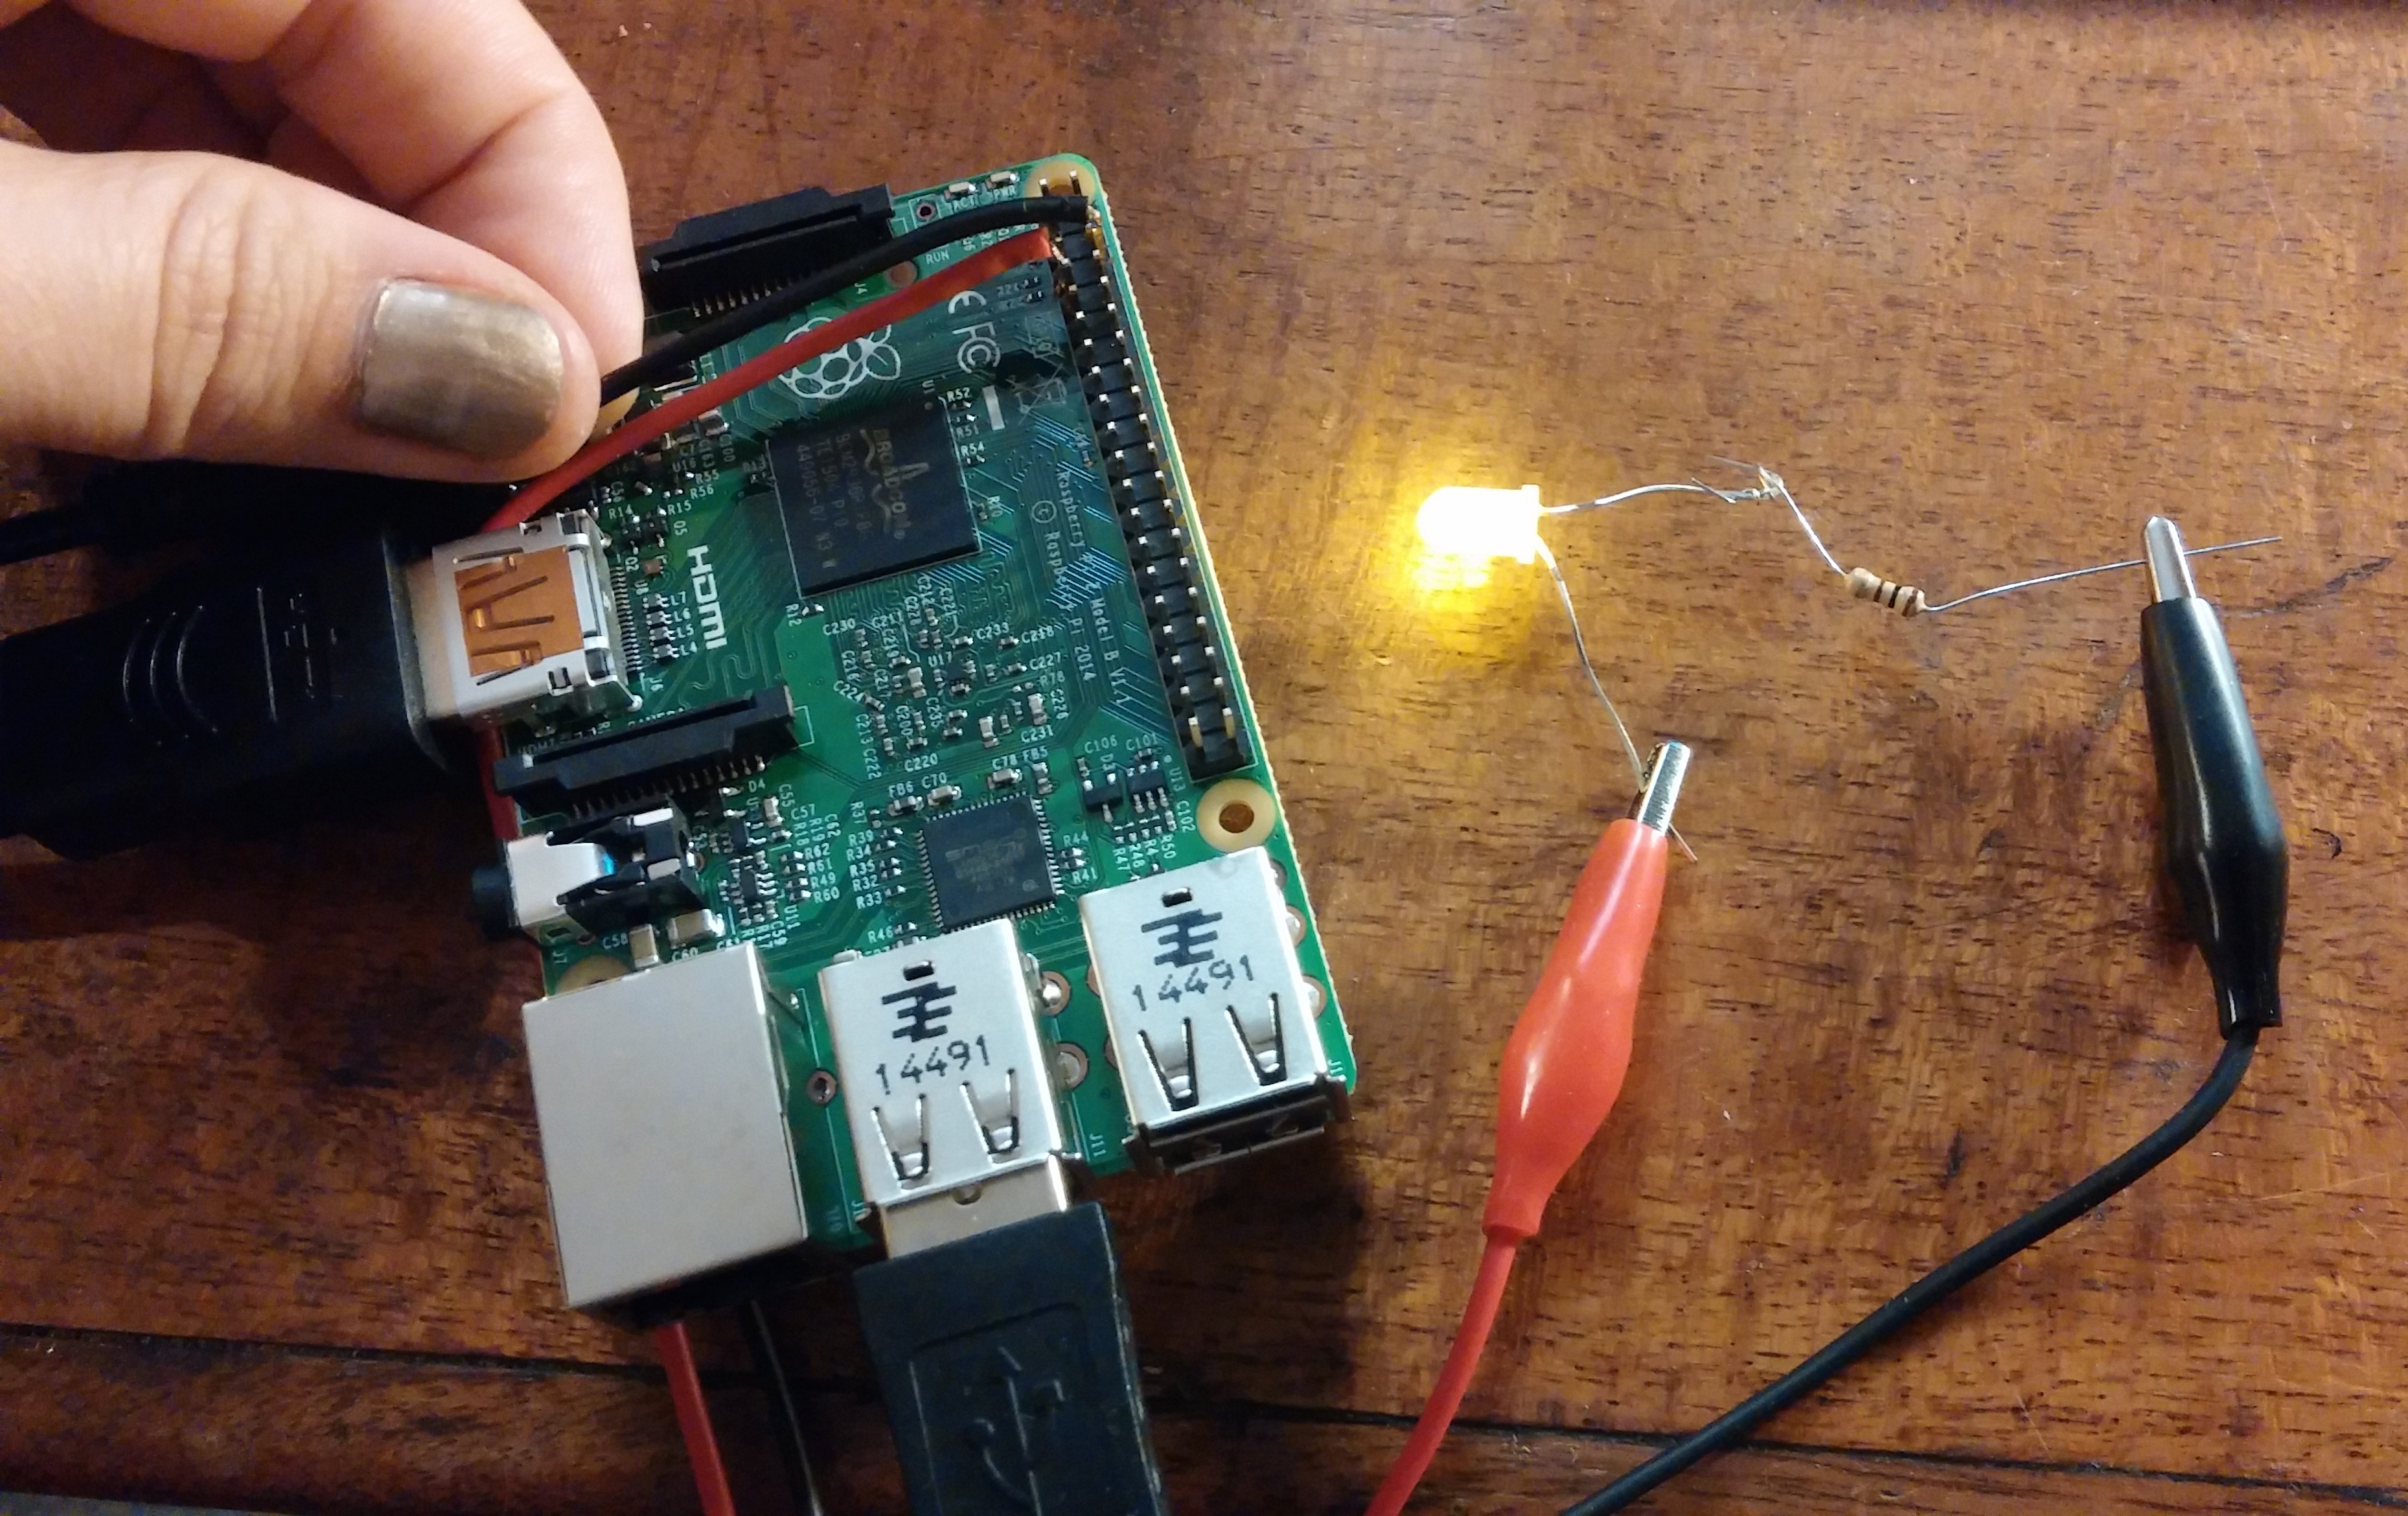
Of course, this doesn't do much unless you've got pin 4 hooked up to something. I soldered alligator jumper wires to digital pin 4 and ground, then clipped them to the probes of a multimeter. Great Success!
I used them to test an LED lamp my dad had lying around. One surface-mount LED on the board was obviously fried, and since they're all wired up in series, it wasn't clear whether everything was toast, or just that one. Now we know: with the pointy probes hooked up to the RasPi's GPIO and ground, testing both possible polarities just to be sure, I was unable to rouse even a quick sparkle and burnout. Totally toast.
Afterwards, though, I hooked up an LED with a 100-ohm resistor, and it shines beautifully. Check out the video above for the final effect.
Note: Screenshots
If you want to get screenshots off your Pi, use the scrot utility, which you can install via apt-get. Then, you can do stuff like this!
Here, I'm using mv to rename the file to something more descriptive, then scp to bump it over to my PC across the local WiFi. (Note the 192.168... address – neither machine is publicly accessible, but I did have to enable remote login / SSH on the Mac.)
Woohoo, you're done! Go forth and rock!


Comments