


Hardware components | ||||||
_baVEVgguW1.jpg?auto=compress%2Cformat&w=48&h=48&fit=fill&bg=ffffff) |
| × | 1 | |||
 |
| × | 1 | |||
 |
| × | 1 | |||
 |
| × | 1 | |||
For this build, we'll be going off of Katie's Hackster Live tutorial from March 2017 (!!). However, I also referenced this other tutorial, by Ingo Lohs.
You can use this to programmatically turn on and off:
- a motor
- an LED
- whatever else you desire!
Plug your Arduino Click Shield into the Arduino 101 board, then plug the Relay Click into position 2. If you want to use position 1 instead, you'll need to change the code to use pins 6 and 10.
Your circuit is going to use the relay as a switch, meaning that one of the wired connections (ground or voltage) is going to be cut in half, and both cut ends will be plugged into the screw terminals on the shield.
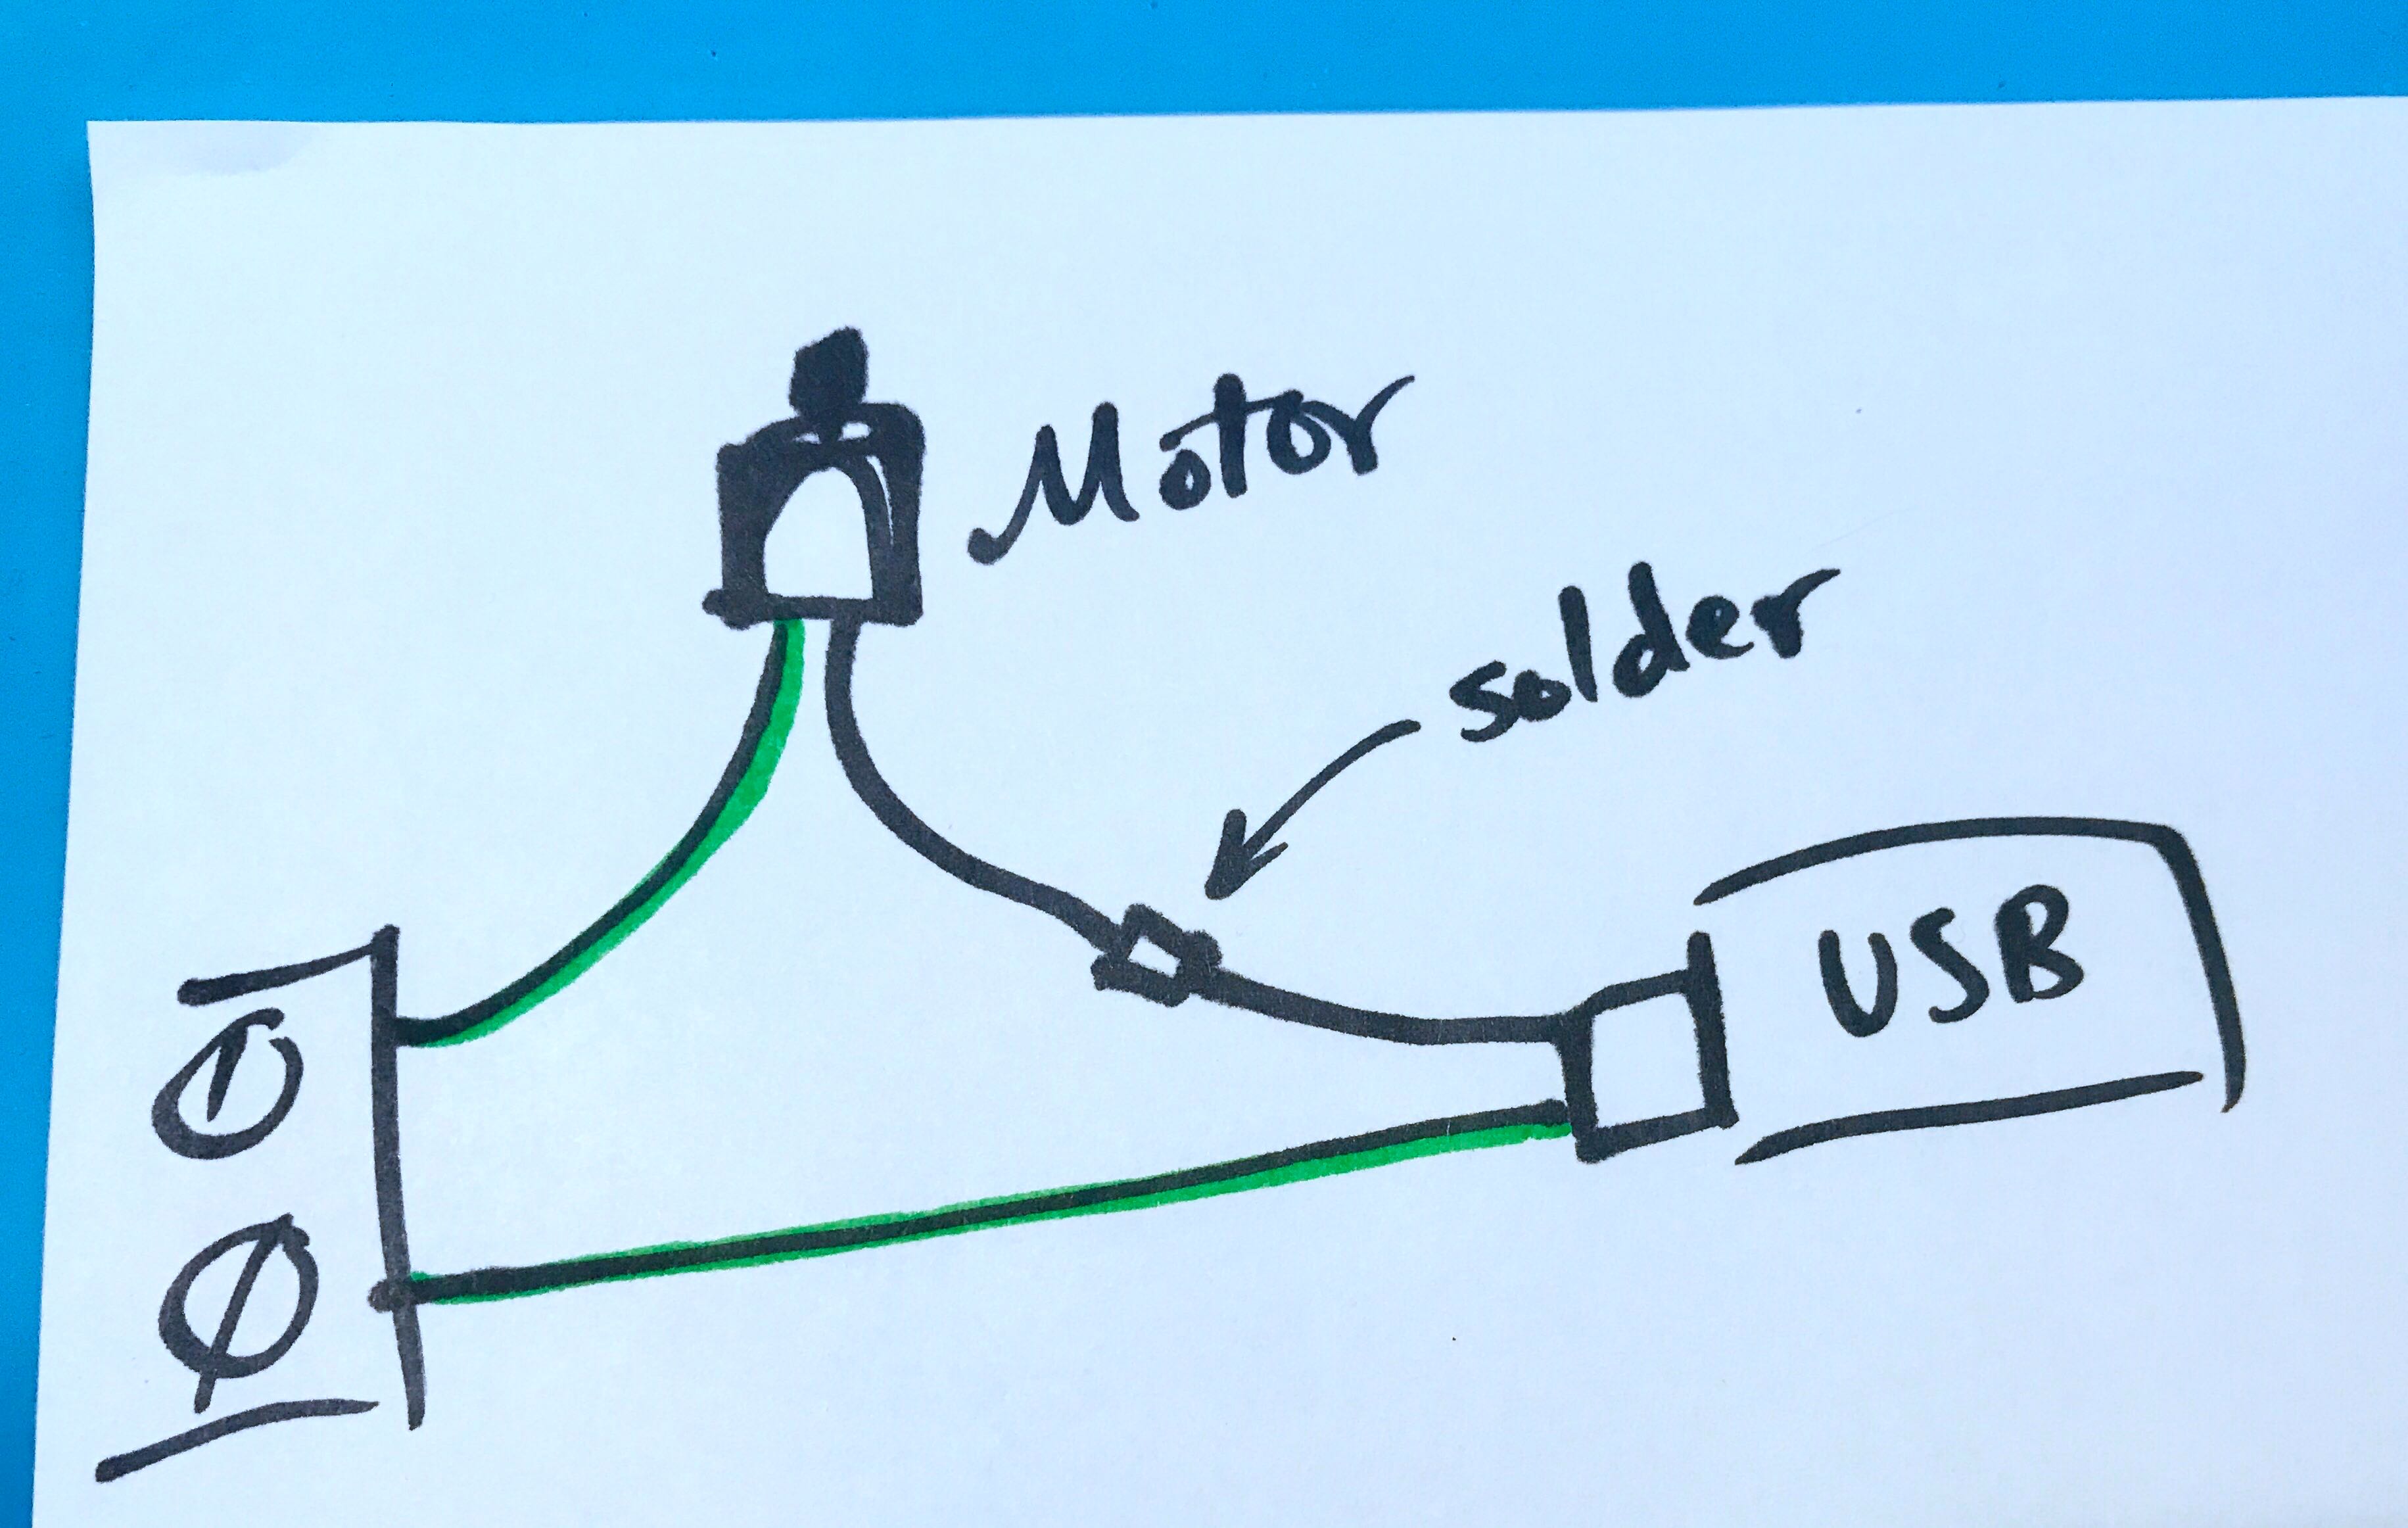
For example, in the circuit below, the motor is powered by a green and a black wire (voltage and ground). (The green is arbitrary.) If you connect those wires directly to the battery, it will run forever. However, if you cut the green wire and run it through the relay, you can then switch the circuit on and off. The connection is PHYSICALLY connected and broken by electromagnets inside the relay! It makes an awesome clicking noise!! I love relays. :)
To connect the wires to the relay, strip the ends (if necessary) and twist the wire strands so they stay together (if necessary). Insert them into the top of the holes and tighten down the screws on top. In the images below, the two left holes are un-connected; see the metal glinting at the bottom of the holes? Those are little metal plates that raise up to clamp the wires in place, so make sure you screw them in tightly :)
Get the Arduino IDE from: https://www.arduino.cc/en/Main/Software
Go to Tools > Board > Boards Manager, and search for "Curie", then install the Intel Curie-based boards.
See the code below for my test, which was just switching the two relays on and off in sequence, with a motor to make a little rhythm machine. :)
You may need to hit the MASTER RESET button on the Arduino itself (next to the USB port) in order to upload code. Or, unplug the Arduino from your computer, click Upload, and then plug it back in.
// BLUETOOTH UPGRADE
Next, I'll be trying to get it working with Bluetooth via this other app, which seems a little simpler than the whole AWS shebang:
https://www.arduino.cc/en/Reference/CurieBLE
https://www.arduino.cc/en/Tutorial/Genuino101CurieBLELED
You can find it in Arduino under File > Examples > CurieBLE > Peripheral > LED.
I believe these become available once you install the Arduino 101 via the Boards Manager:
I'm able to get the device's built-in LED to turn on, by sending a "Byte Array" of 0x01 (or 0x00 for "off"). However, the relays won't do anything... yet. :)
You probably want to change the name of your device in the list; just edit the "LED" part of .setLocalName("LED") to say whatever you want to call it.

Comments