

Hardware components | ||||||
_ztBMuBhMHo.jpg?auto=compress%2Cformat&w=48&h=48&fit=fill&bg=ffffff) |
| × | 1 | |||
 |
| × | 1 | |||
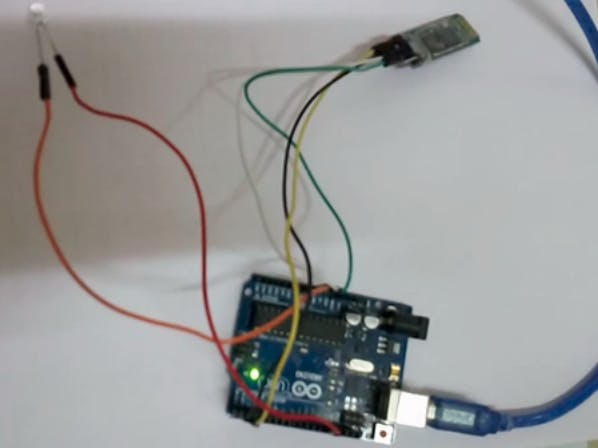
In this project we are using Arduino, Bluetooth module (HC-05) and a smart phone. Here we are going to recognize our voice through one smartphone app and for that purpose we have connected one LED to pin number 13 of Arduino. So first we have to connect our app to Arduino through HC-05 Bluetooth module. So we have to enable Bluetooth in our smartphone and then we have to connect to Arduino through HC-05. After getting the successful connection, we'll open that app and we will say "switch on the light" (as we have written in our code) so our LED will turn on and if we say "switch off the light" so our LED will turn off. So you can say anything as long as you modify your code for it; also you can control anything, even any electrical appliances. Here we have chosen one LED for that.
Software UsedInstallation of Arduino IDE: You can download the latest version of Arduino IDE from the below link: https://www.arduino.cc/en/Main/Software
We are using one smartphone app named AMR_Voice. Here below is the link to download: https://play.google.com/store/apps/details?id=robo...
- LED with 1k resistor
- Arduino UNO
- HC-05 Serial Bluetooth Module
- Jumper Cables
1) Arduino UNO: Arduino/Genuino Uno is a microcontroller board based on the ATmega328P (datasheet). It has 14 digital input/output pins (of which 6 can be used as PWM outputs), 6 analog inputs, a 16 MHz quartz crystal, a USB connection, a power jack, an ICSP header and a reset button.
2) HC-05 Bluetooth Module: HC‐05 module is an easy to use Bluetooth SPP (Serial Port Protocol) module, designed for transparent wireless serial connection setup. The HC-05 Bluetooth Module can be used in a Master or Slave configuration, making it a great solution for wireless communication. This serial port Bluetooth module is fully qualified Bluetooth V2.0+EDR (Enhanced Data Rate) 3Mbps Modulation with complete 2.4GHz radio transceiver and baseband. It uses CSR Bluecore 04‐External single chip Bluetooth system with CMOS technology and with AFH (Adaptive Frequency Hopping Feature).
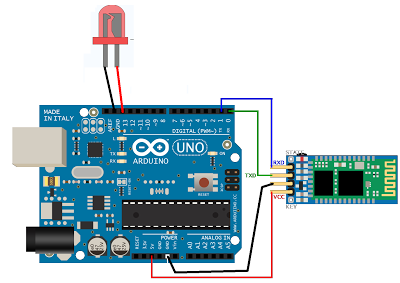
Circuit DiagramHere you can see how HC-05 and one single LED is connected to Arduino Uno. You have to make sure one thing that Tx of HC-05 should be connected to Rx of Arduino and Rx of Hc-05 is connected to Tx of Arduino.
- VCC (HC-05)--------------------5V of Arduino (3.3V of Arduino)
- GND (HC-05)--------------------GND of Arduino
- Rx (HC-05)-----------------------Tx of Arduino
- Tx (HC-05)------------------------Rx of Arduino
If have any doubt regarding this project feel free to comment below or you can email us at info@deligence.com. And if you want to learn more about this type of project, then feel free to visit our YouTube channel.
Thanks & regards,
Deligence Technologies
Comments