

Hardware components | ||||||
_ztBMuBhMHo.jpg?auto=compress%2Cformat&w=48&h=48&fit=fill&bg=ffffff) |
| × | 1 | |||
| × | 1 | ||||
| × | 1 | ||||
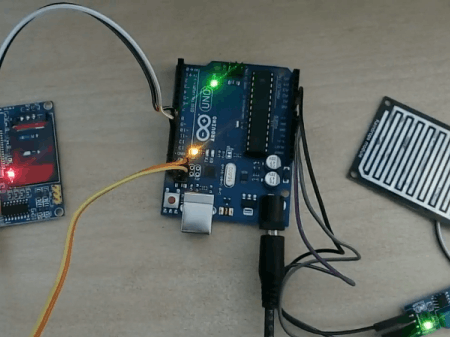
Here we are using a Raindrop Sensor to detect raindrop intensity and generate an analog varying signal from 0 to 1024. It also generates a digital output according to its preset value.
When the raindrop sensor detects rain, then it's going to send an analog signal to Arduino Uno board. Arduino Uno monitors the change happening to the raindrop sensor. When the value from the raindrop sensor goes beyond a certain level, our Arduino Uno sends some at command to our GSM Module, and the GSM module sends an SMS to the given phone number.
Installation of SoftwareArduino IDE
You can download the latest version of Arduino IDE from the below link: https://www.arduino.cc/en/Main/Software
For this project you need some components:
- Raindrop sensor
- GSM module (SIM-900):
- Arduino Uno
- Jumper Wire
The rain sensor module is an easy tool for rain detection. It can be used as a switch when raindrops fall through the raining board and also for measuring rainfall intensity. The module features a rain board, a control board that is separate for more convenience, power indicator LED and adjustable sensitivity though a potentiometer. The analog output is used in detection of drops and the amount of rainfall. Connected to 5V power supply, the LED will turn on when the induction board detects no raindrops and DO output is high. When dropping a small amount of water, DO output is low, so the switch indicator will turn on. Brush off the water droplets and, when restored to the initial state, it outputs a high level. Figure is given below.
This is a GSM/GPRS-compatible Quad-band module as used in cell phones, which works on a frequency of 850/900/1800/1900MHz and which can be used not only to access the Internet but also for oral communication (provided that it is connected to a microphone and a small loud speaker) and for SMSs. Externally, it looks like a big package (0.94 inches x 0.94 inches x 0.12 inches) with L-shaped contacts on four sides so that they can be soldered both on the side and at the bottom. Internally, the module is managed by an AMR926EJ-S processor, which controls phone communication, data communication (through an integrated TCP/IP stack), and (through an UART and a TTL serial interface) the communication with the circuit interfaced with the cell phone itself.
The processor is also in charge of a SIM card (3 or 1,8 V) which needs to be attached to the outer wall of the module. In addition, the GSM900 device integrates an analog interface, an A/D converter, an RTC, an SPI bus, an I²C, and a PWM module. The radio section is GSM phase 2/2+ compatible and is either class 4 (2 W) at 850/ 900 MHz or class 1 (1 W) at 1800/1900 MHz. The TTL serial interface is in charge not only of communicating all the data relative to the SMS already received and those that come in during TCP/IP sessions in GPRS (the data-rate is determined by GPRS class 10: max. 85,6 kbps), but also of receiving the circuit commands (in our case, coming from the PIC governing the remote control) that can be either AT standard or AT-enhanced SIMCom type. The module is supplied with continuous energy (between 3.4 and 4.5 V) and absorbs a maximum of 0.8 A during transmission. Figure is given below.
Arduino/Genuino Uno is a microcontroller board based on the ATmega328P (datasheet). It has 14 digital input/output pins (of which 6 can be used as PWM outputs), 6 analog inputs, a 16 MHz quartz crystal, a USB connection, a power jack, an ICSP header and a reset button. Figure is given below.
In this project, we are using a raindrop sensor to detect raindrop intensity and generate some analog values. When the raindrop sensor detects raindrop intensity, the Arduino UNO sends a command to the GSM Module which then sends an email to the given email ID.
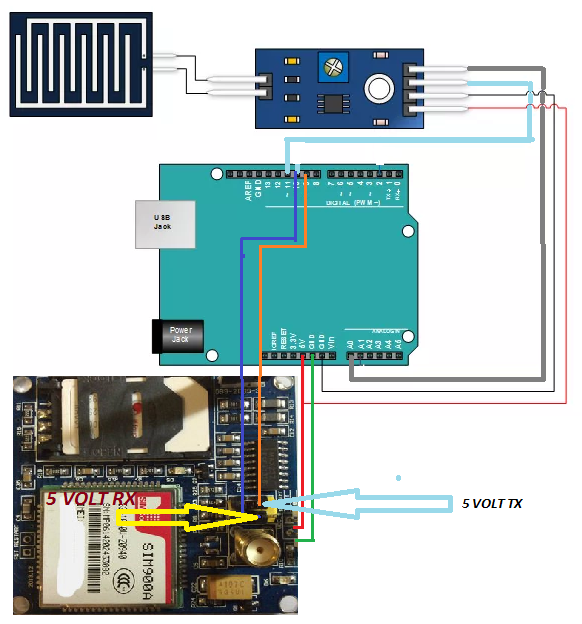
The connections of our circuit is given below. There are two circuit diagrams. One is for the Raindrop Sensor with Arduino:
And the other is for Arduino with GSM Module:
If have any questions regarding this project, feel free to comment below or you can mail us: info@deligence.com
And if you want to learn more about these types of project then feel free to visit our YouTube channel.
Comments