


Hardware components | ||||||
| × | 1 | ||||
 |
| × | 1 | |||
 |
| × | 1 | |||
Software apps and online services | ||||||
| ||||||
 |
| |||||
| ||||||
| ||||||
This project is part of the HoverGames Challenge 1: Fight Fire with Flyers. As the overall complexity this time around was quite high, for this project I have opted for working in a team with two of my friends. They are nordpolcamper and reteple7.
Between the three of us we have quite some embedded systems development experience. Even so, at the beginning of this project we were new to the world of drones.
The original idea of our team can be found here. As outlined below in our story we had to deal with some radical choices regarding our goals. As this is quite the long story, for the TL;DR you can just jump to end and read our conclusion.
2. First assemblyMechanics:
Once we finally got the drone kit, we split into two groups, one person (reteple7) did our mechanical assembly, while nordpolcamper and me handled the software preparation of the FMU and review.
Below we have some photos from our first assembly day.
During this one afternoon we managed to complete the drone up to the point where, just as it was getting dark we could perform the PX4 PWM test from the NuttX console, as shown below.
For the mechanics assembly we basically followed NXP's guide here, at the same time dropping everything that we deemed as non-essential. Another point where we cut corners was not to use plastic cable bindings for wires (clean build came much later).
For the software side, we also followed NXP's guide here, including using a pre-compiled binary for the bootloader. Your mileage here might vary, we routinely use a mixture of Linux and Windows to set everything up and debug.
3. Safety first !!!I cannot really stress this point enough in words. The drone provided in this kit is quite strong. Once you are done with the main assembly, before attaching any rotors, make sure the safety switch configuration works properly (both on the drone side as well as on the remote control side). You can easily test this using the PX4 firmware and the brushless DC motors without any rotors. I am giving this advice since we had an "experience" with this. We were fortunate enough to end up with just a scare and one broken rotor...
With the safety topics out of the way, at this point we had an assembled drone tied to a table. Next, we tried to lift off and measure the current draw (using a current clamp and a laboratory DC power supply). It quickly dawned on us, just what we got our selves into.
Our first measurements made it clear we were looking at a lot of power draw to be able to test for long periods of time. (we do have some actual numbers for the current lying around somewhere, since as you can see in the videos below, we were typically measuring every run during that time)
Since at this point we had not really spent the time to research a battery, we were not really prepared to invest any money into a LiPo just yet.
After a bit of fidgeting we came to our temporary solution. But first let me explain a little bit, we were looking for a cheap way to supply a enough current to the drone for long periods of time such that we could perform our tests and learn how the drone actually works.
Enter the car battery, once we had the idea it was quite easy to implement: we recycled an AC power cable (rated for the current we were expecting). On one side we soldered an XT-60 connector to match the drone input and on the other a set of DC banana connectors such that we could easily attach to the battery.
The only thing to keep in mind here is the cable length needs to be kept quite short otherwise one experience a sharp voltage drop and the drone will no longer function as expected (the PX4 firmware will actually reject the battery in that case).
5. Learning how to fly + adjusting expectationsWe spent the next period understanding how the drone actually works. Things like how do the various calibration parameters of the PX4 firmware impact flight ? How does manual flight control (using the remote) actually work.
During this period it also became quite apparent to us that there was no way we were going to achieve our original goals.
First, even with our minimal build (we stripped away everything that was non-essential right off the bat) the FMU + frame + motors + ESCs is still quite heavy.
Minimal drone weight (without battery): approximately 993g
Foam landing strip: 42g vs wood landing gear at 417g
Additionally, the motors are quite strong and draw a lot of current -> there is no chance whatsoever of a small battery like we intended (otherwise we would have no flight time at all, assuming we could even lift off).
Armed with this new understanding, we set off to find an actual proper drone battery that would allow us to fly.
Our search parameters where quite simple: we needed a battery fast, it needed to provide the right capacity such that we could actually sustain flight, and weight was no longer an object. Team decision: sacrifice weight for flight time.
We finally settled on:
Looking pretty good:
Once we finally had our battery it was time for freedom, so we took our drone to a park with as wide of open space we could find (again I cannot stress the safety stuff enough).
Manual flight was pretty much fine at this point. Our attempts at autonomous flight lead us to a problem which other people have reported (as well as NXP) and which we were kind of already expecting.
Explanation: since our autonomous flight was not really working properly we took a bunch of hard landings -> which kept damaging the already fragile legs of the drone. Eventually the support struts of the legs broke and the legs completely fell off.
How we broke the legs (eventually...)
At this point, we finally bit the bullet and agreed on our first all-round overhaul of the drone. Goals: clean up the build and replace the old legs with a new more stable landing gear.
We decided to go with a wood based build, mostly because it was a cheap, easy to work with and sturdy material we had lying around.
During the rebuild, we got the idea that our new landing support could also serve as a payload carrier, mostly to hold and cushion our new heavy battery.
With the woodwork out of the way, we finished the reassembly and add some foam to all the sides, the thinking here was: hard landings.
And the final product:
After around 10 hours of work on the rebuild -> we were finally ready to fly again or so we thought...
At this point because of our overhaul we had changed the position/location/orientation of the FMU as well as most of the other components. And it did not really down on us that we might need to run a re-calibration.
On the first manual flight attempt the drone lifted around 15 m up into the air and came crashing down straight to the ground before we had any chance to react. In retrospect, it looks like in this instance the "return to home" functionality of the "mission mode" was somehow triggered.
2 days of work almost down the drain...
Even worse we experienced some more component damage this time around, but more on this below (under Rebuild #2).
For now, some videos from the wood prototype test runs (after fixing the issue from that original fall described above), manual flight with RC control:
8. Rebuild #2The components we managed to damage by trying to fly without a proper set of sensor calibration values where the radio antenna (easy fix in this case open and re-solder, was harder to diagnose though), the GPS module (broken mount) and another rotor was also completely broken.
The most important fix here (once the small mechanical fixes where done) was to properly re-calibrate the PX4 firmware.
Around this time nordpolcamper also replaced the wood parts of our new landing gear with some type of sturdy charcoal foam to drop all that extra weight we had put on with the original wood prototype.
And we could finally fly again. Below you can see some nice videos:
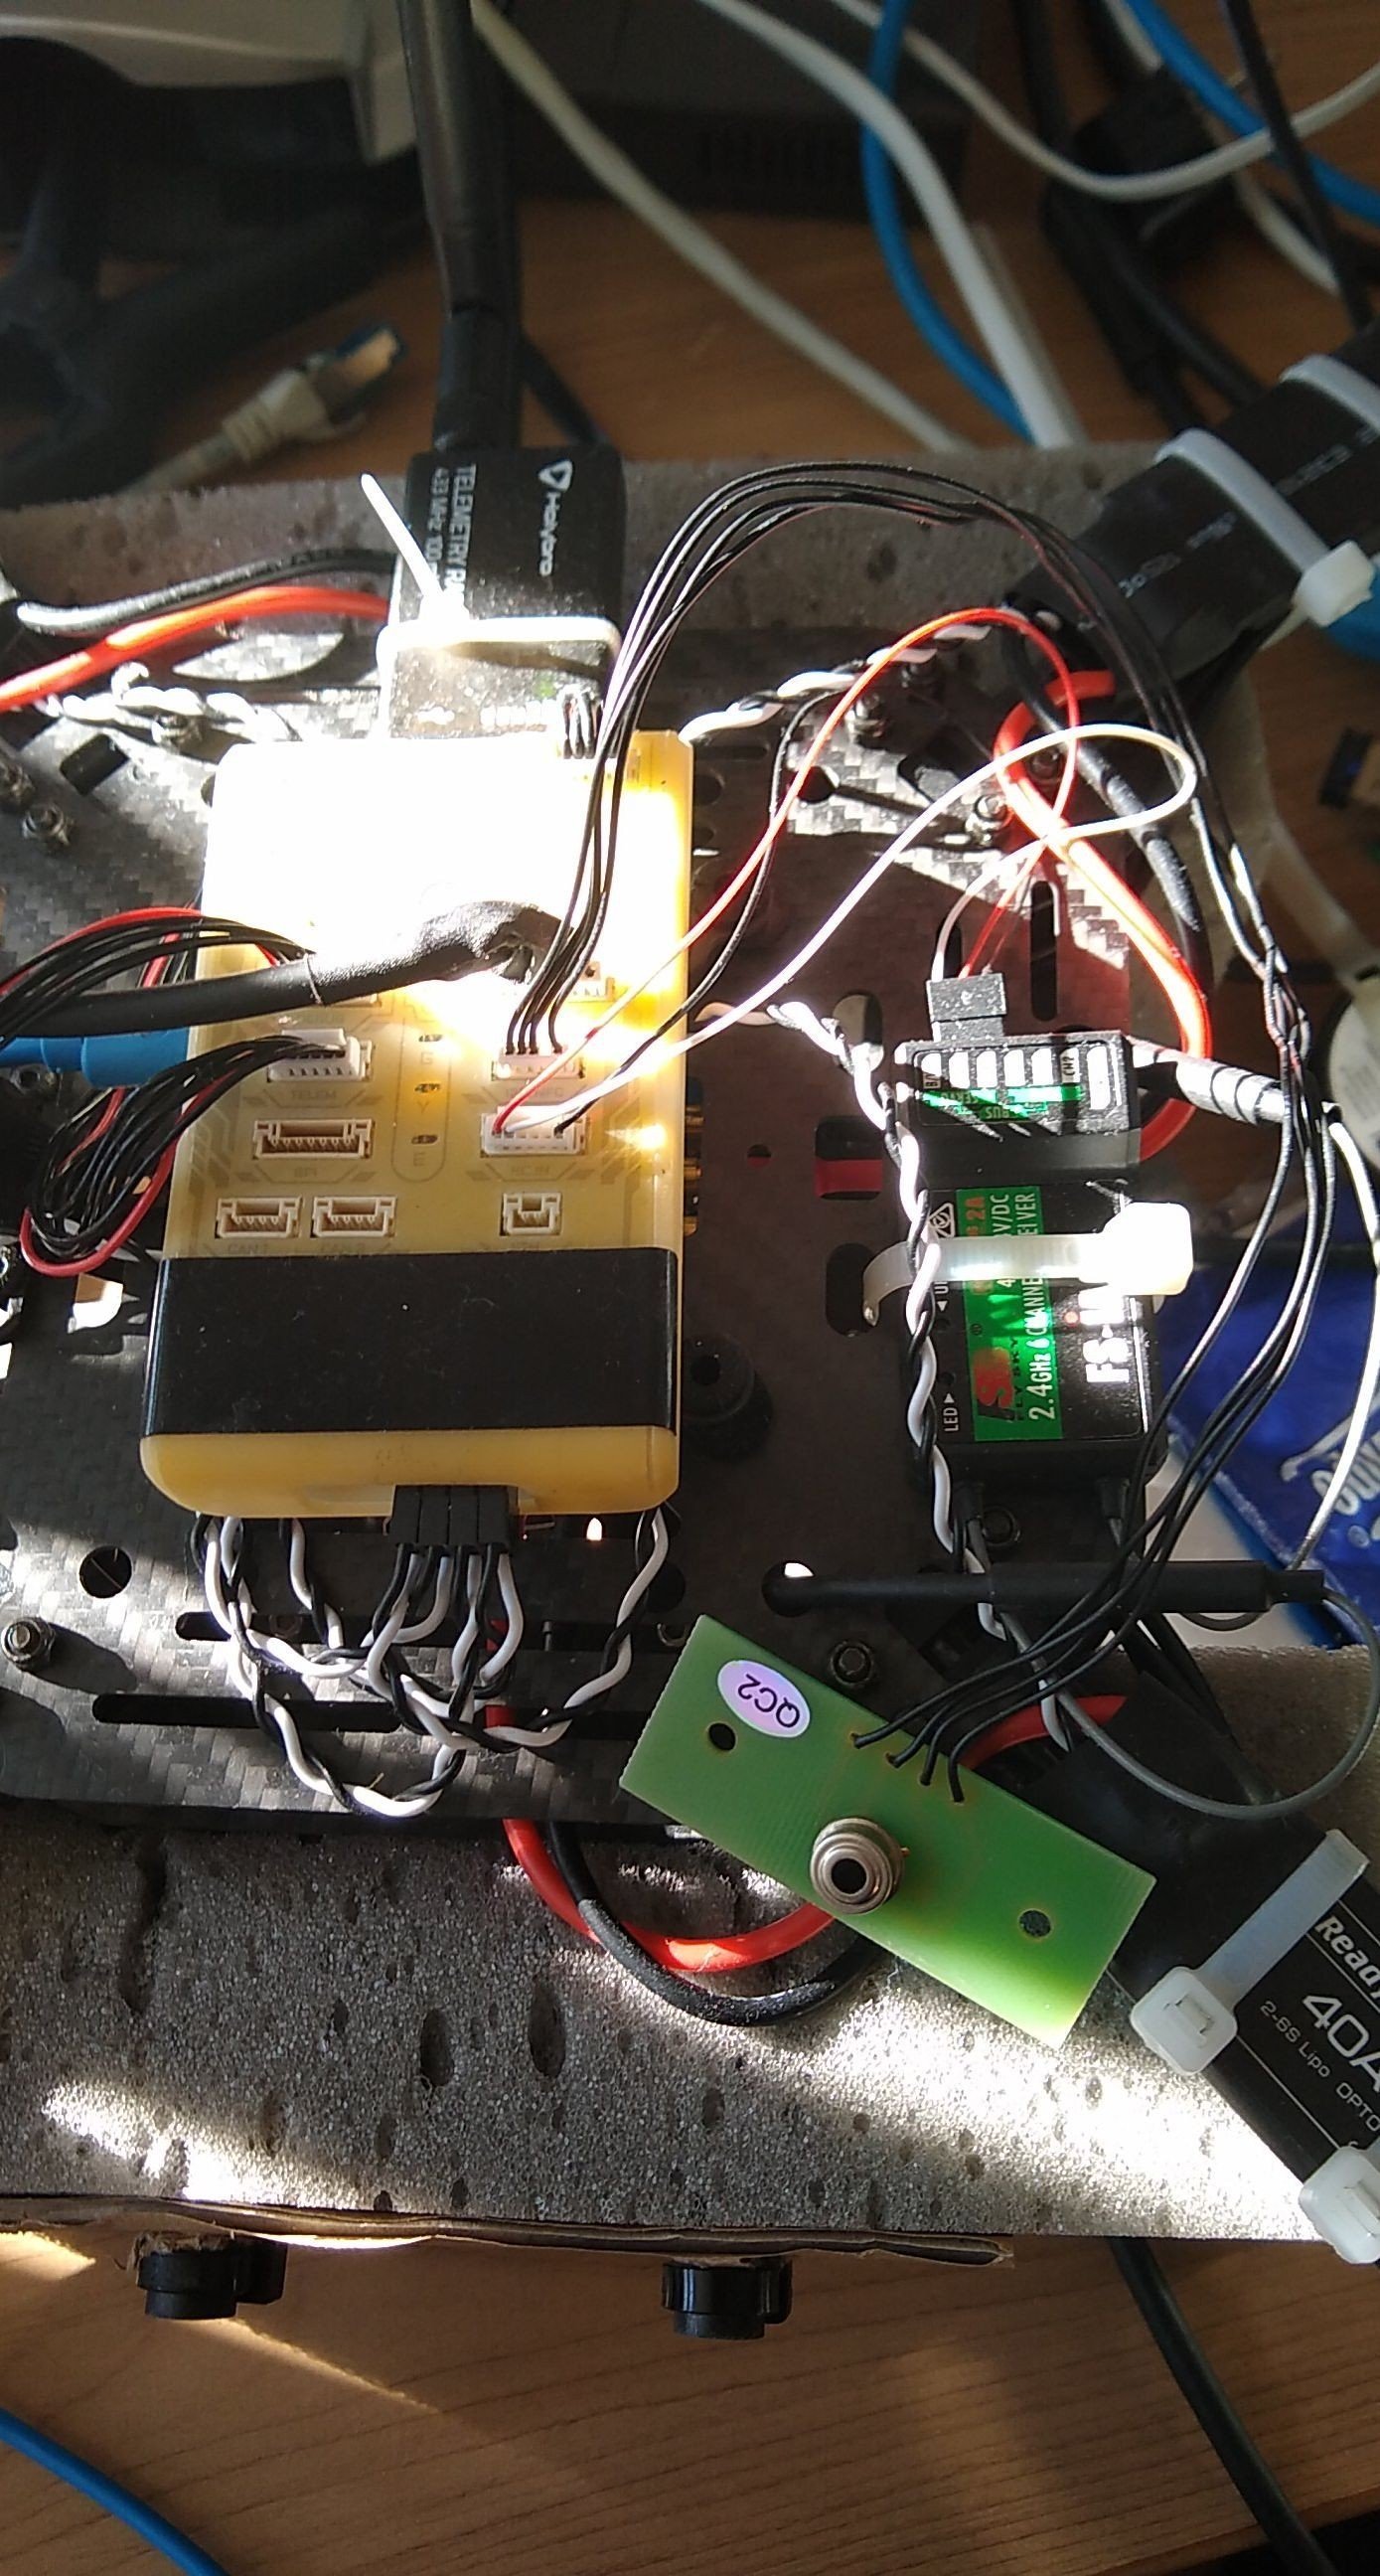
Below is the final state of our drone, as is stands today:
Describe work from IOT example link1link2link3
Additionally, reteple7 and I have been doing some work on the PX4 Bootloader, and for the purpose of quickly iterating over some of our changes we have acquired an NXP FRDM-K66F.
10. PixyCam2 and heat sensor integrationIntegration of these 2 components is part of our current activities. The first tests were done by reteple7. Some photos below:
Bellow we have some photos taken from a Raspberry PI 2 by attaching the Pixy2 Cam via USB and the Raspberry PI V2 Cam.
There a lot of reasons behind our decision, but to make a longer story very short, after a discussion with reteple7 it does not make any sense for us to the Pixy2 in the future. Both the HW design and the SW support are not on par with other alternatives that we have available. For a small taste of the situation, with the current HW design of the Pixy2, the way we see to obtain a decent performance out of it (comparable to the Raspberry PI cam for example) one would need to break out the SWD/JTAG of the NXP controller on the Pixy2 and start a rewrite of the current firmware (do a quick review of that code, to get a feeling for yourself). And for that amount of work the Raspberry PI is right there with a nice HW interface, and Linux driver support + GStreamer. Even so reteple7 might attempt something there in the future, mostly because we like having fun.
11. Final status & lessons learnedWe can now fly including by means of the PX4 mission mode (semi-autonomous mode). We can compile a MAVROS example both for the simulator as well as for the actual FMU (on the actual drone the example does not work yet). The additional modules we have received (PixyCam2, IR sensor and RapidIoT prototype) are integrated with our PX4 firmware.
Next steps: use the input from the integrated additional modules to achieve fully autonomous flight.
We did not actually end up doing that many usable code changes to the core PX4 firmware, the version we have been using (latest stable most of the time) suited us quite well up until this point. As shown below we did push some fixes that we have done to get the RapidIoT example to build properly. Once we do have something useful to push in the future, reteple7 might make 2 new PRs: one for the core PX4 firmware and one for the bootloader changes we have been working on.
Lessons learned:
- calibration should not be underestimated
- we gained a bit more knowledge about the PX4 firmware
- even though safety was important we should have had more confidence in our selves since autonomous mode/mission mode was already working (even when we thought otherwise)
We would like to thank hackster.io and NXP for the hardware and the opportunity to have some fun with drones.


Comments