


Hardware components | ||||||
 |
| × | 1 | |||
| × | 1 | ||||
Software apps and online services | ||||||
 |
| |||||
| ||||||
Hand tools and fabrication machines | ||||||
 |
| |||||
This is a simple, and an ideal project to work towards keeping in mind that peak summer is upon us now any day! If you live in the northern hemisphere. Basically, if you live in an old apartment like me and don’t have one of those fancy! Modern air conditioners installed at home, you can automate your setup using BOLT which is based on the ESP8266 with custom firmware, and trigger your air conditioner just before leaving work using the BOLT IoT cloud platform as shown in the video below.
In my case, I have about a 15 to 20 minutes drive from work, so this is ideal for me, I can quickly check the weather condition/temperature, without stepping out of the office, and switch on the my air conditioner just before leaving work.
Now you can modify the code below, if you normally leave at the same time from work, to check the temperature using the OpenWeatherMap.org API and say if the temperature is more than 25 C, turn on your air conditioner.
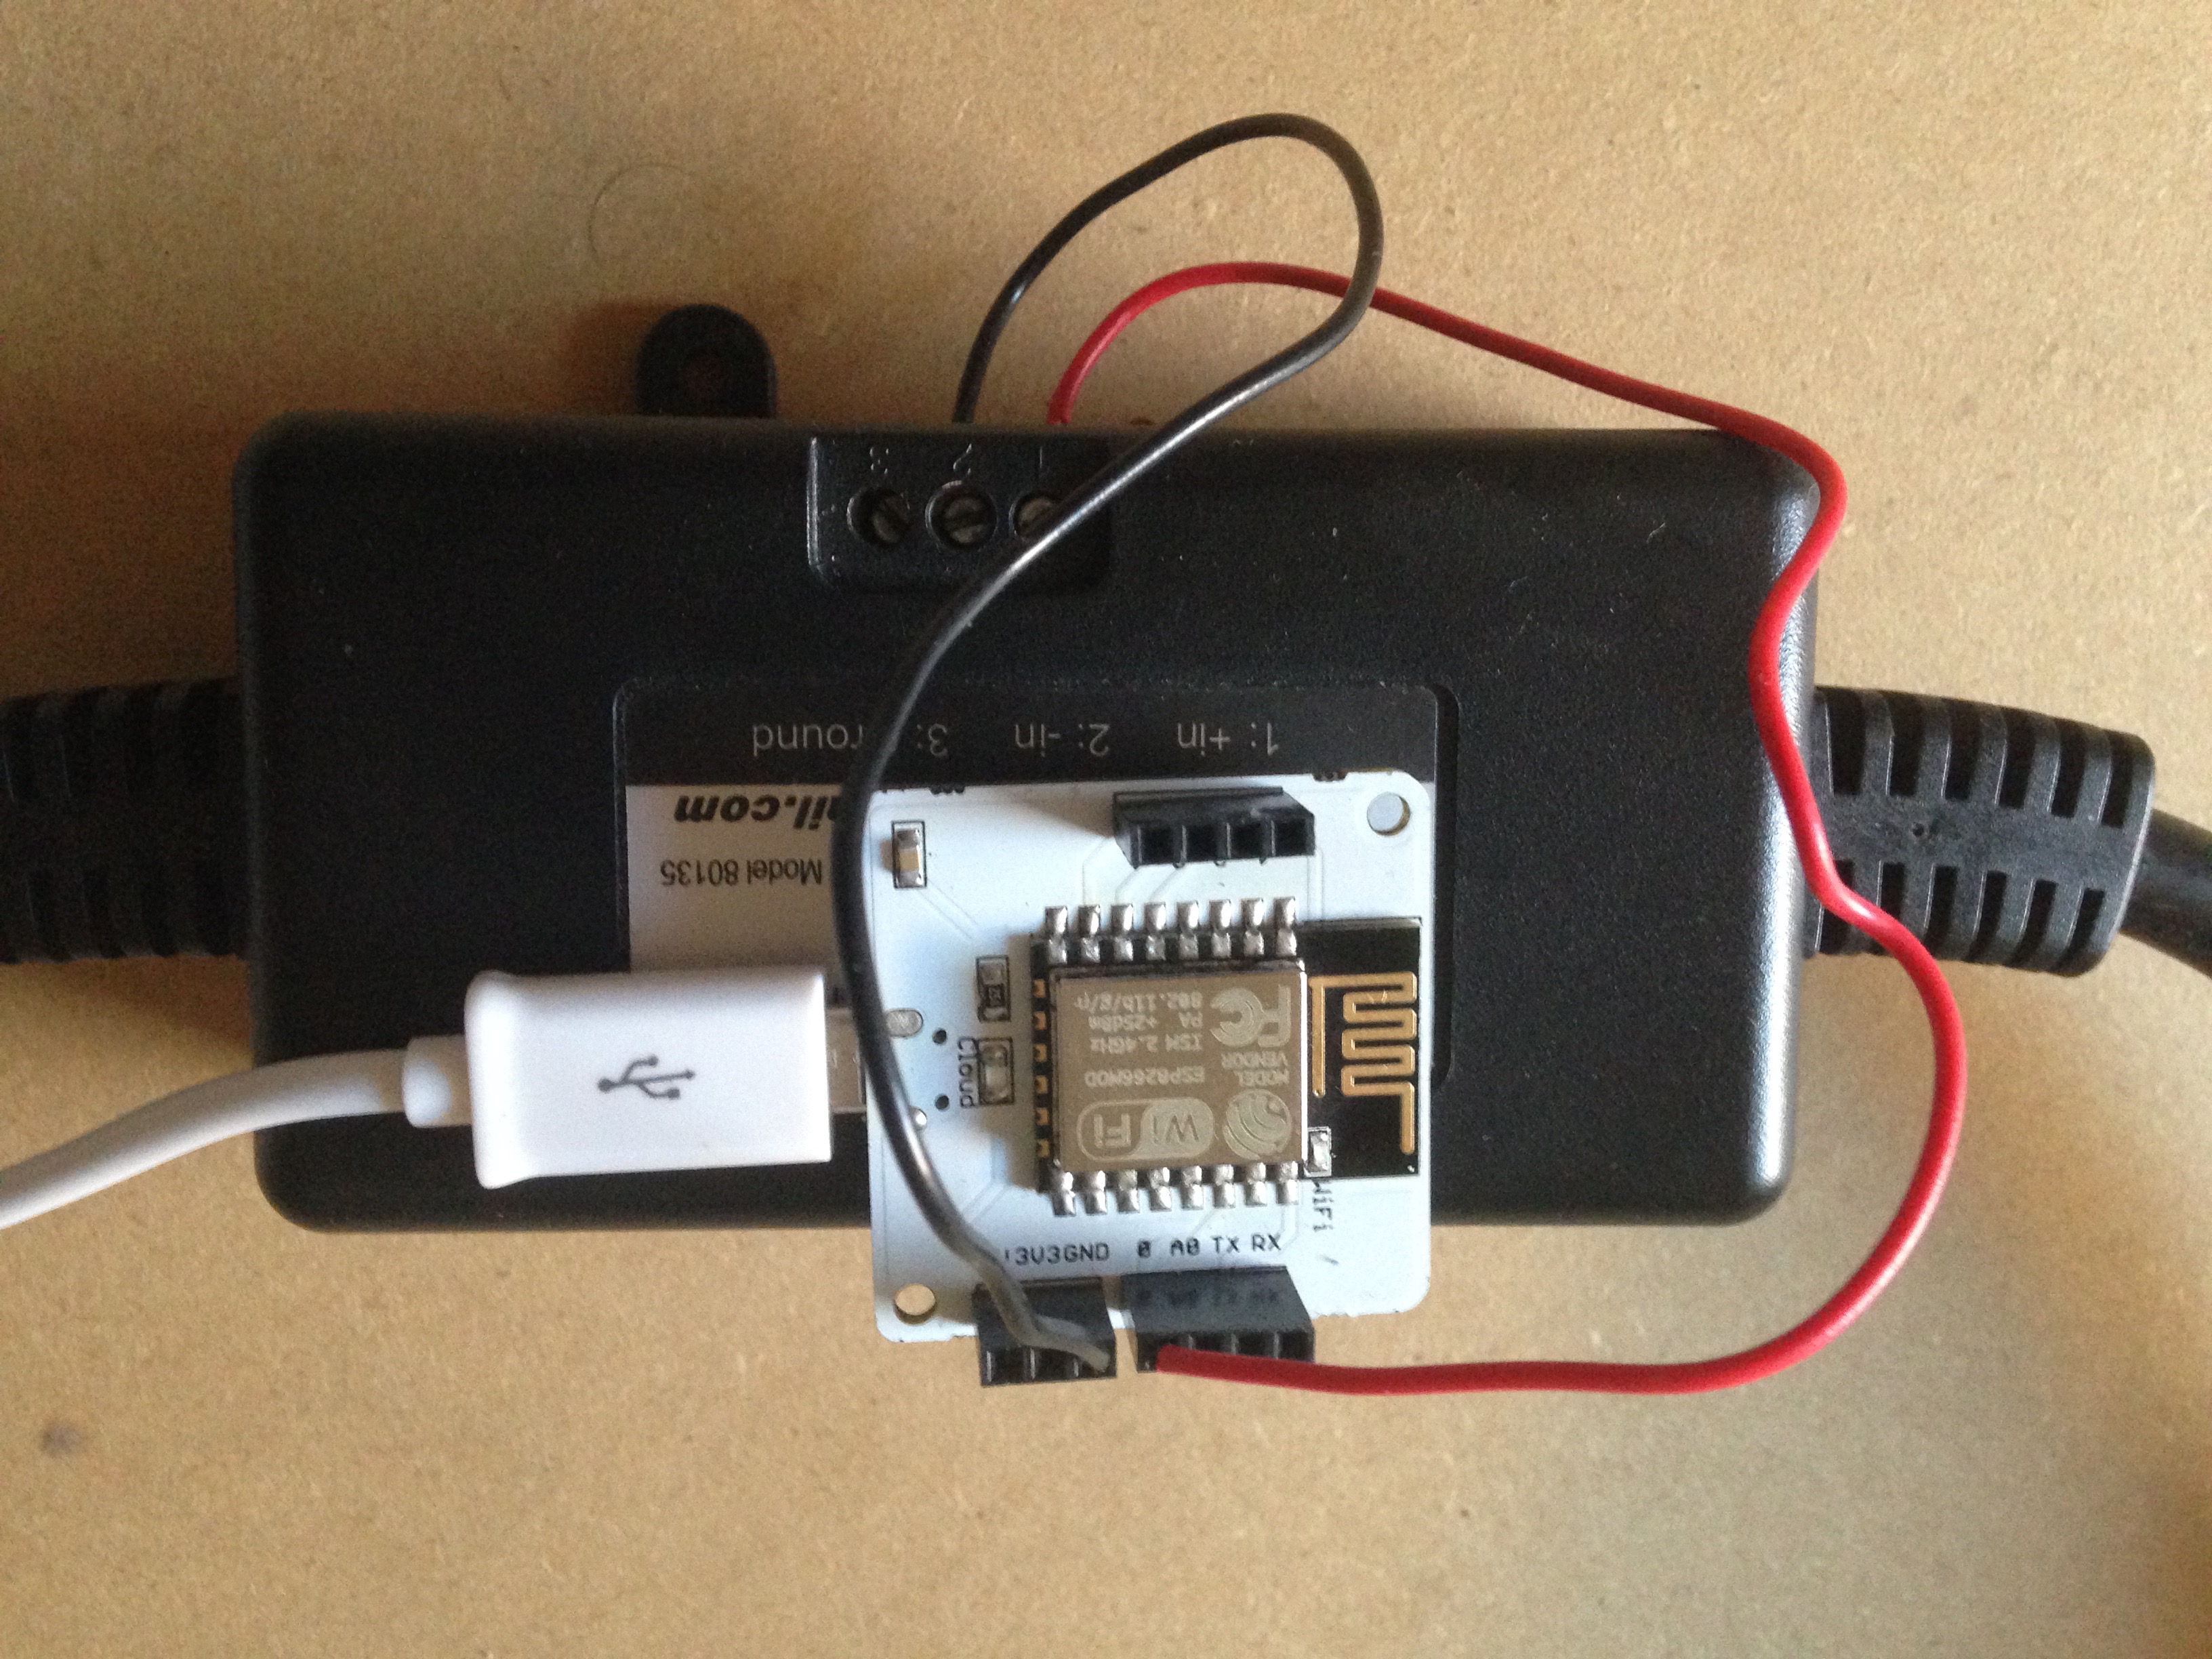
Steps to follow to complete the build#1 - 3D print the STL fileThis is an optional step if you have a 3D printer at home or have access to one at you library/makerspace. As part of the project I have 3D printed case to hold the BOLT on a power tail switch, so that my cat does not mess with the wire, but you can also use a 110/240 V relay (Warning : be careful when using high voltage..). There are a couple more versions of the STL file which I have uploaded to Thingevese, which you can find at –, just in case you don't like this one that is attached below.
As part of the circuit, the power tail switch is connected to GPIO #0 on the BOLT.
Create an account using the sign up link on the https://cloud.boltiot.com. And also download the Bolt App on you phone which will take you step by step to connect your BOLT module to your home WiFi. Once you have successfully connected the green LED should glow. Here is a link to the Quick start guide which should help you setup.
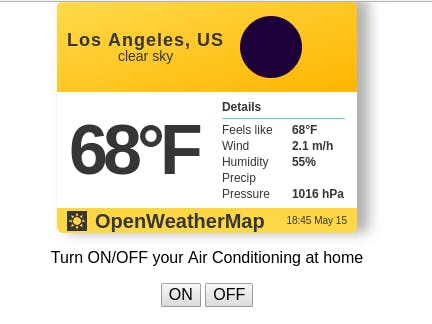
If you plan on using OpenWeatherMap to show the weather on the page as you see in the video above, create an account on OpenWeatherMap.org and then generate an API key which you will need in the next step.
In addition, your will also figure out your city id which you will need in the next step, you can find your cityid at http://openweathermap.org/help/city_list.txt, in my case I live in Los Angeles, California and my cityid is 5368361.
#5 Copy the code below to BOLT IoT Cloud platformNow before you copy the code below modify the openweathermap appid and cityid which you captured above. Once you login to your Cloud account you need to create a product, and if you run into any problems follow quick start guide - Project 2 - LED Control. And, also dont forget to generate you API key. Now if you don't plan on using the OpenWeatherMaps then you can use the code on github which is part project 2 - LED control in the quick start guide.
To access the page at work, you will have login to your Bolt IoT cloud account, and here is how it should look..
Now run a test, and you will never have to face the heat !! when you come back home from a long day of work !


Comments