


Hardware components | ||||||
 |
| × | 1 | |||
| × | 1 | ||||
_ztBMuBhMHo.jpg?auto=compress%2Cformat&w=48&h=48&fit=fill&bg=ffffff) |
| × | 1 | |||
| × | 1 | ||||
Disclosure of Material Connection: I received the JBtek, 1Sheeld and DIYmall products for free so that I could provide product feedback to the company and post a product review. I am disclosing this in accordance with the Federal Trade Commission's requirements.
I have been playing with my Arduino boards lately, and I wanted to try out the servo control. I didn't have any spare servos laying around, but I did have a Traxxas Slash R/C truck with a servo mounted in it. I decided to play around with the steering servo, and then I got ideas of how to control it using some of the 1Sheeld capabilities.
I decided that I wanted to use my smartphone to control the truck just by tilting the phone (left/right for steering, forward/back for power). After some time playing around with the code and hardware, I had a rough working setup.
Components I used:
- Small USB battery pack (to power the Arduino + 1Sheeld)
- JBtek breadboard power supply
- DIYmall Arduino compatible UNO R3
- Solderless breadboard + jumper wires
- Traxxas Slash (2wd)
For the software, I just played around with samples for Servo control and the 1Sheeld orientation sensors until I got a good understanding of how everything operated.
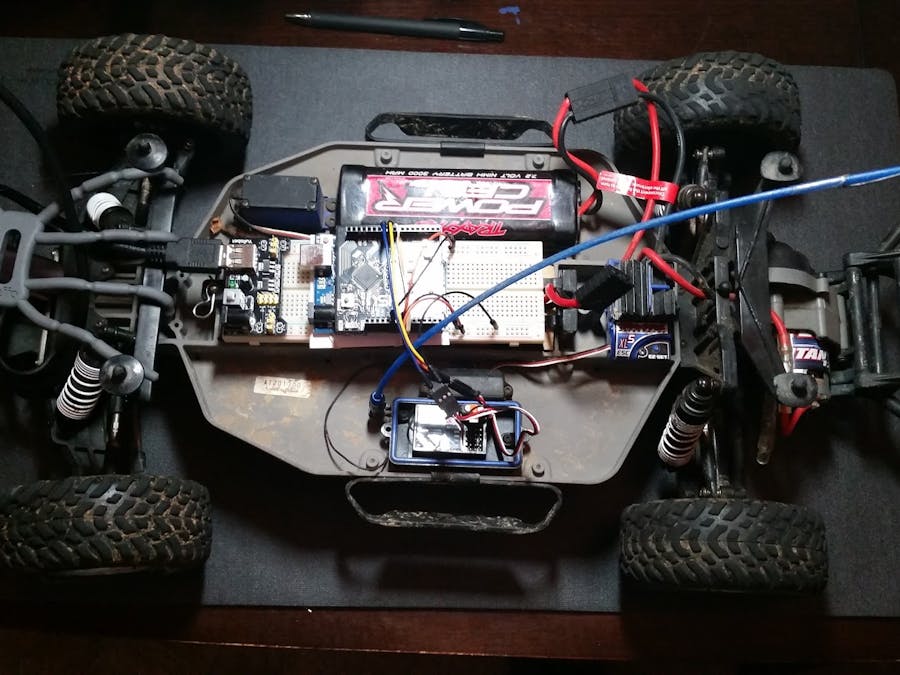
To prepare the Traxxas Slash, I removed the waterproof cover from the receiver and disconnected the two cables (steering servo and electronic speed control). It was very simple, and I can return it back to R/C mode very easily once I am done. I then mounted the breadboard with the breadboard power supply on the Slash chassis, and also put the UNO + 1Sheeld on the breadboard using a rubber band to keep things in place. After that, I just had to connect my setup.
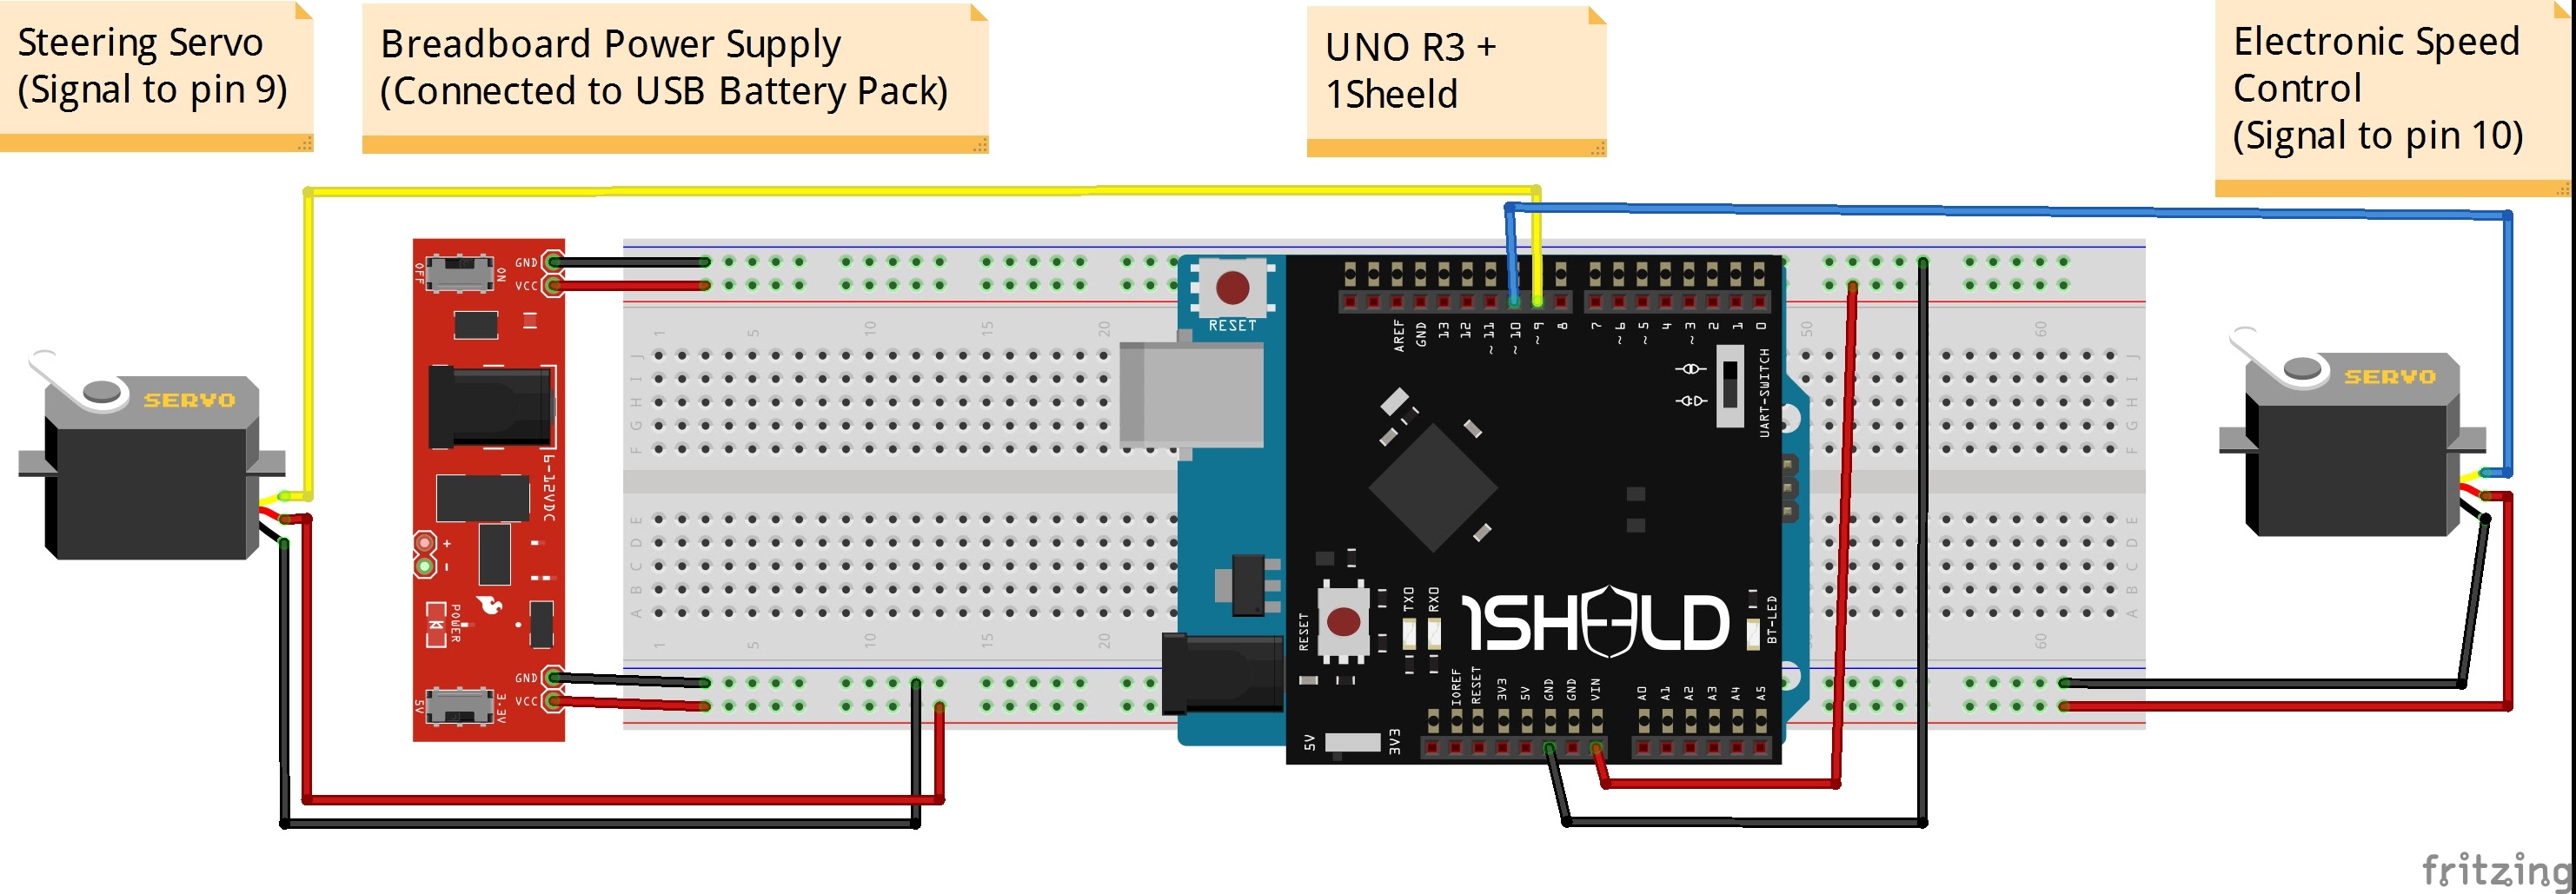
WARNING: For normal servos, you would connect the red cable from the servo to your + voltage however with an Electronic Speed Control the unit typically does not need power (since it is connected to the battery). In fact, on my unit the ESC was providing 6V on the red wire so if you did connect that to your 5V supply bad things could happen.
Close up of breadboard with components
R/C receiver with one of the servo cables removed
Shot of the entire setup Once the software + hardware was ready, I turned on the breadboard power supply but left the Electronic Speed Control (ESC) off. This would allow me to test the steering without the truck moving. The steering seemed to work fine, not as smooth as the regular R/C setup but not bad. Next, I turned on the ESC and tilted the phone to confirm the wheels got power.
After I confirmed everything was working, I did a quick test inside the house and then took it outside to play around. It was pretty neat being able to just tilt the phone to control the truck.
Here is video of the truck running:


Comments