Babu Vaka
Published © GPL3+

A Simple Arduino Based LEDs Dance To Audio Input

Making LEDs dance to audio input & dimming LEDs according to frequency of audio. It's very simple and less price.

IntermediateShowcase (no instructions)2 hours10,727
A Simple Arduino Based LEDs Dance To Audio Input

Things used in this project

Hardware components

Resistor 10k ohm
Resistor 10k ohm
×5
Resistor 100k ohm
Resistor 100k ohm
×2
Capacitor 10 nF
Capacitor 10 nF
×1
Capacitor 1 µF
Capacitor 1 µF
×1
General Purpose Dual Op-Amp
Texas Instruments General Purpose Dual Op-Amp
×1
Resistor 1k ohm
Resistor 1k ohm
×1
Single Turn Potentiometer- 10k ohms
2k pot is enough.
×1
Microphone Amplifier Breakout
Adafruit Microphone Amplifier Breakout
General Electricite microphone is more than enough, we can make our own amplifier using above components.
×1

Software apps and online services

Arduino IDE
Arduino IDE

Story

Read more

Schematics

Mic along with amplifier

here schematic circuit is attached. Before connecting to arduino an amplifier & offset zero level is used to make convenient to arduino.

Code

Leds dance to audio input

Arduino
Interfacing microphone with Arduino. Generally, microphone can give output ranges of millivolts, but Arduino has scale range of 0-5 V. In this experiment to amplify the microphone signal, LM358n IC used. It's need single power supply so it can best suitable to Arduino platform. Some adjustments are made according to offset value which is absorbed on oscilloscope.
/*
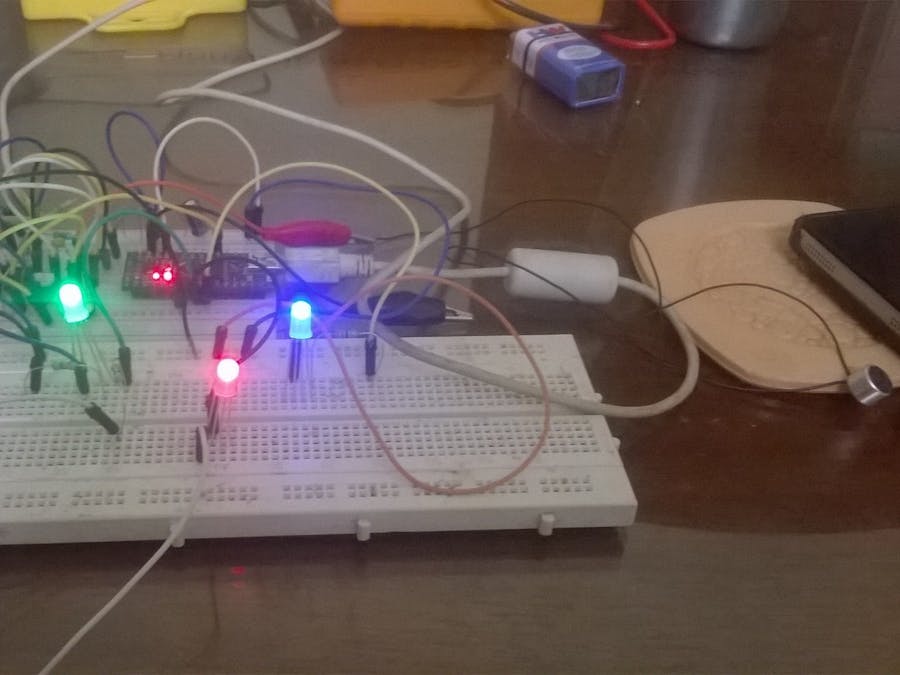
 Mic is connected to arduino analog pin 2. red green blue leds are connected to digital pins of arduino.
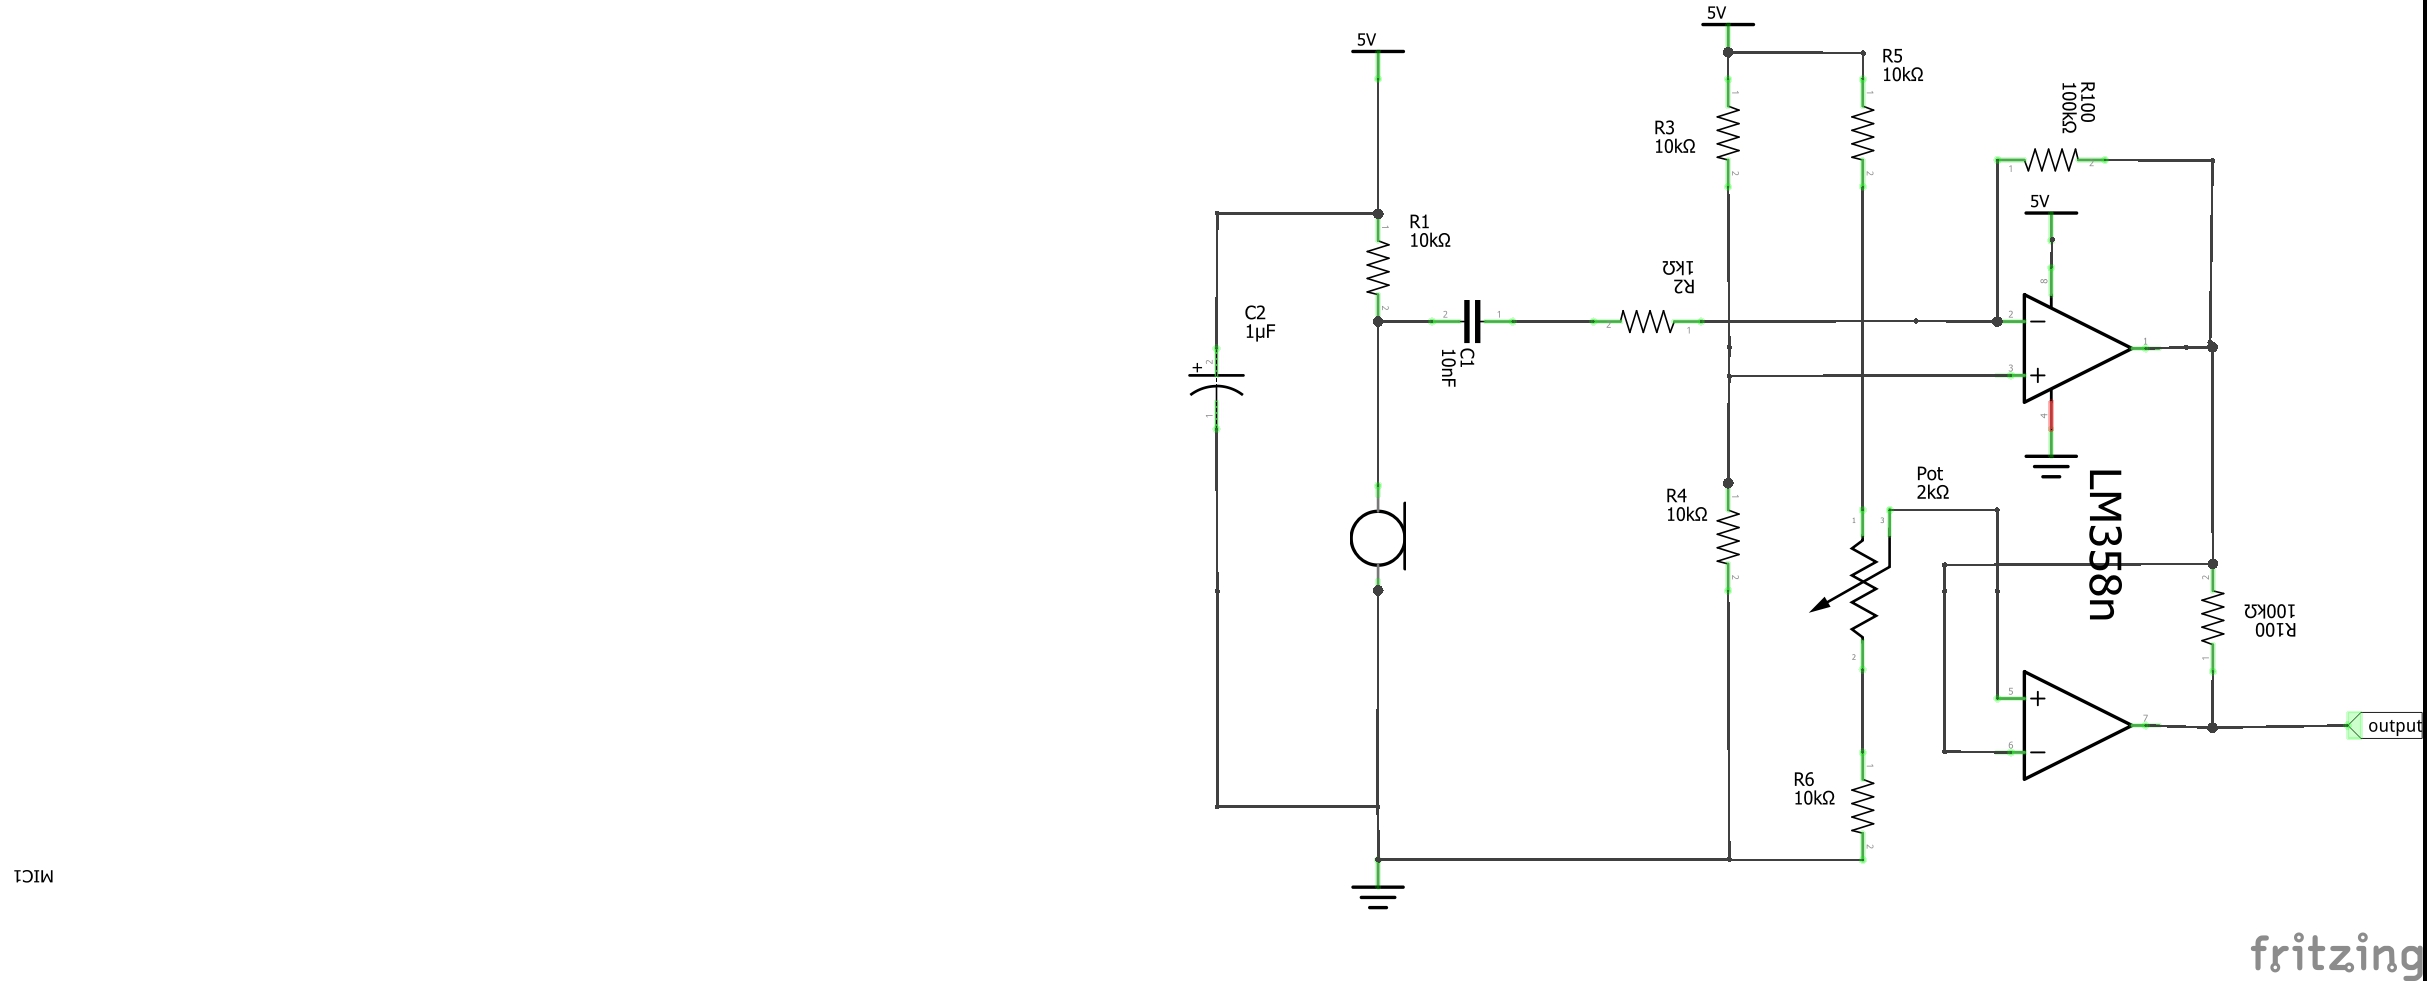
 before connecting to arduino, use oscilloscope to check the input audio signal level and offset levels. Arduino has scale range of 0-5v 
 so we need to check offset value and according to that level map analog readings.

 3,5 ,6 are Pwm pins of arduino.. so can adjust in the range of 8 bit scale..
 */

#define microphonePin A2
#define Red 3      
#define Green 5
#define Blue 6
int sound;
int sound1;
void setup() {
  // put your setup code here, to run once:
Serial.begin(9600);
pinMode(microphonePin, INPUT);
  pinMode(Red, OUTPUT);
  pinMode(Green, OUTPUT);
  pinMode(Blue, OUTPUT);
}

void loop() {
   sound= analogRead(microphonePin);  // getting input audio signal readings
  
  Serial.print(sound);    // input audio signal readings to Serial display
  Serial.print(" ");
  if (sound>415)
  {
    sound1=map(sound,415,750,140,255);  //  mapping higher frequency values which are above offset to  the scale of 150 - 255
    }
    else if (sound>340 && sound <415)   // keeping offset reading to zero scale..here offset value in the range of 340 - 415(offset value at 1.45v) ..its depends on componets used in circuit..
    {
       sound1=map(sound,340,415,0,9);
      }
      else if (sound<340)
      {
       sound1=map(sound,0,340,10,139);// keeping below offset readings to scale of 1-139..
      }
     
      
   if(sound1>240)
        {
             digitalWrite(Red,HIGH);   // set the LEDs on
             digitalWrite(Green,HIGH);
             digitalWrite(Blue,HIGH);
        }  
        else if((sound1)>200)
        {
             digitalWrite(Red,LOW);   // set the LED off
             digitalWrite(Green,HIGH);
             digitalWrite(Blue,HIGH);
            
        }
        else if(sound1>160)
        {
             digitalWrite(Red,HIGH);   // set the LED on
             digitalWrite(Green,LOW);
             digitalWrite(Blue,HIGH);   // set the LED on
             
        }
         else if(sound1>120)
        {
             digitalWrite(Red,LOW);   // set the LED off
             digitalWrite(Green,LOW);   // set the LED off
             digitalWrite(Blue,HIGH);
             
        }
        
         else if(sound1>80)
        {
             digitalWrite(Red,HIGH);   // set the LED on
             digitalWrite(Green,HIGH);   // set the LED on
             digitalWrite(Blue,LOW);
             
        }
          else if(sound1>40)
        {
             digitalWrite(Red,LOW);   // set the LED on
             digitalWrite(Green,HIGH);   // set the LED off
             digitalWrite(Blue,LOW);
             
        }
          else if(sound1>10)
        {
             digitalWrite(Red,HIGH);   // set the LED on
             digitalWrite(Green,LOW);   // set the LED off
             digitalWrite(Blue,LOW);
             
        }
         else
        {
             digitalWrite(Red,LOW);   // set the LEDs off
             digitalWrite(Green,LOW);   // set the LEDs off
             digitalWrite(Blue,LOW);   // set the LEDs off
            
        }

  Serial.println(sound1);
 
  delay(10);
}
  

Credits

Babu Vaka

Babu Vaka

1 project • 0 followers
Passionate about new technologies, Want to explore as much as possible & wanna do some crazy things from scratch.

Comments