


Hardware components | ||||||
 |
| × | 1 | |||
| × | 1 | ||||
Software apps and online services | ||||||
| ||||||
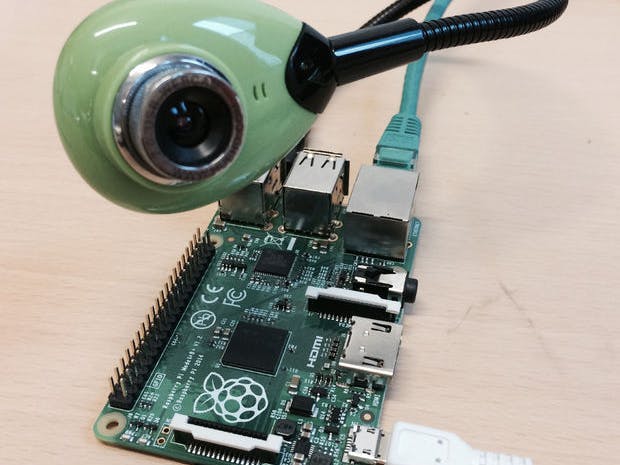
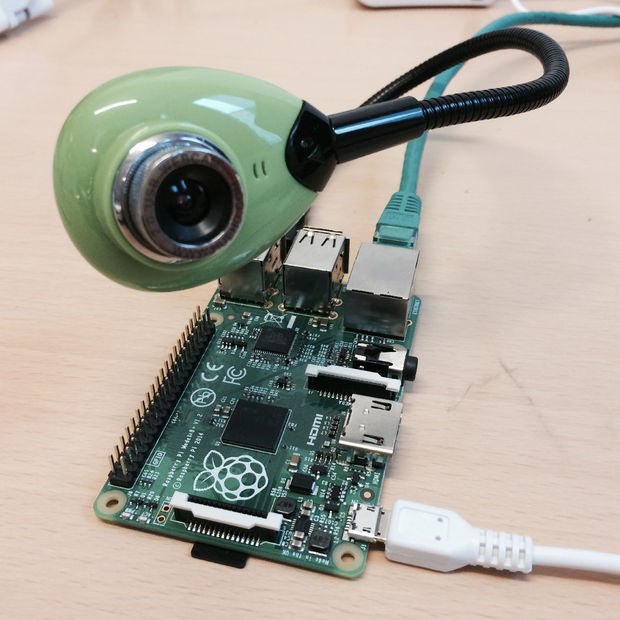
A basic USB camera can be used to detect motion in a room. In the following steps we will show you how you can use Reactive Blocks to program a ready to run Java application that sends SMS when motion is detected. With Reactive Blocks you make Java SE applications so the alarm application can be deployed on any machine with Java SE and a camera attached or integrated. The application is easily deployed on the Pi since the Raspbian release has Oracle Java pre-installed.
This is what you need:
- Raspberry Pi Model B+ with Raspbian OS
- Standard USB camera
- Ethernet cable
- Screen and keyboard for the Pi
- Windows or MAC computer with JDK
- Reactive Blocks, an Eclipse plugin, to program the application.
Step 1: Install Reactive Blocks from www.bitreactive.com/installation/
Step 2: Download the application from the libraries.
Make sure you have opened the Reactive Blocks perspective and that you are in the Blocks view. From the Blocks view select the import button and choose Reference applications. Select the Motion Detection project. At this point you will be asked to register with a google ID. This will give you immediate access to the building blocks libraries and modifiable systems and tutorials.
The Motion Detection project you downloaded includes two applications, the actual Alarm System and a test application the Test motion detection. In this tutorial you will only use the Alarm System.
Step 3: Understand the application
The application Alarm System looks like this
It is composed of 7 building blocks; 5 standard building blocks from the libraries and 2 custom made blocks that were made for this application.
Standard Blocks from the IoT library are:
- Grabber, grabs images from the USB camera
- Image to file, writes buffered image object to file
- Periodic Timer, starts at accurate time stamps and sends a signal on the tick pin every period.
- Buffer Eager, pushes out the first element in the queue automatically. The buffer ensures that only one message is sent to the SMS Send block since it can only process one message at a time.
- SMS Send, sends SMS through the Twilio service
Custom made blocks for this application are:
- ReadConfig, reads config data from input file
- View, views an image on the screen.
The Periodic Timer block works as a system engine. It will periodically issue a tick that sends a signal to the Grabber block via the grab pin.The Grabber block uses the Open Intelligent Multimedia Analysis for Java, OpenIMAJ. When the block is initialized, a separate thread is started to read data from the camera. The thread listens to a command queue. When the block receives a command via the grab pin it will take one picture and deliver it on the image pin.
The image is then passed to the Motion Detection block that performs the actual image detection. The Motion detection block also uses OpenIMAJ. A method within this block compares two images and will flag changes in image when motion is detected. The method is very CPU intensive and has to be run in a separate thread. When an image is detected it is signaled on the motionDetected pin which will trigger the generation of an SMS message.
The light blue boxes are all Java methods specifically made for this application. Clicking on a method block opens the Java editor. You can see what some of the methods look like here:
When you click on a building block you can see the details of the logic inside the block. If you look inside the ReadConfig block you will see it is made by combining one existing building blocks and 4 Java methods.
Step 4: Enable SMS
This alarm application uses Twilio as SMS service. To enable SMS you must edit the file config/motiondetection.ini. You can find it in the package explorer view under br.ref.motiondetection, see the picture.
If you don´t have the Twilio service you can modify the application to use your own SMS service. We also have a ready to use building block for the Clickatell service.
If you rather have email notification or if you want to monitor your application from a cloud service, this is also quite easy to do with small modifications. You can find building blocks for SMTP email, AirVantage Cloud, IBM Bluemix and Xively to name a few.
Of course, you can always run the application without SMS enabled.
Step 5: Build and run the application on your laptop
You need to build the application before you run it on your computer, and later deploy it to the Raspberry Pi. This is done using the Reactive Blocks code generator that creates a complete Java project from the structure of the building blocks. The code that represents the diagrams is the synchronization code that handles events in the right order and at the right time, and typically accounts for more than 60% of lines of the code in your program. Since the building blocks are precise mathematical structures the generator can transform this logic into very efficient code. This is very nice Reactive Blocks feature because to write such code manually is tedious and difficult. To generate the code, this is all you need to do:
Right click the project intrusion detection under the Projects tab and Select Java standard edition. Make sure logging info is INFO. The generated project will then open automatically under the Package Explorer tab. See the figure for details.
Step 6: Run the application on your computer
Now you can execute the generated project. In the Package Explorer view under the generated _exe project, right click AlarmSystem.launch and select RunAs and then choose
Watch the window on the screen and the Console view. Should look something like the this:
Terminate the application by closing the camera-window.
Step 7: Export as runnable JAR file
If you want to run the application on a Raspberry Pi, the next step is to export the generated project to a runnable JAR file. To do this, right click the executable project in the package explorer view and choose export. Then select the Runnable JAR file option and hit next. In the following window select the proper launch configuration and export destination.
Step 8: Prepare your Raspbery Pi
- Prepare the SD card with Raspbian (we have tested using NOOBS)
- Insert the SD card into the Raspberry pi
- Connect the camera
- Connect the network
- Connect a screen and keyboard to the Pi
- Start the Raspberry pi by connecting the micro USB for power supply.
- Find out the IP address of your Raspberry Pi. When started up, your Raspberry Pi will report something like "My IP address is 10.10. 15.107"
- We have tested with Raspbian (default login: pi, password: raspberry), which includes Java by default.
Step 9: Deploy the application to your Raspberry Pi
To copy the runnable jar file you already exported to Raspberry Pi follow these steps:
- Open a terminal on your machine
- Go to the directory where the generated JAR file is located
- Type scp alarmsystem.jar pi@10.10.15.107:~/
- You will be asked for the password combination. "pi" is the default user name and "raspberry" the default password
- Go to the directory where the configuration file motiondetection.ini is located. Easiest for me is to manually copy the file from the Eclipse editor over to the same directory as the jar file.
- Type scp motiondetection.ini pi@10.10.15.107:~/
10.10.15.107 is the IP address, replace it by the IP address of your Raspberry Pi.
Step 10: Run the application on your Raspberry Pi
You are now ready to run the application.
- Login to the Raspberry Pi either directly or remotely via ssh.
- Make a new config directory: mkdir config
- Check if the runnable JAR file and .ini has been copied to the Raspberry Pi
- Move the .ini file to the config directory: mv motiondetection.ini config/
- Type sudo java -jar alarmsystem.jar
- Watch the output on the console
- Terminate with ^C


Comments