My continued saga first utilizes the NEW Adabox002 Mini Robot with Feather 32u4 and the Feather Motor Controller in stacked format and have it updated to use the Piezo code to play sound when an on-screen button is pressed. I used the Adafruit revised Piezo code and added it to all four on-screen buttons which code can be revised later.
The second build again utilizes another Adafruit Mini Robot but will utilize the HUZZAH ESP and Feather Motor Control left over from Part 1's build for the tank platform to fit it up.
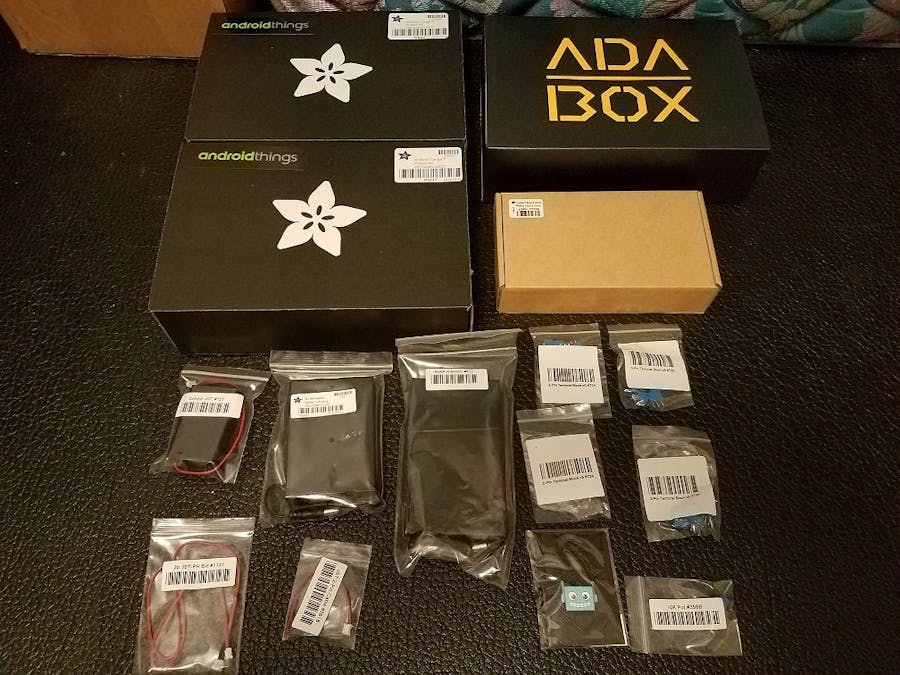
Finally my Adabox002 arrived with additional Mini Rover
What's new?
I experimented with the supporting standoffs when I initially assembled each Mini Robot to keep things symmetric and to allow for maximum battery storage and electronic layout space. You'll notice slight differences in the pictures.
So once again, I used Adafruit's documentation for each construction step and viewed the available videos to clear up issues that I discovered.
I even needed to go back to their forum because I had made a few "Tech 101" oversights/mistakes (i.e., I drilled an oversized hole in one plate because I didn't realize that the plates weren't symmetric). I changed the battery size/type I was going to use so I needed to move the brass supports multiple times, as Lady Ada said in the Christmas unboxing video.
Adafruit's Christmas Evening unboxing of the Adabox002
When she assembled one motor and wheel incorrectly: "what's a project if you don't have to undo a step or two" ...at least that's her jest.
I even decided not to use the half-breadboard and instead use a 1/4 mini breadboard instead (I would have used another Double Feather Wing if I had one available).
I am still waiting for a power switch for the Li-Po battery, so I don't have to keep unplugging it when not in use. Speaking of Li-Po Batteries, that was another "Tech 101" mistake. I had forgotten a lesson learned from 1st build, the Feather needs it's own power source as well as the DC Motors. I figured that if they are stacked, that they would use/share the same power source. Wrong!
This video shows various standoff positional changes due to battery holder
Lessons learned:
1. When assembling DC Motor mounts be sure that nut face is parallel to mount, not on edge.
2. Stand-offs can be placed in many holes, be sure to keep plates in-lined symmetrically so that they overlay on top of each other.
3. Be sure to have battery holder that is selected for use on hand so that during assembly you can orientate power switch in large opening.
4. Both Feather 32u4 and Motor Controller need separate battery's. DC Motors need 4-AA batteries (6v) but the Feather 32u4ncan use a Li-Po 3.7vdc @350maH.
5. Use Velcro or tape to hold Li-Po battery to motor battery case.
Modified Adafruit 32u4 BLE with Piezo-packetParser.cpp
Arduino
I added the Piezo code for each of the 4 buttons
#include<string.h>#include<Arduino.h>#include<SPI.h>#include<SoftwareSerial.h>#include"Adafruit_BLE.h"#include"Adafruit_BluefruitLE_SPI.h"#include"Adafruit_BluefruitLE_UART.h"#define PACKET_ACC_LEN (15)#define PACKET_GYRO_LEN (15)#define PACKET_MAG_LEN (15)#define PACKET_QUAT_LEN (19)#define PACKET_BUTTON_LEN (5)#define PACKET_COLOR_LEN (6)#define PACKET_LOCATION_LEN (15)// READ_BUFSIZE Size of the read buffer for incoming packets#define READ_BUFSIZE (20)/* Buffer to hold incoming characters */uint8_tpacketbuffer[READ_BUFSIZE+1];/**************************************************************************//*! @brief Casts the four bytes at the specified address to a float*//**************************************************************************/floatparsefloat(uint8_t*buffer){floatf=((float*)buffer)[0];returnf;}/**************************************************************************//*! @brief Prints a hexadecimal value in plain characters @param data Pointer to the byte data @param numBytes Data length in bytes*//**************************************************************************/voidprintHex(constuint8_t*data,constuint32_tnumBytes){uint32_tszPos;for(szPos=0;szPos<numBytes;szPos++){Serial.print(F("0x"));// Append leading 0 for small valuesif(data[szPos]<=0xF){Serial.print(F("0"));Serial.print(data[szPos]&0xf,HEX);}else{Serial.print(data[szPos]&0xff,HEX);}// Add a trailing space if appropriateif((numBytes>1)&&(szPos!=numBytes-1)){Serial.print(F(" "));}}Serial.println();}/**************************************************************************//*! @brief Waits for incoming data and parses it*//**************************************************************************/uint8_treadPacket(Adafruit_BLE*ble,uint16_ttimeout){uint16_torigtimeout=timeout,replyidx=0;memset(packetbuffer,0,READ_BUFSIZE);while(timeout--){if(replyidx>=20)break;if((packetbuffer[1]=='A')&&(replyidx==PACKET_ACC_LEN))break;if((packetbuffer[1]=='G')&&(replyidx==PACKET_GYRO_LEN))break;if((packetbuffer[1]=='M')&&(replyidx==PACKET_MAG_LEN))break;if((packetbuffer[1]=='Q')&&(replyidx==PACKET_QUAT_LEN))break;if((packetbuffer[1]=='B')&&(replyidx==PACKET_BUTTON_LEN))break;if((packetbuffer[1]=='C')&&(replyidx==PACKET_COLOR_LEN))break;if((packetbuffer[1]=='L')&&(replyidx==PACKET_LOCATION_LEN))break;while(ble->available()){charc=ble->read();if(c=='!'){replyidx=0;}packetbuffer[replyidx]=c;replyidx++;timeout=origtimeout;}if(timeout==0)break;delay(1);}packetbuffer[replyidx]=0;// null termif(!replyidx)// no data or timeout return0;if(packetbuffer[0]!='!')// doesn't start with '!' packet beginningreturn0;// check checksum!uint8_txsum=0;uint8_tchecksum=packetbuffer[replyidx-1];for(uint8_ti=0;i<replyidx-1;i++){xsum+=packetbuffer[i];}xsum=~xsum;// Throw an error message if the checksum's don't matchif(xsum!=checksum){Serial.print("Checksum mismatch in packet : ");printHex(packetbuffer,replyidx+1);return0;}// checksum passed!returnreplyidx;}
Modified Adafruit 32u4 BLE with Piezo-BluefruitConfig.cpp
Arduino
This is 2nd required code
// COMMON SETTINGS// ----------------------------------------------------------------------------------------------// These settings are used in both SW UART, HW UART and SPI mode// ----------------------------------------------------------------------------------------------#define BUFSIZE 128 // Size of the read buffer for incoming data#define VERBOSE_MODE true // If set to 'true' enables debug output#define BLE_READPACKET_TIMEOUT 500 // Timeout in ms waiting to read a response// SOFTWARE UART SETTINGS// ----------------------------------------------------------------------------------------------// The following macros declare the pins that will be used for 'SW' serial.// You should use this option if you are connecting the UART Friend to an UNO// ----------------------------------------------------------------------------------------------#define BLUEFRUIT_SWUART_RXD_PIN 9 // Required for software serial!#define BLUEFRUIT_SWUART_TXD_PIN 10 // Required for software serial!#define BLUEFRUIT_UART_CTS_PIN 11 // Required for software serial!#define BLUEFRUIT_UART_RTS_PIN -1 // Optional, set to -1 if unused// HARDWARE UART SETTINGS// ----------------------------------------------------------------------------------------------// The following macros declare the HW serial port you are using. Uncomment// this line if you are connecting the BLE to Leonardo/Micro or Flora// ----------------------------------------------------------------------------------------------#ifdef Serial1 // this makes it not complain on compilation if there's no Serial1#define BLUEFRUIT_HWSERIAL_NAME Serial1#endif// SHARED UART SETTINGS// ----------------------------------------------------------------------------------------------// The following sets the optional Mode pin, its recommended but not required// ----------------------------------------------------------------------------------------------#define BLUEFRUIT_UART_MODE_PIN 12 // Set to -1 if unused// SHARED SPI SETTINGS// ----------------------------------------------------------------------------------------------// The following macros declare the pins to use for HW and SW SPI communication.// SCK, MISO and MOSI should be connected to the HW SPI pins on the Uno when// using HW SPI. This should be used with nRF51822 based Bluefruit LE modules// that use SPI (Bluefruit LE SPI Friend).// ----------------------------------------------------------------------------------------------#define BLUEFRUIT_SPI_CS 8#define BLUEFRUIT_SPI_IRQ 7#define BLUEFRUIT_SPI_RST 6 // Optional but recommended, set to -1 if unused// SOFTWARE SPI SETTINGS// ----------------------------------------------------------------------------------------------// The following macros declare the pins to use for SW SPI communication.// This should be used with nRF51822 based Bluefruit LE modules that use SPI// (Bluefruit LE SPI Friend).// ----------------------------------------------------------------------------------------------#define BLUEFRUIT_SPI_SCK 13#define BLUEFRUIT_SPI_MISO 12#define BLUEFRUIT_SPI_MOSI 11
Modified Adafruit 32u4 BLE with Piezo-ble_robot_rc_m1m2_pizo_code.ino
Arduino
Modified Adafruit code to add piezo tone for each of the 4 buttons. Motors are on M1 and M2
#include<string.h>#include<Arduino.h>#include<SPI.h>#if not defined (_VARIANT_ARDUINO_DUE_X_)#include<SoftwareSerial.h>#endif#include"Adafruit_BLE.h"#include"Adafruit_BluefruitLE_SPI.h"#include"Adafruit_BluefruitLE_UART.h"#include"BluefruitConfig.h"#include<Wire.h>#include<Adafruit_MotorShield.h>// Create the motor shield object with the default I2C addressAdafruit_MotorShieldAFMS=Adafruit_MotorShield();// And connect 2 DC motors to port M1 & M2 !Adafruit_DCMotor*L_MOTOR=AFMS.getMotor(1);Adafruit_DCMotor*R_MOTOR=AFMS.getMotor(2);//Name your RC hereStringBROADCAST_NAME="Adafruit Black Robot Rover";StringBROADCAST_CMD=String("AT+GAPDEVNAME="+BROADCAST_NAME);Adafruit_BluefruitLE_SPIble(BLUEFRUIT_SPI_CS,BLUEFRUIT_SPI_IRQ,BLUEFRUIT_SPI_RST);#define toneC 1911#define toneC1 1804#define toneD 1703#define toneEb 1607#define toneE 1517#define toneF 1432#define toneF1 1352#define toneG 1276#define toneAb 1204#define toneA 1136#define toneBb 1073#define toneB 1012#define tonec 955#define tonec1 902#define toned 851#define toneeb 803#define tonee 758#define tonef 716#define tonef1 676#define toneg 638#define toneab 602#define tonea 568#define tonebb 536#define toneb 506#define tonep0 intspeaker=A1;longvel=20000;booleanhasplayed=false;// A small helpervoiderror(const__FlashStringHelper*err){Serial.println(err);while(1);}// function prototypes over in packetparser.cppuint8_treadPacket(Adafruit_BLE*ble,uint16_ttimeout);floatparsefloat(uint8_t*buffer);voidprintHex(constuint8_t*data,constuint32_tnumBytes);// the packet bufferexternuint8_tpacketbuffer[];charbuf[60];/**************************************************************************//*! @brief Sets up the HW an the BLE module (this function is called automatically on startup)*//**************************************************************************/voidsetup(void){Serial.begin(9600);AFMS.begin();// create with the default frequency 1.6KHz// turn on motorsL_MOTOR->setSpeed(0);L_MOTOR->run(RELEASE);R_MOTOR->setSpeed(0);R_MOTOR->run(RELEASE);Serial.begin(115200);Serial.println(F("Adafruit Bluefruit Robot Controller Example"));Serial.println(F("-----------------------------------------"));/* Initialize the module */BLEsetup();pinMode(speaker,OUTPUT);L_MOTOR->setSpeed(155);R_MOTOR->setSpeed(155);}intmelod[]={tonec,toneG,toneE,toneA,toneB,toneBb,toneA,toneG,tonee,toneg,tonea,tonef,toneg,tonee,tonec,toned,toneB};intritmo[]={18,18,18,12,12,6,12,8,8,8,12,6,12,12,6,6,6};voidloop(void){// read new packet datauint8_tlen=readPacket(&ble,BLE_READPACKET_TIMEOUT);readController();}boolreadController(){// Buttonsif(packetbuffer[1]=='B'){uint8_tbuttnum=packetbuffer[2]-'0';booleanpressed=packetbuffer[3]-'0';// Serial.println(buttnum);if(pressed){if(buttnum==1){if(hasplayed==true){return;}for(inti=0;i<17;i++){inttom=melod[i];inttempo=ritmo[i];longtvalue=tempo*vel;tocar(tom,tvalue);delayMicroseconds(1000);}//delay(1000);hasplayed=true;}if(buttnum==2){if(hasplayed==true){return;}for(inti=0;i<17;i++){inttom=melod[i];inttempo=ritmo[i];longtvalue=tempo*vel;tocar(tom,tvalue);delayMicroseconds(1000);}//delay(1000);hasplayed=true;}if(buttnum==3){if(hasplayed==true){return;}for(inti=0;i<17;i++){inttom=melod[i];inttempo=ritmo[i];longtvalue=tempo*vel;tocar(tom,tvalue);delayMicroseconds(1000);}//delay(1000);hasplayed=true;}if(buttnum==4){if(hasplayed==true){return;}for(inti=0;i<17;i++){inttom=melod[i];inttempo=ritmo[i];longtvalue=tempo*vel;tocar(tom,tvalue);delayMicroseconds(1000);}//delay(1000);hasplayed=true;}if(buttnum==5){L_MOTOR->run(FORWARD);R_MOTOR->run(FORWARD);}if(buttnum==6){L_MOTOR->run(BACKWARD);R_MOTOR->run(BACKWARD);}if(buttnum==7){L_MOTOR->run(RELEASE);R_MOTOR->run(FORWARD);}if(buttnum==8){L_MOTOR->run(FORWARD);R_MOTOR->run(RELEASE);}}else{L_MOTOR->run(RELEASE);R_MOTOR->run(RELEASE);hasplayed=false;}}}voidBLEsetup(){Serial.print(F("Initialising the Bluefruit LE module: "));if(!ble.begin(VERBOSE_MODE)){error(F("Couldn't find Bluefruit, make sure it's in CoMmanD mode & check wiring?"));}Serial.println(F("OK!"));/* Perform a factory reset to make sure everything is in a known state */Serial.println(F("Performing a factory reset: "));if(!ble.factoryReset()){error(F("Couldn't factory reset"));}//Convert the name change command to a char arrayBROADCAST_CMD.toCharArray(buf,60);//Change the broadcast device name here!if(ble.sendCommandCheckOK(buf)){Serial.println("name changed");}delay(250);//reset to take effectif(ble.sendCommandCheckOK("ATZ")){Serial.println("resetting");}delay(250);//Confirm name changeble.sendCommandCheckOK("AT+GAPDEVNAME");/* Disable command echo from Bluefruit */ble.echo(false);Serial.println("Requesting Bluefruit info:");/* Print Bluefruit information */ble.info();Serial.println(F("Please use Adafruit Bluefruit LE app to connect in Controller mode"));Serial.println(F("Then activate/use the sensors, color picker, game controller, etc!"));Serial.println();ble.verbose(false);// debug info is a little annoying after this point!/* Wait for connection */while(!ble.isConnected()){delay(500);}Serial.println(F("*****************"));// Set Bluefruit to DATA modeSerial.println(F("Switching to DATA mode!"));ble.setMode(BLUEFRUIT_MODE_DATA);Serial.println(F("*****************"));}voidtocar(inttom,longtempo_value){longtempo_gasto=0;while(tempo_gasto<tempo_value){digitalWrite(speaker,HIGH);delayMicroseconds(tom/2);digitalWrite(speaker,LOW);delayMicroseconds(tom/2);tempo_gasto+=tom;}}


Comments