


Hardware components | ||||||
 |
| × | 1 | |||
Software apps and online services | ||||||
 |
| |||||
Hand tools and fabrication machines | ||||||
| ||||||
The project is simple, it is just a java server that acts as a hue bridge and gets the requests from Alexa's API redirecting them to an IP you declare in the configuration page.
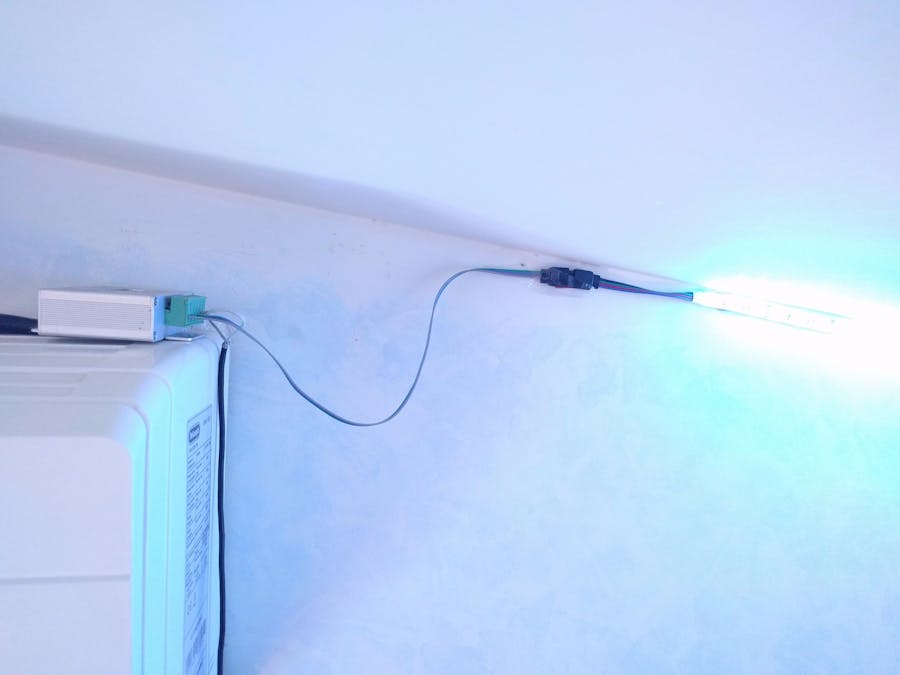
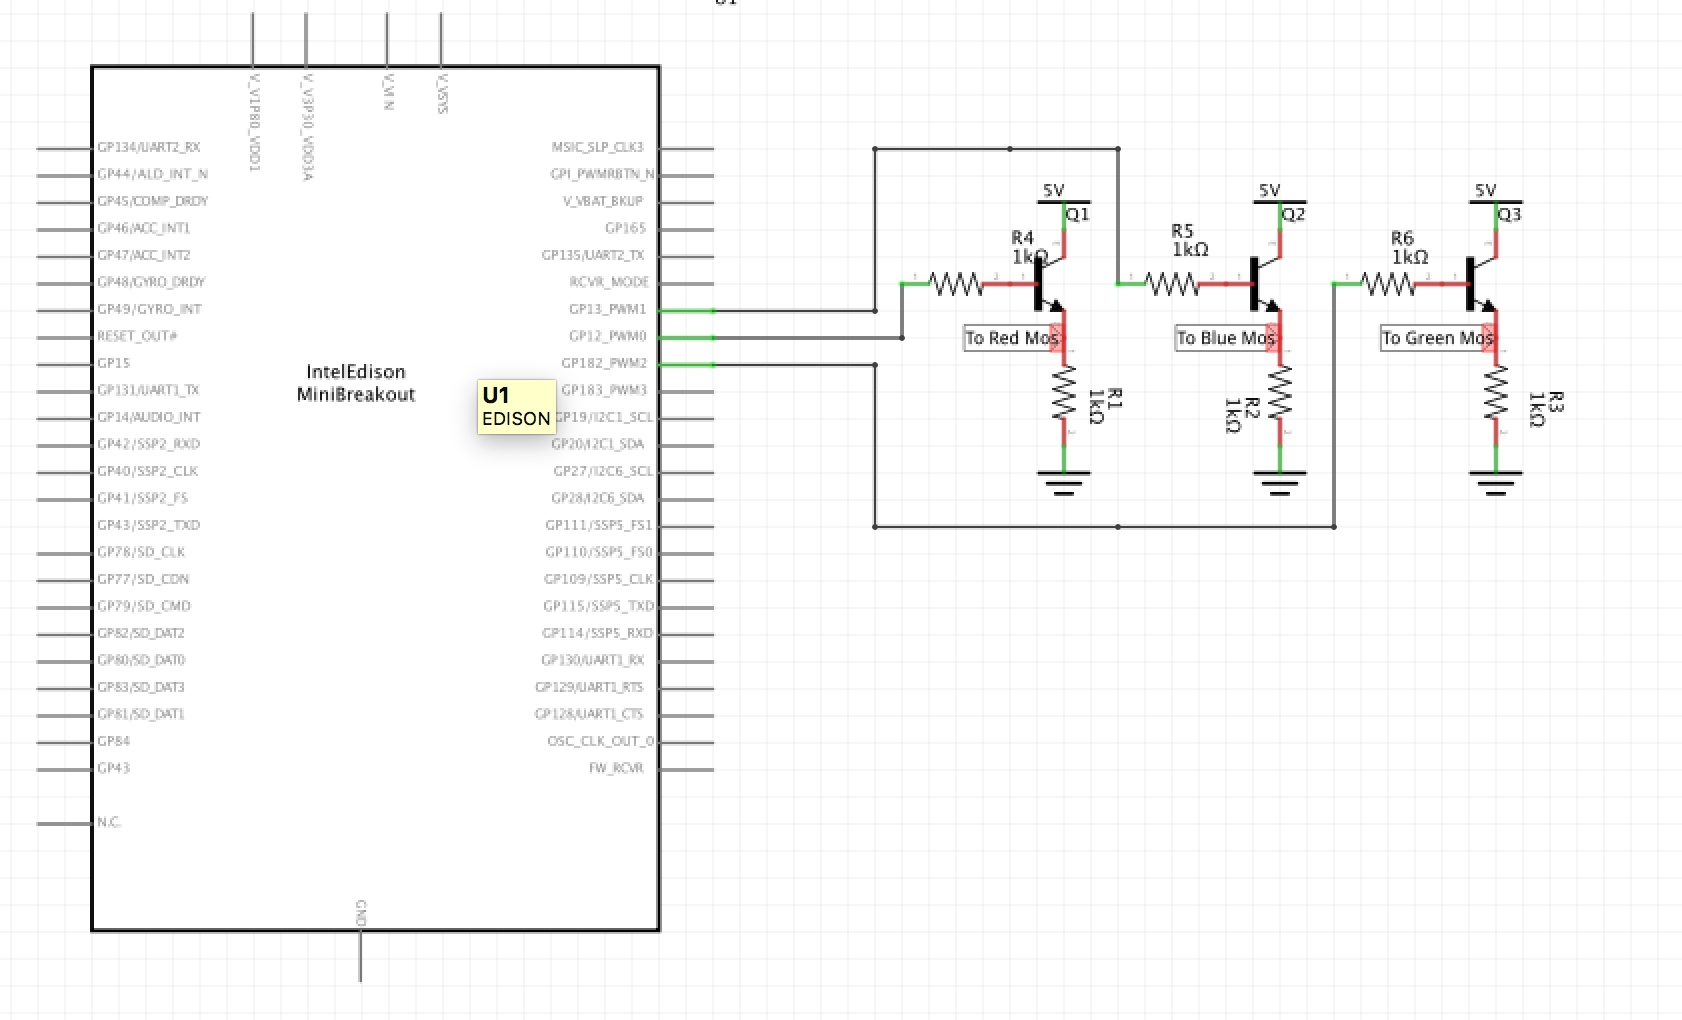
In this case, the server is a Java Applet that runs on the Intel Edison and then redirect the request to itself or another device to turn on at a desired intensity the color of a LED strip. So you don't have to buy 100$ Philips LED strips but only a 10$ one and mod the circuit as shown here.
Wondering how to get anything controlled by your voice or by the press of a dash button? https://github.com/lollokara/Alexa-Universal-API
The configurationThere you will find all the info about the Code and how to run it.
So first of all, get ready your Edison. Configure it so you will connect to it in ssh
and have internet access. Then install the dependencies:
For Python Server:
$ pip install requests
$ pip install Flask
For Node server:
$ opkg install libpcap-dev
$ npm install node-dash-button
After that, edit the Python script to match your hardware setup:
# example request: {"on": true,"bri":255}
from flask import Flask, request, url_for
import json
import mraa
app = Flask(__name__)
@app.route('/red', methods=['GET', 'POST']) # define the url to be called like http://IP:PORT/red in this case
def red():
	js=json.dumps(request.get_json()) #get the json request
	js=json.loads(js)
	#print("recived data: "+str(js["on"]))
	#print("recived data: "+str(js["bri"]))
	if (js["on"]==False):  #look up at the json to see what to do
		red.write(1)
		return "200"
	if (js["on"]==True and len(js)==1):
		red.write(0)
		return "200"
	if len(js)>1:
		pwmvalue=float(js["bri"])/255.0000
		pwmvalue=round(pwmvalue,2)
		red.write(1-pwmvalue)
		print(1-pwmvalue)
	return "200"
if __name__ == '__main__':
#Init your MRAA obj here to be used in the flasks functions
	red = mraa.Pwm(14)
	red.period_us(700)
	red.enable(True)
	red.write(1)
	app.run(
		host="0.0.0.0",
		port=int("5000")
 )
Back to the Node server.
Note: This part is only if you want to add a degree of freedom and control the stuff also with your dash button.
$ cd node_modules/node-dash-button
$ node bin/findbutton
It will watch for new ARP and UDP requests on your network. There may be several such requests, so press it a few times to make sure. Copy the hardware address as shown below, and make a note of the protocol used.
Then edit the main.js file to match the hardware ID of your dash button. Now is the turn to run the Java code. Find the .jar
file in the main repo and launch it like so:
$ java -jar Java_API_Server/target/amazon-echo-bridge-0.4.0.jar --upnp.config.address=<YOUR IP>
It should start, after 90 seconds it should be running and ready, go to http://YOURIP:PORT/configurator.html
and create a new device, enter a requestbin URL as on and off URLs just to test and then ask Alexa to discover devices. She should answer that one device has been found and then the fun begins. Say "Alexa turn on <devicename>
" and then look at the requestbin
you should see the JSON posted. Then run the Python sever configured as you prefer, enter the URLs from your Python server into the Java configuration fields and start testing.
After all is done, I suggest you to install Crontab into the Edison and set a Watchdog script to see if one of the server crashes.
$ echo "src intel-iotdk http://iotdk.intel.com/repos/1.1/intelgalactic" > /etc/opkg/intel-iotdk.conf
$ opkg update
$ opkg install cronie
$ export EDITOR=nano
$ crontab -e
And then add the script like so:
*/1 * * * * /bin/sh <script location>
So it will check every minute that is running, then edit the script so match the executable location ( edit <JAR FILE LOCATION>
):
#!/bin/bash
#export DISPLAY=:0 #needed if you are running a simple gui app.
process=/usr/bin/java
makerun="/usr/bin/java -jar <JAR FILE LOCATION> > /dev/null"
if ps | grep -v grep | grep $process > /dev/null
then
#sudo wall -n not crashed
exit
else
$makerun &
#sudo wall -n running
fi
exit
And that's it! Byeeee!


Comments