

Hardware components | ||||||
 |
| × | 1 | |||
| × | 1 | ||||
 |
| × | 1 | |||
 |
| × | 1 | |||
 |
| × | 1 | |||
 |
| × | 1 | |||
Software apps and online services | ||||||
 |
| |||||
Today we'll study about the basics of ESP-12E NodeMcu V3 module. We will also see the basic connection scheme for blinking-led later in this tutorial.
Q>> What is an ESP-12E NodeMcu V3 module?
A>> NodeMCU is a LUA based interactive firmware for Expressif ESP8622 Wi-Fi SoC, as well as an open source hardware board that contrary to the $3 ESP8266 Wi-Fi modules includes a CP2102 TTL to USB chip for programming and debugging, is breadboard-friendly, and can simply be powered via its micro USB port.
This module is one of the cheapest available wifi-modules in market. V3 or Version3 is the latest version of this module. This tutorial however will facilitate you to connect all the versions of ESP8266 NodeMcu, i.e V1 , V2 or V3.
For makers, having ESP-12 module, rest assured, 12E is no different from its precursor. The only difference : 6 extra GPIOs are present in ESP-12E
Headers: 15-pin header with access to GPIOs, SPI, UART, ADC, and power pins.
Power: 5V via micro USB port
Hardware Components required:
Header PINOUT: (Save this picture for future references)
After you've assembled all the hardware components, click on this link and download all the files. The file contains requisite drivers needed to use this module. This will save you a lot of time.
Now, the ZIP file you've just downloaded, will be put to use in this tutorial as well as in the forthcoming tutorials.
Software requirement: ArduinoIDE
First of all, your ArduinoIDE needs to know that you want to use this NodeMcu module. That is, you need to select the right board. Confused?
Well, its very simple!
Follow this flowchart: (Tools > Board > Boards Manager) as depicted in Fig(4)
Next, select the requisite board. [Fig(5)]
Having done so, you can cross-check. (Tools > Board > ESP8266 Modules)
Out of this entire list, you need to select "NodeMCU 1.0 (ESP-12E Module)" as in Fig(6).
Now, select the correct port. Can't recognize the port?? Wait!
Check this out.....
Go to the Device Manager and update the driver.
Now, its a matter of few minutes before you can get started.... Let's proceed.
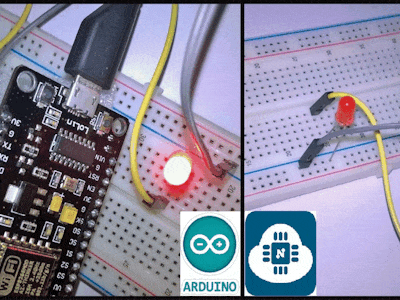
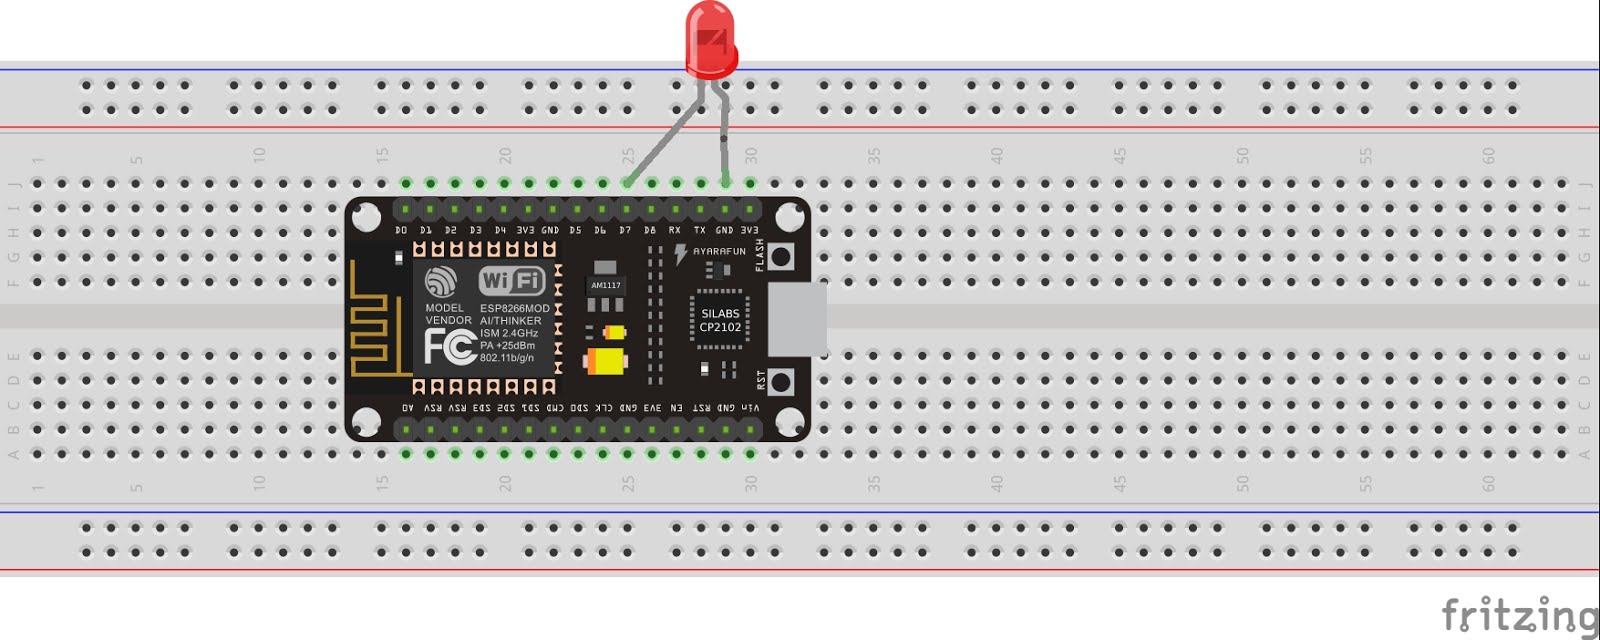
Connecting the LED to NodeMcu: (Zoomed-snapshot of the Circuit)
Connection Profile:
Connect D7 pin (NodeMcu) to the long leg of the LED (the positive leg, called the anode).
Connect G(Ground)pin to the short leg of the LED (the negative leg, called the cathode)
Now, come back to the ArduinoIDE. You need to set up the preferences.
(File > Preferences)
Copy this URL: http://arduino.esp8266.com/stable/package_esp8266com_index.json and paste it in the Additional Boards Manager URLs option. Refer Fig (8)
Final Task: Upload the code for Blinking an LED
Next...
Next, run the code. And your job's done!
You'll see the LED blinking as in Fig (11)
Congo! You've successfully interfaced a NodeMcu...and even Blinked an LED!


Comments