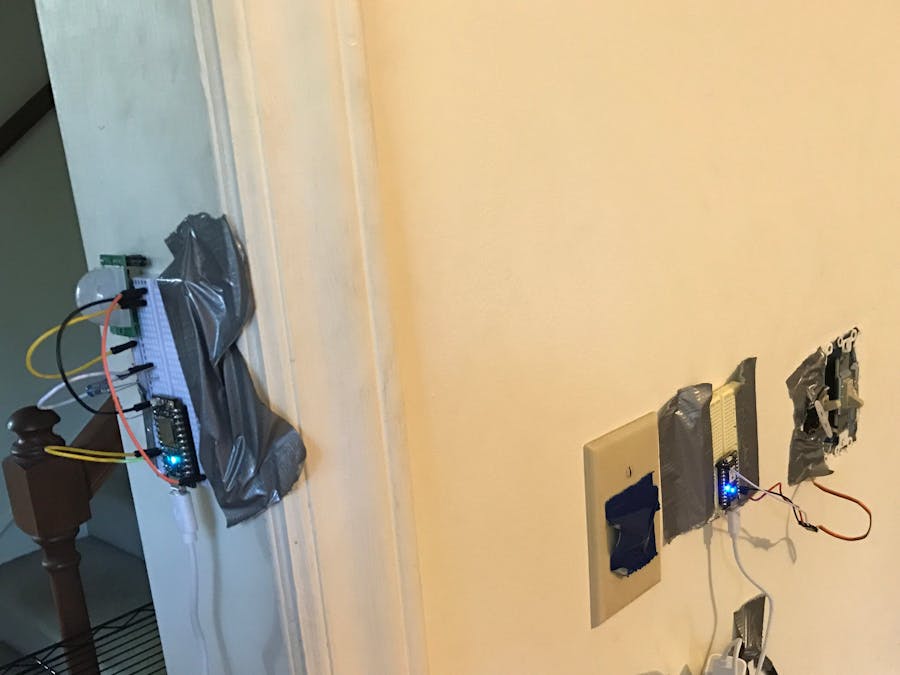
Have you ever woke up in the middle of the night and couldn't find the light switch? Well then this project is for you. This project uses two particle photons to control a PIR motion sensor and a micro servo motor that were both included in the particle maker kit, that can be purchased in the particle web store.
The PIR sensor reads a temperature variation when you get near it, then sends a signal through the particle cloud. After the signal is sent to the cloud, the second particle receives the signal and rotates the servo motor, which in turn flips on the light switch.
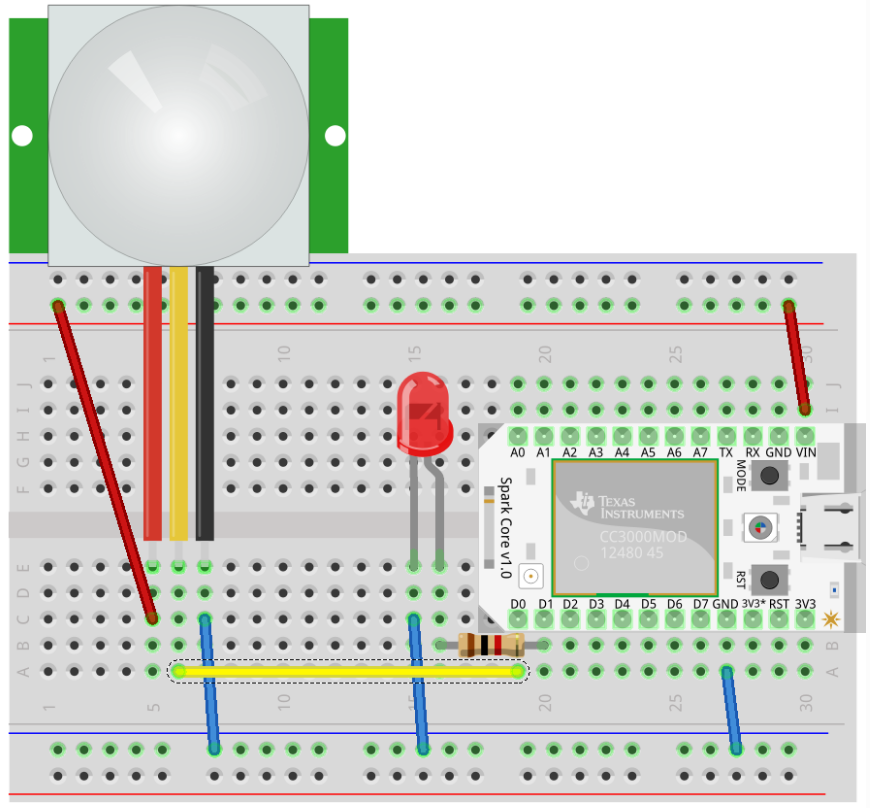
The first step in this project is to set up the PIR circuit. First, the Particle Photon, PIR sensor, LED, and 1K ohm resistor must be attached to the breadboard. Then the PIR needs to be wired into the photon. To wire the PIR, three jumper wires are needed to connect the sensor to the Vin, ground, and signal pins of the photon.
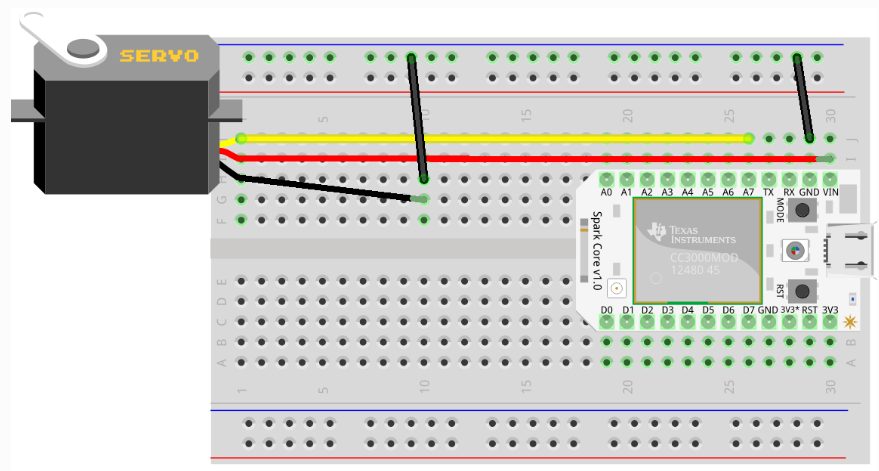
The next part of the project is to attach the servo to the photon. For the servo to work, the power wire must be connected to the Vin pin on the second photon. Then the ground and signal wires must be attached.
After both photons are set up, the power sources can be attached and the photons powered up. Once both photons are powered up, they can be connected to your WiFi. When the particles are connected to the WiFi, they can be flashed with the codes below. The servo can be adjusted so that the angle of rotation is at a desired amount but for our application the angle of rotation did not matter.


Comments