This project utilizes the AmazonDRS Arduino library to initiate frictionless purchases on Amazon by scanning NFC tags.
Looking for some help getting started with AmazonDRS Dash Replenishment for Arduino and still need to get your Amazon accounts setup, authorize 'Log in with Amazon', exchange tokens, etc? Hop on over to the Getting Started guide at the AmazonDRS GitHub repo and try out the Amazon Dash Button for Arduino project.
1/12/2017 - Coming Soon!
I'm working on creating an Arduino shield(aimed at the Due and Zero) that will incorporate the ATWINC1500 WiFi and the PN532 transceiver for NFC all in one shield sized package. Stay tuned for more updates!
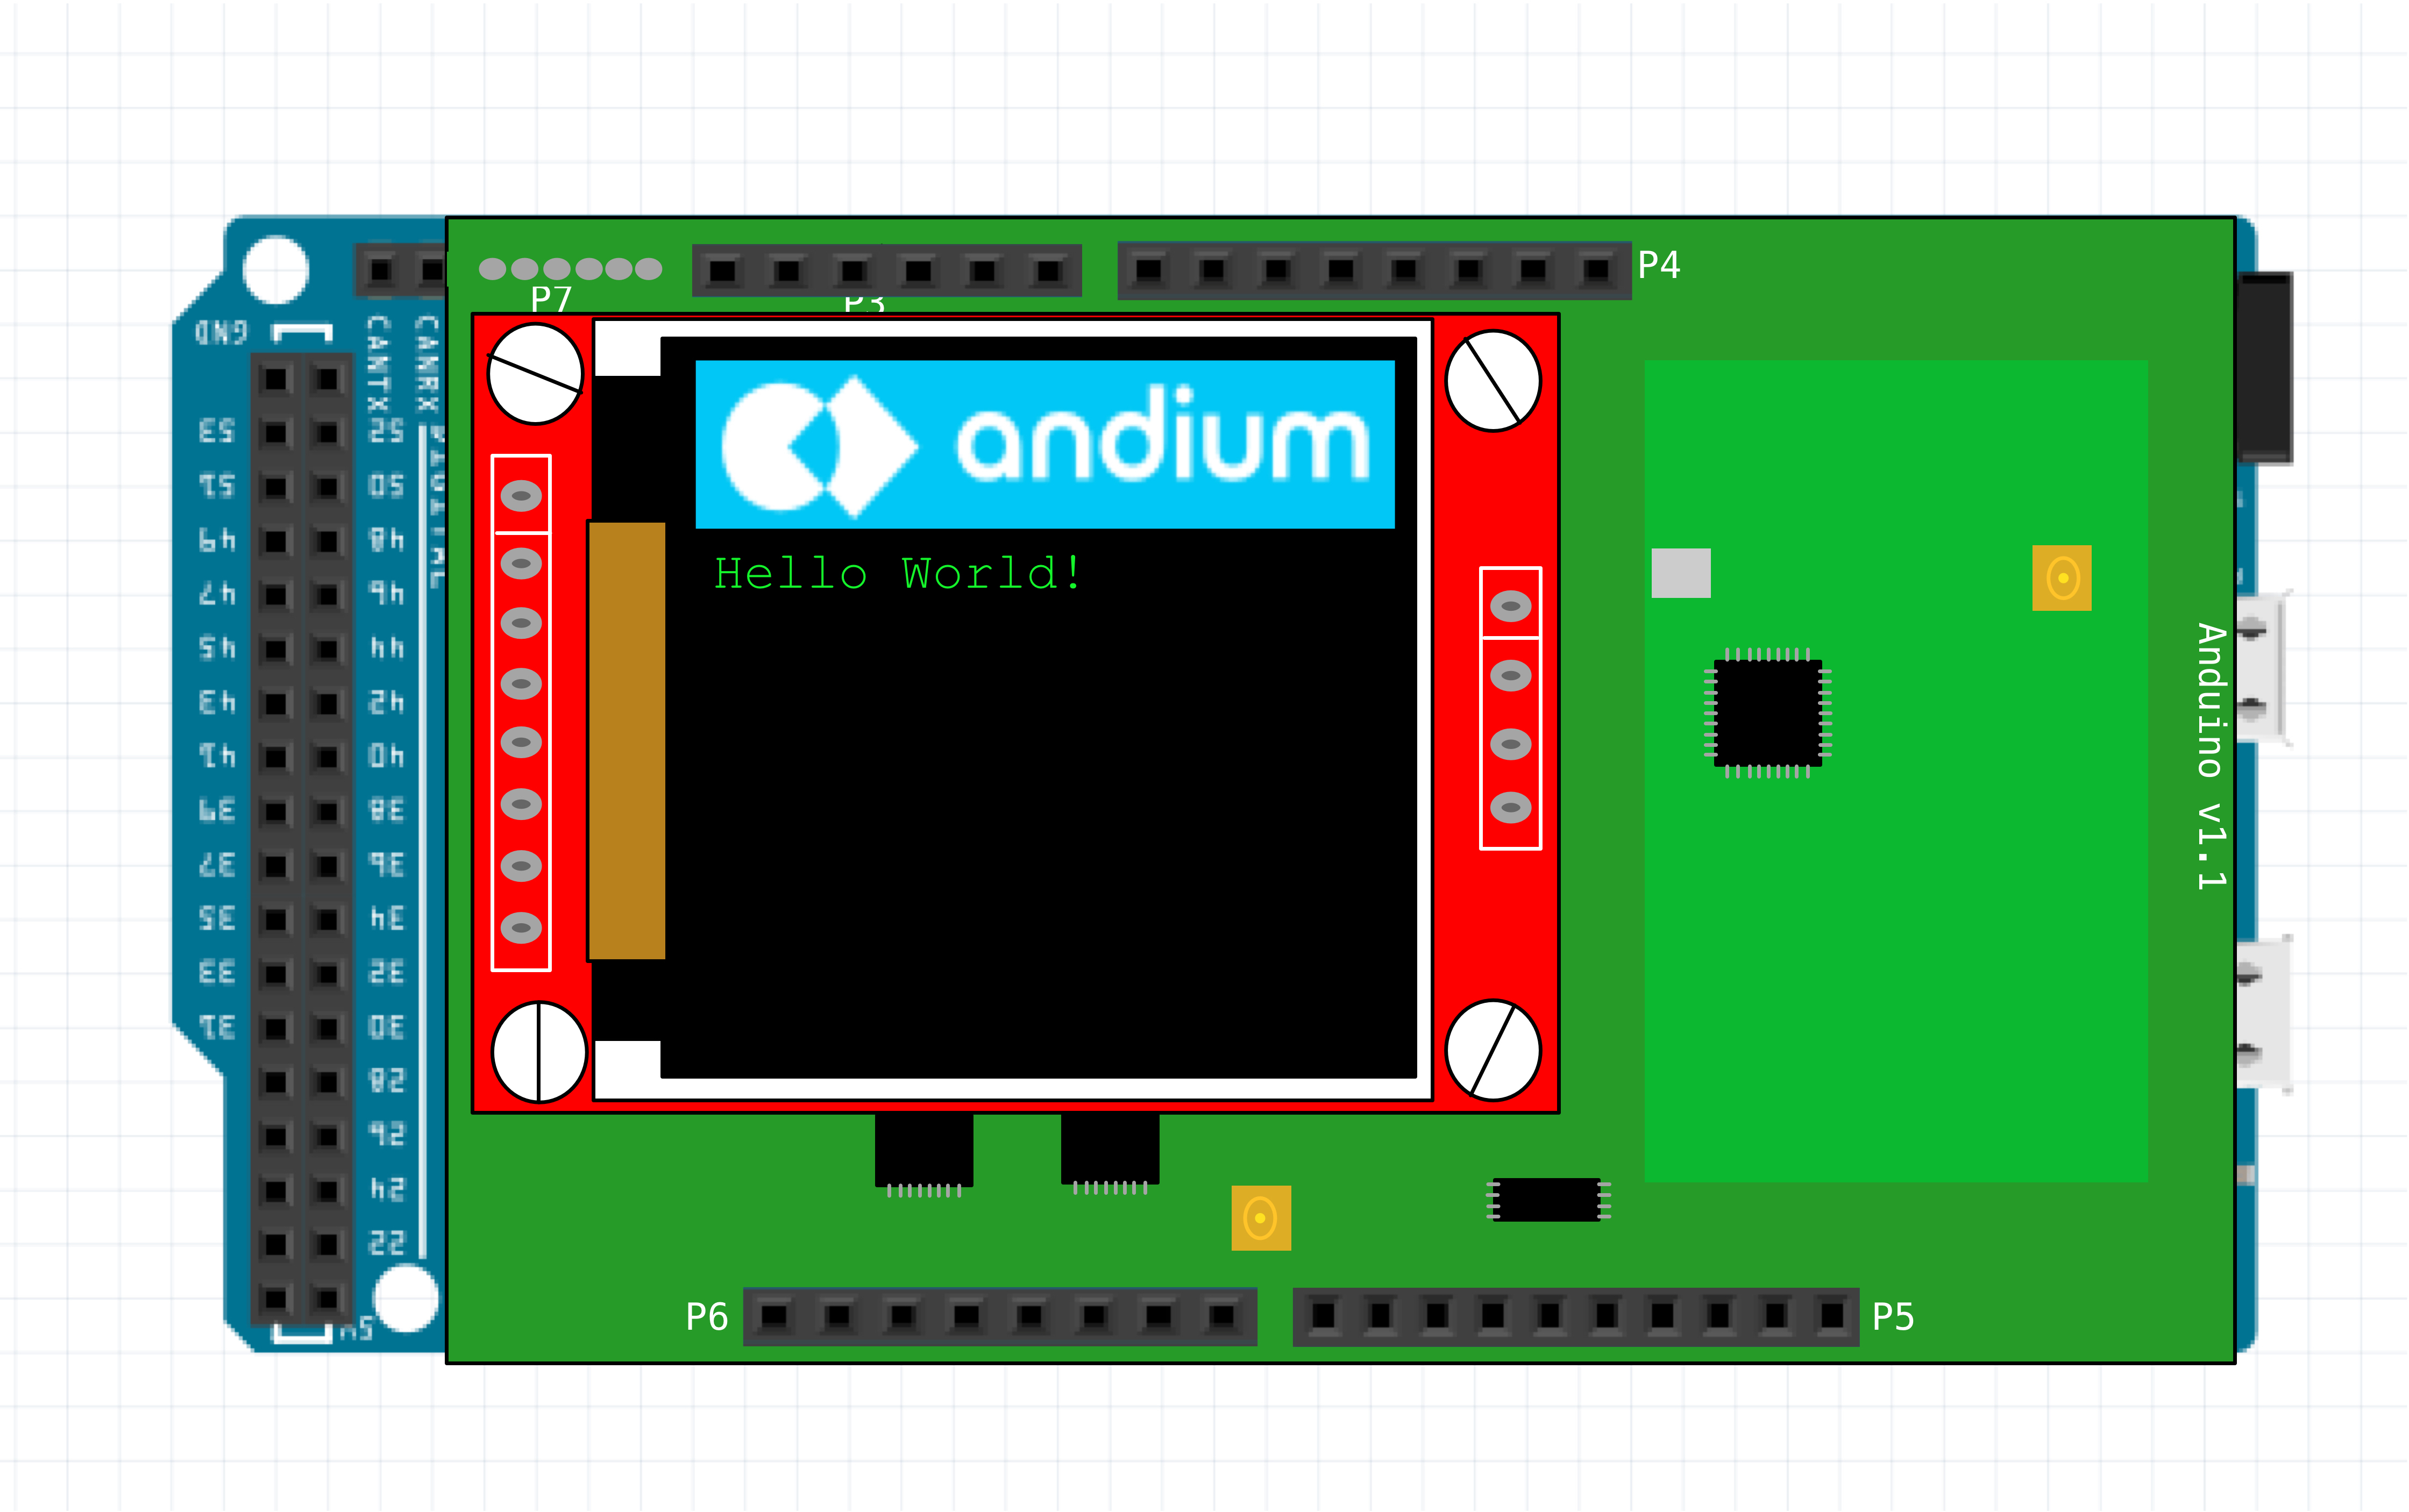
2/26/2017 - The Shields Are In!Check out the video below for a complete demo of Replenisher! I The shield combines NFC, WiFi, EEPROM, and an LCD. The open source design and libraries for interacting with the shield are all available here! Big thanks to Andium(a new IoT startup I work at) for working with me to spin off a small batch of these shields to make available to the community! You can grab one here. I created a project hub on hackster where I'll start posting more projects and ideas that spin off from the new shield.
MotivationThe Amazon Dash Button for Arduino is cool, but once the excitement of interacting with the API wears off there really isn't anything too mind blowing about hitting a button to place an order. So I decided to create this project to show a different way you might want to initiate frictionless Dash Replenishment around your home or office.
The idea is to use NFC tags to create a more fluid replenishment process for products that might not necessarily pair with a "smart" device. A smart fridge that orders groceries is great, but does your T.V. remote really need a WiFi connection to order new batteries? Utilizing the unique product identifiers Amazon uses called ASINs we can burn an identifier into each RFID tag. The sticker tags could be placed anywhere! Manufacturers could even print them onto their packaging or place them inside their devices. Since RFID tags are passively powered they require no batteries, no WiFi, no time consuming setup. The only device we need to connect to WiFi is the NFC scanner that we're about to create!
Getting StartedHardwareFirst lets make sure you have all of the necessary hardware for the project. I've used the Arduino MKR1000 but any WiFi 101 enabled Arduino should work.
In order to scan NFC tags we're also going to need an NFC antenna and transceiver. I've decided to go with Adafruit's PN532 NFC shield with a built-in antenna. The shield is designed for the typical Arduino Uno/Due/Zero/Etc shield form factor but there are breakouts on the board for SPI so we can easily wire up our MKR1000. In addition to headers that ship with the shield and the Arduino we'll also need, jumper cables, and some NFC tags. Specifically Ntag203 Mifare Ultra-light tags(I chose the round stickers, you'll see why in a minute!) This specific flavor or RFID tags are compatible with Adafruit's shield as well as most Android phones and tablets I've tried.
If you haven't already, solder the two rows of header pins to your MKR1000 and solder the provided shield headers to your PN532 shield. We'll be using SPI so you only need to solder the NFC shield headers to the strip labeled for power (IOr, RST, 3v, 5v, GND...) and the SPI header(MOSI, SS, MISO...etc). You'll also want to make sure you bridge 'SEL 1' and 'SEL 0' with a blob of solder to configure the shield for SPI. If you're a bit lost on setting up the shield check out Adafruit's getting started guide for the PN532 shield.
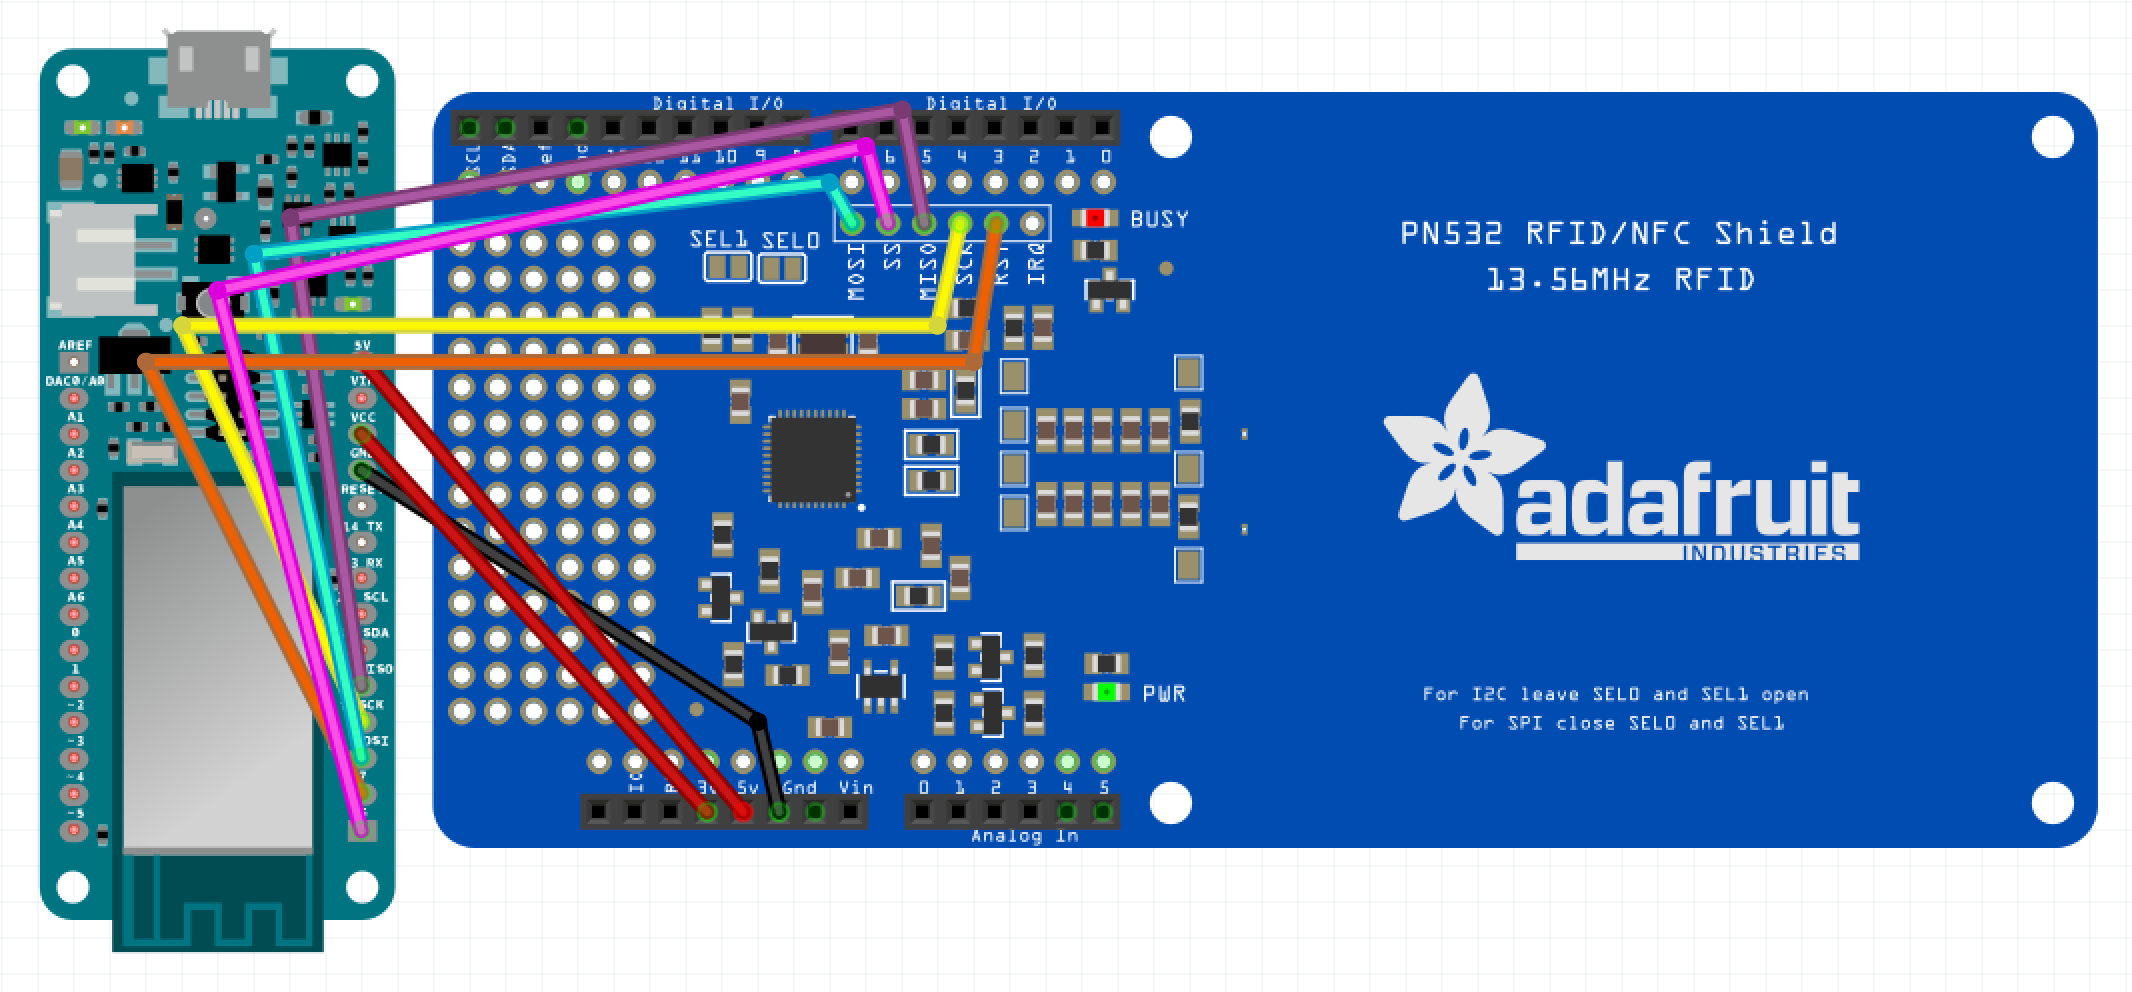
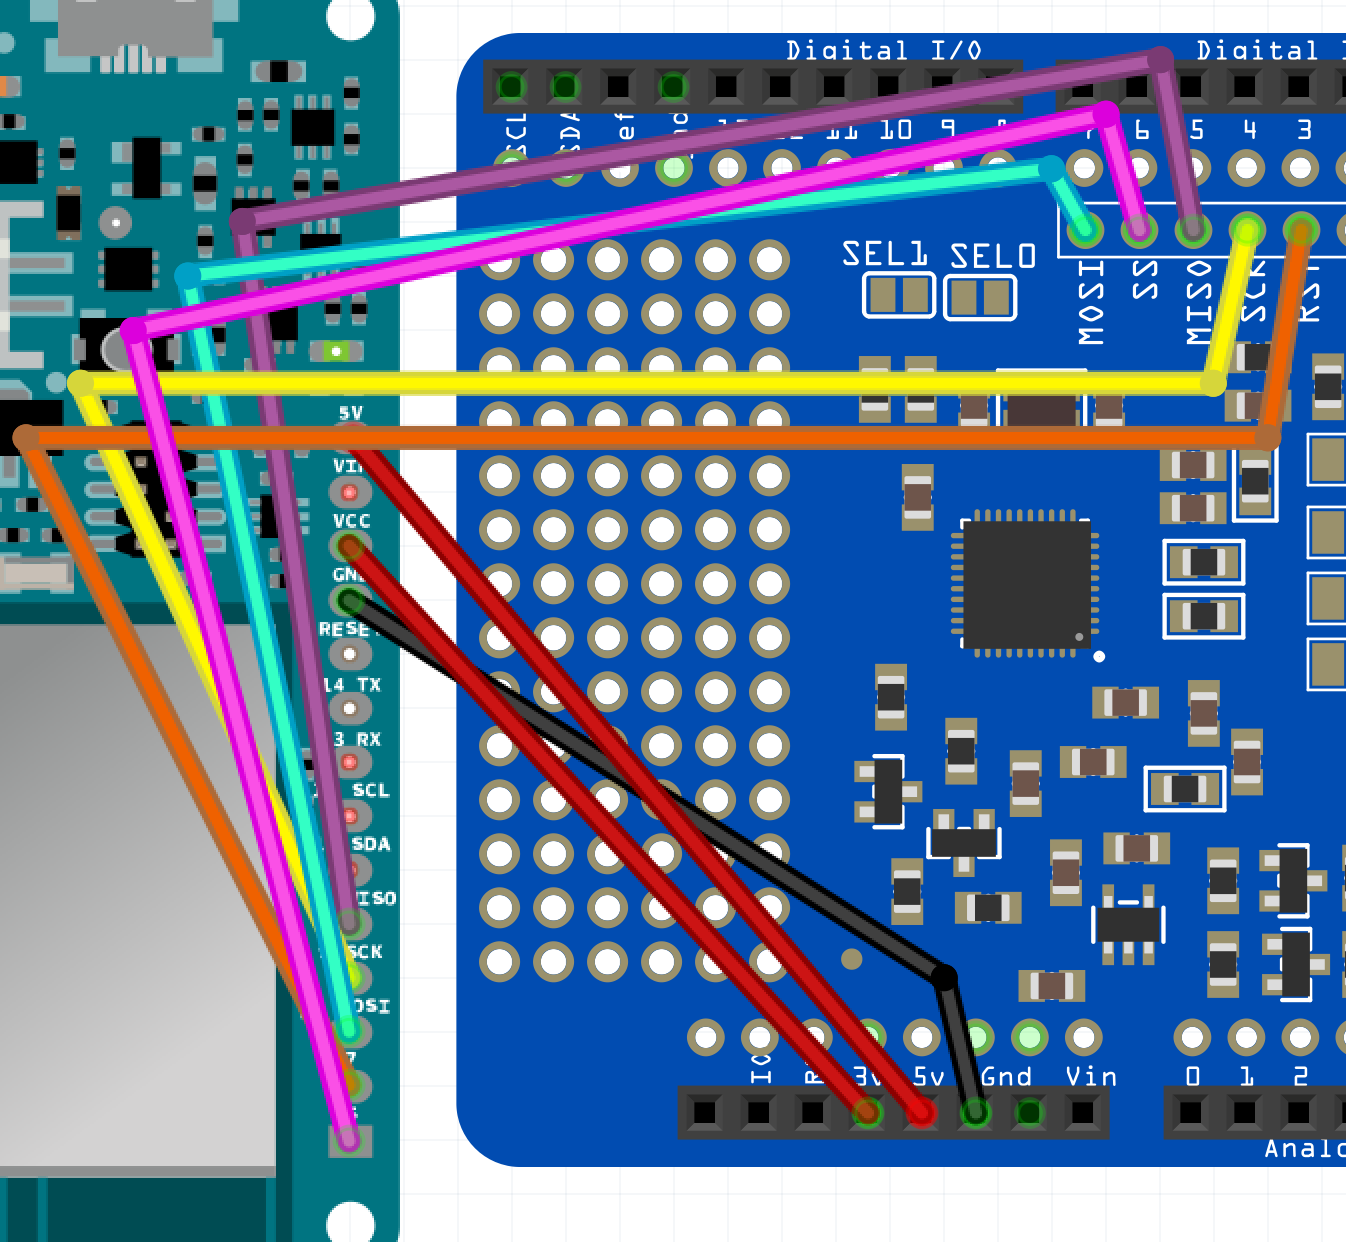
Let's wire up the shield!Outlined in this Fritzing diagram are all the connections you'll need to make between the shield and the Arduino. Take note below of SEL 1 and SEl 0. Those are the copper contacts that need to be bridged together, each witch a blob of solder, so we can use SPI to communicate with the shield instead of I2C.
Here's a quick rundown on all the connections made above. Arduino on the left ':' shield on the right....
- 5v : 5v
- VCC : 3v
- Gnd : Gnd
- MISO : MISO
- SCK : SCK
- MOSI : MOSI
- DIO 7 : RST
- DIO 6 : SS
Great! Now that we've got the hardware we can get some practice using the shield and NFC by configuring our registration and product RFID tags.
Creating Product Specific RFID TagsEach product we want to seamlessly replenish using our 'Replenisher' will need to be burned into it's associated RFID sticker/tag. I've chosen these 5 products(ASINs) while creating my Dash Replenishment Device.
- Slot 1: AAA Batteries(B00NTCHCU2)
- Slot 2: Coffee(B00PQ4SLCY)
- Slot 3: Plastic Cutlery(B010RLC7P2)
- Slot 4: Plastic Cups(B014VIECFK)
- Slot 5: Notebook(B01DN8TB5U)
At this time creating slots, Dash Replenishment Devices and adding ASINs are tasks aimed at the device manufacturer or developer. In order for this tool to gain widespread adoption I'm imaging Amazon opening up slot creation and ASIN selection to the end user.
In anticipation of the new Arduino shield I'm creating for 'Replenisher' (I should hopefully receive by the end of the month!) I'm working on a sort of mash-up of my favorite PN532 libraries I've found on GitHub. Consider it a "Best of" consisting of Adafruit and Seed Studio's PN532 libraries, as well as Don Coleman's NDEF library. The library will have a handful of example sketches and will utilize hardware interrupts by default (IRQ pull-ups are already wired on the shield). As soon as I get the shield and test I'll release that library and more detailed instructions working with NFC. So for now I'll keep these steps sort of high level. If you'd like to give this a go now you should still be able to perform what you need to do using Adafruit's library. Just double check you've used the correct SS and RST pins.
- Format each(5) Ntag203 Mifare Ultra-light tag to support NDEF.
- Add a 'text record' containing the corresponding Slot Id to each tag.
- Print some sticker labels for the tags!
This process changes the structure of the RFID tag to support the NDEF standard. This way our tags are bit more universal and can be easily deciphered by any reader that supports NDEF. This will also standardize the terminology I'll use to refer to the data being passed around.
Add a Text RecordNDEF tags can contain messages, and messages contain one or more records. Our text record contains the 'Slot Id' we pulled from our Dash Replenishment Device. You can find these in your Dash Replenishment Developer Portal, just edit your newly created device.
NdefMessage message = NdefMessage();
message.addTextRecord("0a6028b7-7509-4b91-b97e-3e291f386461"); //slotId
write(message);
Repeat this process for all 5 tags! If you read one of the tags the message data contained on the tag should look like this...
NDEF Message 1 record, 43 bytes
 NDEF Record
   TNF 0x1 Well Known
   Type Length 0x1 1
   Payload Length 0x27 39
   Type 54  T
   Payload 02 65 6E 30 61 35 30 32 38 62 37 2D 37 36 30 39 2D 34 62 39 31 2D 62 39 37 65 2D 33 65 32 39 31 66 33 38 36 34 37 31  .en0a6028b7-7509-4b91-b97e-3e291f386461
   Record is 43 bytes
The '.en' is the encoding type for the for the text record 'english'. To really do this properly we could have added a mime media record with a type of "application/json" and stored something like...
{"slotId":0a6028b7-7509-4b91-b97e-3e291f386461}
on the tag but this is just a proof of concept for now so the text record will do just fine.
Print LabelsThe last step is to print some labels with images of our products. This way we can easily identify the tags and what we'll be replenishing when we scan them! I picked up some Avery 6450 labels and added images using a template in MS Word.
Then just place the tags wherever they make sense. I placed the cup on the cupboard door, stuck the batteries to the back of the remote, the coffee on the side of the coffee maker, the cutlery on the shelf and the notebook to the inside cover. When it's almost time to replace these items just scan and... voilá order placed!
There's one last tag to create! That's our device registration tag. This tag will be placed on the side of 'Replenisher' the scanning device. So when you first unbox the device and are ready to authorize 'Log in with Amazon' and manage your product selections you can do this without even going to the computer!
Just take your 'Login with Amazon' consent request url...
https://www.amazon.com/ap/oa?client_id=amzn1.application-oa2-client.c0a2100c1af289b1bf4011c71f6029b3&scope=dash%3Areplenish&scope_data=%7B%22dash%3Areplenish%22%3A%7B%22device_model%22%3A%22Arduino_dash%22%2C%22serial%22%3A%22arduino123%22%2C%20%22is_test_device%22%3A%22true%22%7D%7Dtest&response_type=code&redirect_uri=https%3A%2F%2Fwww.getpostman.com%2Foauth2%2Fcallback
Shorten it using a tool like bit.ly or Google link shortener...
http://amzn.to/2ikkZzB
And write a new uri record to an RFID tag!
NdefMessage message = NdefMessage();
message.
write(message);
Now when the user scans the device with their NFC capable phone or tablet they can register their products and slots and authorize replenisher right then and there.
Next lets take a closer look at the amazonDashNfc sketch and see how it all works!
amazonDashNfc The Arduino Sketch for 'Replenisher'#include "AmazonDRS.h"
#include "AnduinoNFC.h"
AmazonDRS DRS = AmazonDRS();
AnduinoNFC NFC = AnduinoNFC();
//WiFi creds -----------------------------------------------------------------
char ssid[] = ""; // your network SSID (name)
char pass[] = ""; // your network password (use for WPA, or use as key for WEP)
//----------------------------------------------------------------------------
void setup() {
Serial.begin(115200);
while (!Serial) {
; // wait for serial port to connect. Needed for native USB port only
}
//Setup NFC
NFC.begin();
//Start up DRS
DRS.begin(ssid,pass);
//initialize slots
DRS.retrieveSubscriptionInfo(); //check slot statuses
}
void loop() {
//scan nfc tag containing slotId
//if scanned id matches a valid slot and the slot is available
//request replenishment for the supplied slot
if (NFC.packetReady())
{
NfcTag tag = NFC.read(); //attempt to read the RFID tag
tag.print(); //and print the results to the terminal
NdefMessage message = tag.getNdefMessage();
NdefRecord record = message.getRecord(0); //grab the bits that contain the DRS Slot ID
int payloadLength = record.getPayloadLength();
byte payloadBytes[payloadLength];
record.getPayload(payloadBytes);
String payloadString = ""; //store the RFID msg bits in a String for comparison
for(int i=3; i<payloadLength; i++)
{
payloadString += (char)payloadBytes[i]; //load up the cmp string with payload less the encoding
}
if(slotId0 == payloadString) //eventually if(slotId[i] has a match and slotStatus[i] is available
{
//we have a match! replenish the products associated with that slot!
DRS.requestReplenishmentForSlot(payloadString);
}
else
{
Serial.print("Sorry, slot ");
Serial.print(payloadString);
Serial.println(" is not available at this time");
}
}
}
Pretty short right? The amazonDashNfc sketch is fairly simple! Essentially the 'Replenisher' device boots up, connects to WiFi, checks the subscription info, and then waits for a tag to be scanned!
DRS.retrieveSubscriptionInfo(); //check slot statuses
Upon startup this method contacts the Dash API endpoint /subscriptionInfo and grabs the latest slot status information. This will pull in and locally save all slot id's and whether or not they were authorized for replenishment. When a tag is scanned we check for a matching slot id and verify its status. If there's a match we...
DRS.requestReplenishmentForSlot(payloadString);
request replenishment! The rest of the sketch just waits for a tag to come within range of our devices RFID antenna and then deals with parsing the payload of the NDEF record.
In it's current form all confirmations and message responses we receive back from the Dash API are printed to the serial terminal. This works fine for testing and development but to make this a truly stand alone system I'm working on developing some alternative notifications... maybe a piezo speaker with a chime or an LCD screen.
Stay tuned for more updates to this project as I make changes to incorporate the WiFi/NFC shield, a product case, and other improvements! Thanks for taking a look!


Comments